
In the last part we climbed to the top of Rusu Mountain and found Mr. Rusu waiting for us. Mr Rusu also unlocked the Bow ability in Kena: Bridge Of Spirits, allowing us to perform new skills and actions!
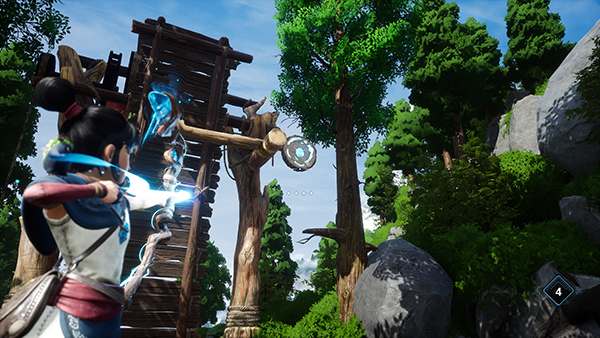
To get used to your new Bow, there are four different target-practicing trials in this area that will reward you with Karma for completing them. They're fairly easy, so they're worth taking on.
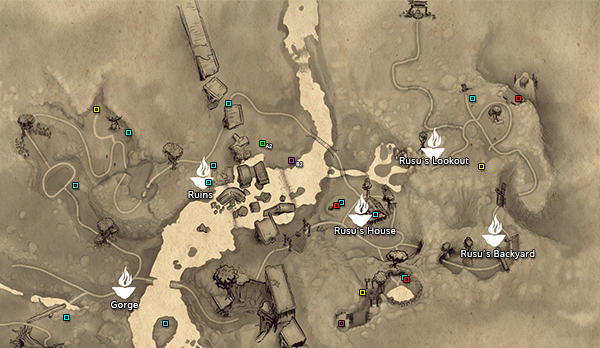
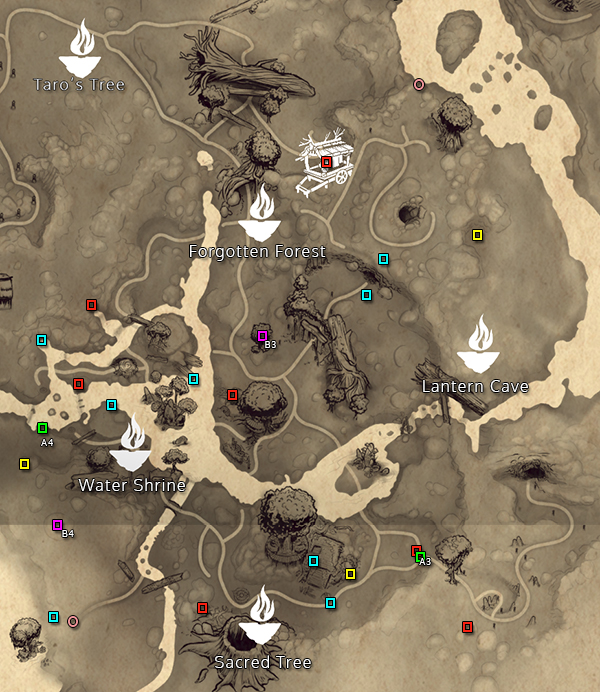
You can use the map above to find hidden items on the map.
- Blue Square - Rot Location
- Red Square - Rot Hat Location
- Green Square - Cursed Chest Location
- Pink Square - Spirit Mail Location
- Yellow Square - Sacred Shrine
Completing all four training exercises will also reward you with Rusu's Mask Hat for Rot.
There is a Hat Cart near one of the training exercises, you'll also unlock a new Hat there.
Don't forget to grab the Rot in this area too.
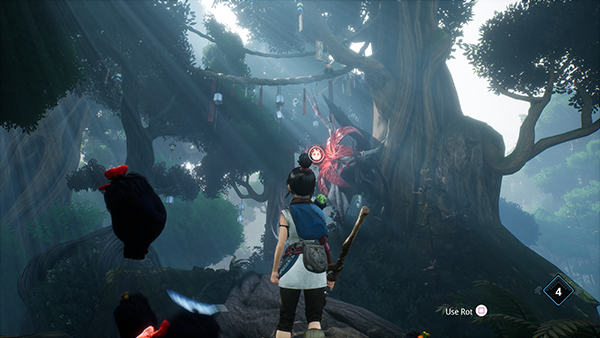
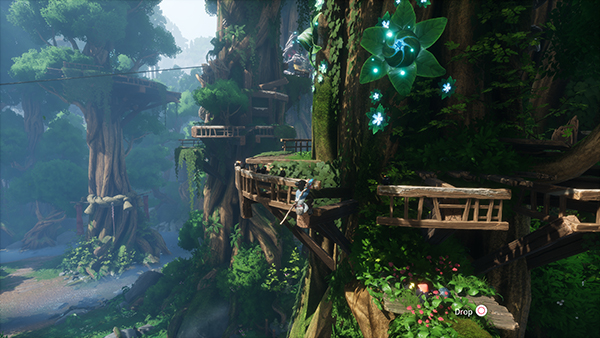
Head to the bottom right of the map and Rusu will recommend sliding down the mud path to his house. You'll have a short battle with some mobs; you're going to need to use your Bow to hit the ranged enemies.
Afterwards, use Rot to destroy the Deadzone Flower (you can fire an Arrow at it to destroy it).
Then hit the symbol next to the Bridge to make it come down.
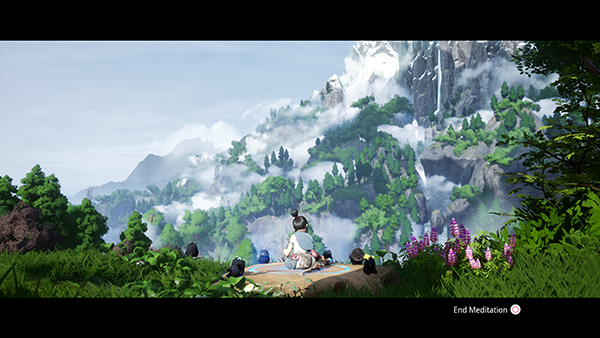
If you look to your right, you can jump onto a platform a meditate. This will increase Kena's MAX HP, which is super useful for those doing the Master Spirit Difficulty.
You'll come to another slope, and this time you need to prepare for a new boss battle
Boss Battle - Wood Knight
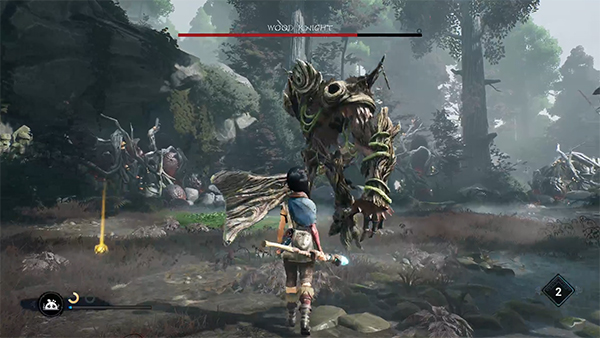
The beginning of the Wood Knight battle sees you fight two rounds of ranged mobs. You'll need to use your new Bow skills to take them out; the mobs will randomly appear on any of the tree branches in front of you, so always keep a look-out to make sure you don't lose any health early on.
Once all of them have been defeated, the Wood Knight will awaken.
He has two main attacks; if you are far away from him, he'll rush at you and launch his giant sword at you. You can dodge this using the Dodge roll skill. Keeping him at distance is a great strategy; just keep peppering him with arrows.
He also throws a boomerang at you; you can block this using your Shield Pulse.
You get one HP heal for this battle; the Wood Knight has three weak points that when hit will deal lots of damage and allow you to collect Rot Charge. When you bind him, be careful because he still swings his sword around wildly.
Check out the video below for more help:
After defeating the boss, you can cleanse Rusu's house. Rusu tells you to meet him at the Forgotten Forest where we will be attempting to find more of Taro's Relics.
Before heading to Forgotten Forest, you can find a Rot inside Rusu's House and lots of Gems. There is another Rot just beyond the house through a small cave and hiding in a bush.
Head back to Taro's Tree; you can either take the path down or teleport using one of the nearby Teleport Statues.
Now that you have access to a Bow, you can find a few more Rot and Hats in the area.
Forgotten Forest
You can use the map above to find hidden items on the map.
- Blue Square - Rot Location
- Red Square - Rot Hat Location
- Green Square - Cursed Chest Location
- Pink Square - Spirit Mail Location
- Yellow Square - Sacred Shrine
To get to the Forgotten Forest, you need to head to the right of Taro's Tree. You'll come to a closed cave door with four crystals surrounding it.
Use your Bow to hit the active one and the crystal energy will flow to the next one until the door opens.
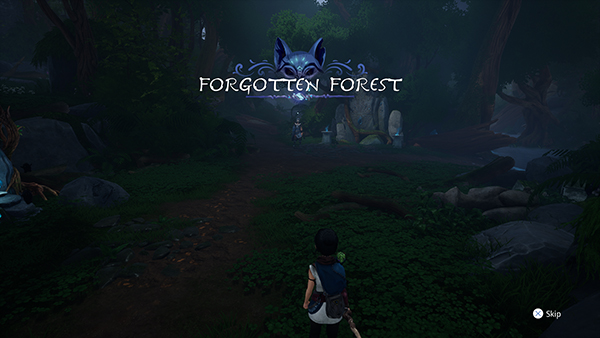
Follow the path through and you'll eventually come to Mr. Rusu again.
He explains there are four shrines you need to cleanse to help Taro. They've been marked on your map.
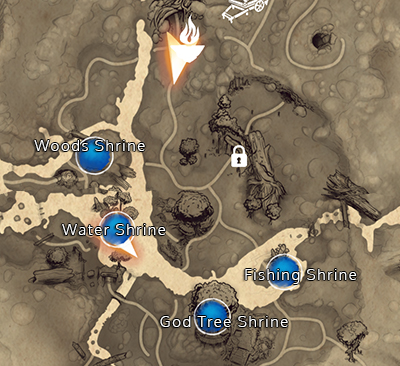
Woods Shrine
The first shrine we'll tackle is the Woods Shrine.
Take the path across the river and you'll come to an area with several enemies. Here you have to defeat two Sprout monsters and several others.
The first area below the bridge spawns two flying mobs and two ranged monsters. Take out the two range mobs first before the fight really gets going, then the two flying mobs. Then just keep dodging the Sprouts main attack and take it down. Make sure not to go too near the path that takes you across the bridge as it will spawn more enemies, making it harder to deal with the Sprout.
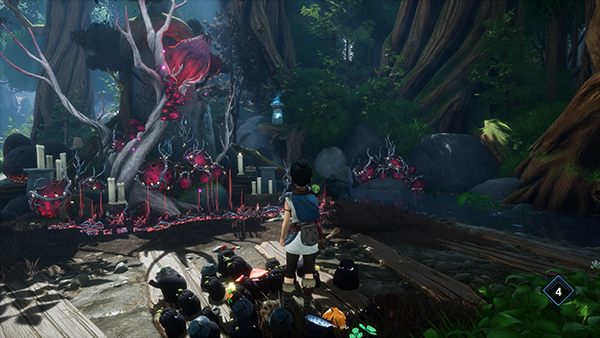
Once you head up the path, another Sprout spawns along with more mobs. Slowly take out the small mobs first and then the Sprout. Once defeated, you can destroy the Deadzone Flower and cleanse the shrine.
Water Shrine
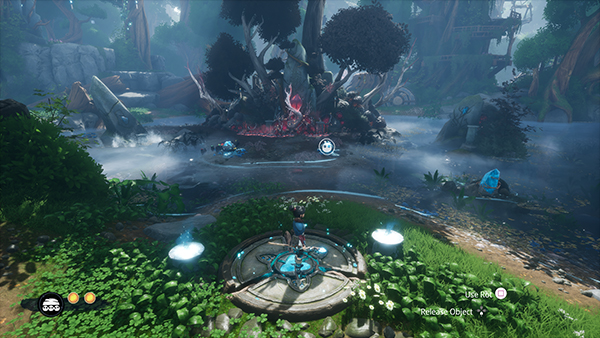
Next up is the water shrine. This one is pretty easy; just move the two rocks either side of the Deadzone Flower, the cross the river to the dial and use your Shield Pulse to ping all the crystals.
The Deadzone flower will then be able to be destroyed with your Rot.
Fishing Shrine
In order to complete this shrine, you must fire arrows in the order of the candles at the statues around you.
If you stand in front of the shrine, there are four candles. Each one represents the order in which you're meant to hit the statues in. The statues have crystals embedded in them and are scattered around the zone.
Hit them in this order:
- Top Right
- Bottom left
- Bottom Right
- Top Left
If you do this correctly, you can destroy the Deadzone Flower. If you mess up, it will summon two flying mobs.
God Tree Shrine
This shrine requires you to climb up the God Tree. Start at the bottom by finding a Teleport Flower. Follow the wooden bridge around the tree and you'll notice you can climb up onto white markings.
Keep climbing up and you'll eventually have to shimmy across the edges of the tree, above more Teleport Flowers.
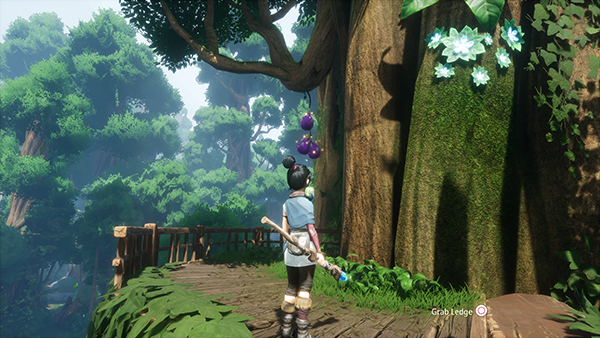
You'll come to a section with three purple fruit hanging. Opposite you will be a teleport flower; hit it to go across. You'll see an elevator that takes you back across when you hit the crystal; jump on and make your way across.
Make your way across the wooden beams and you'll eventually come to a landing that will spawn mobs as soon as you pull up.
The mobs here will shoot purple arrows at you that will explode and knock you back. Good luck doing this section on Master Spirit Difficulty as there is so many things that can go wrong.
You can use the Flowers around you to teleport to safety; the flying mobs follow you so you won't get much time. You can hit the mobs in the chest that throw the fireballs as that will one-shot them.
Jump in the air to give yourself the time-leap slowdown move to hit mobs more accurately.
Once you wipe them all out you can destroy the Deadzone Flower.
Sacred Tree
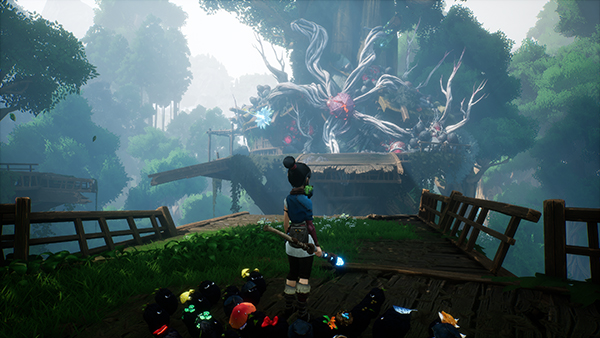
Once all four shrines have been cleansed, you can now head to the Sacred Tree which is located at the bottom of the Forgotten Forest.
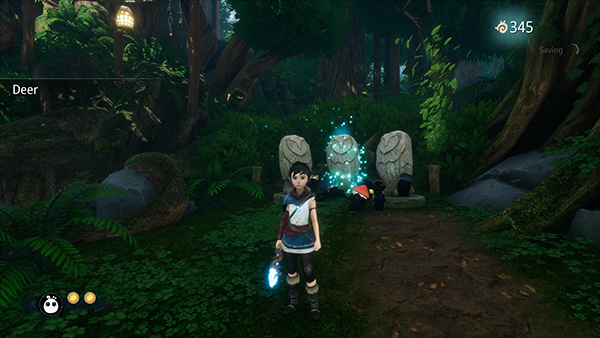
Here you need to move three Owl Statues to open the gate. They are scattered nearby; just use your Rot to move them to the three glowing circle platforms. This will also unlock the Deer Hat.
Once done, head to the dial and use your Spirit Pulse to open the gate.
Boss Fight - Sprout Captain
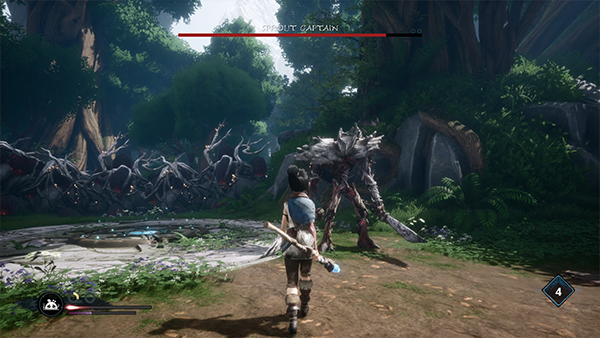
As soon as you activate the door, Sprout Captain will come out. You can use your Bow to get a few free shots in on him before he emerges.
The key to this fight is stunning him with your Shield when he jumps at you with his cross-slash attack. Timing it well will allow you to get in several hits.
To bind Sprout Captain you need two Rot charges; so just keep dodging his slash attacks and stunning him. Eventually, once you get a bind on him, he'll probably have very little HP left and you can finish him off.
If you have the upgrade Enter The Fray, it can help to bind him much quicker.
Check out the video guide below:
That wraps up this part of the Kena: Bridge Of Spirits Walkthrough! How did you find the Shrine challenges? It took us almost 30 minutes to finish the God Tree Shrine on Master Difficulty!

Discussion