The penultimate chapter of Ender Lilies see's us head into the Verboten Domain, a creepy underground world in Land's End containing some of the toughest monsters in the game.
This area can actually be accessed quite early on (as soon as you get the dash ability) but it's best to complete it once you have cleared up Stockade due to obtaining the special Relic known as Heretic's Mask.
Heretic's Mask reduces the amount of damage you receive from the red poison mist areas- which is in abundance in Verboten Domain and so without it, it's pretty impossible to complete the area.
That being said, since defeating Hoenir in Chapter Seven, we obtain the ability Executioner's Hook, which lets us hook on lanterns, allowing us to complete many of the previous maps from before.
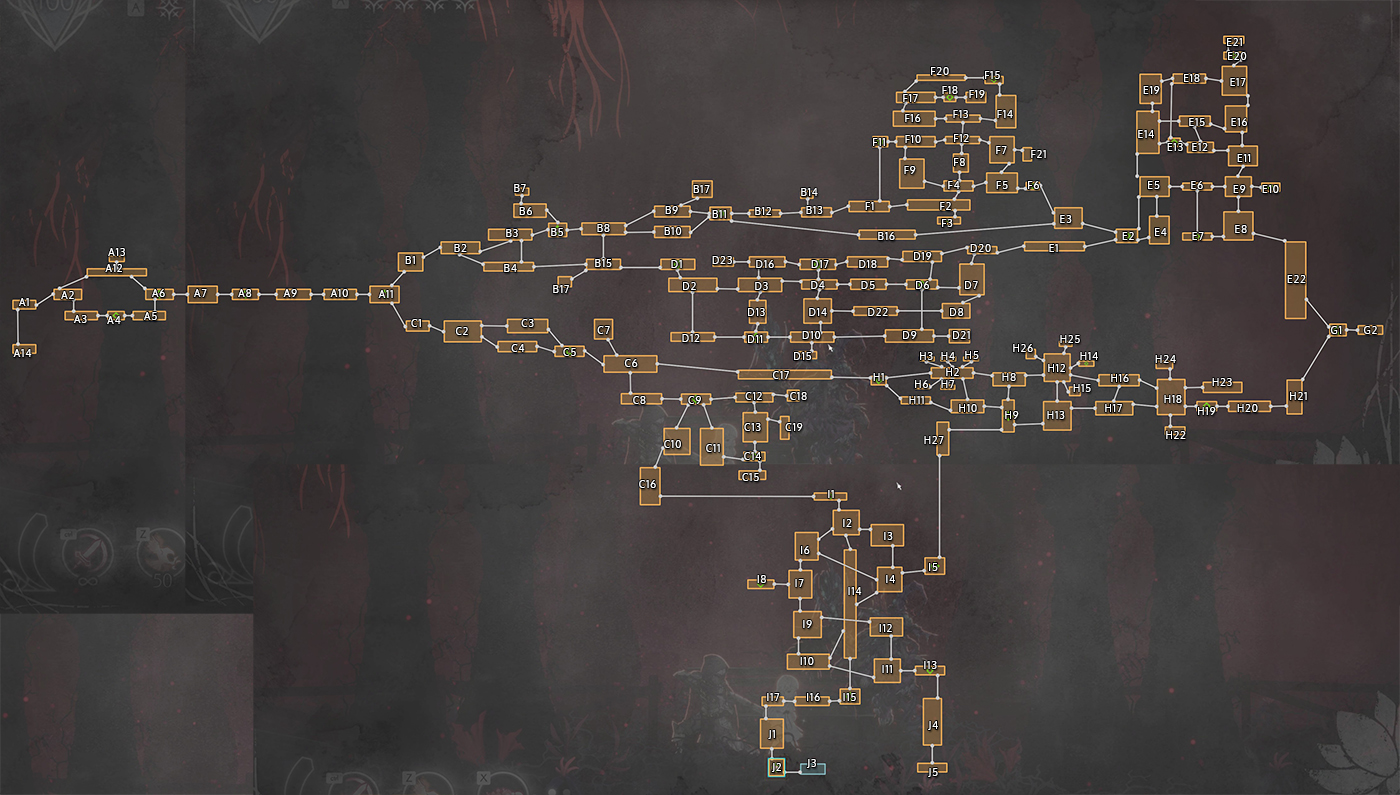
- Findings: A13, I5, I1, I13, I15, I17
- Bosses: H23, F20, I11, I16
- Amulet Fragments: H2, F13, I2, I14, I7, I10, I12
- Actions: Unlock
- Relics: H24, E14, I5, I6, I14, I12
- Chain Of Sorcery: F7, H8, H26, I3, I9
- Stagment Blight: H11, H2, B3, B16, F20, F8, F2, I2, I4, I6, I7, I9, I10, I11
- Furious Blight: H18, H17, H17, B9, F17, E3, C16, I4, I7, I10
- Priestess Wish: A13, I13
- Ancient Souls: H22
- Priestess Doll:
Tracking Back
Now that we have our new Action Skill Executioner's Hook, we can go back and access most areas of the Ender Lilies maps from before. There is still one final action skill to get so not all maps will be available to us yet. Anyhow, let's first explore the rest of Stockade.
Head back to H18 and use the Executioner's Hook to jump up to the top platforms. You can break through some Red Pustulant Ground and enter H22. Here you can pick up 1x Ancient Soul. Head back to H18 and climb all the way to the top of the map and head right to enter H23, where you'll fight a new mini-boss.
Boss Fight - Dark Executioner
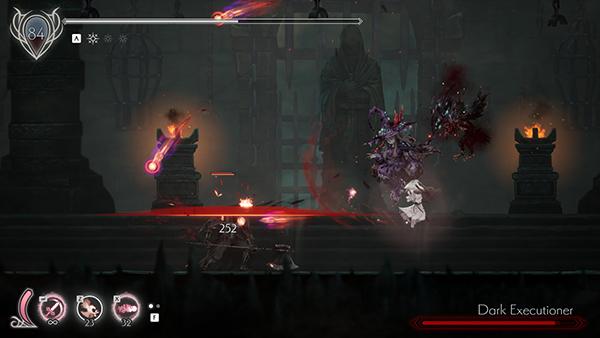
In the lead up to this boss, there are several mobs you need to take out before you face him. You should be patient so that you can preserve your HP before facing him.
Dark Executioner loves to use his invisibility + teleport attacks and so this fight is extremely annoying. Timing his swing attacks will make it easier; if you have range Spirit Skills equipped it will also be a lot easier.
Dark Executioner becomes a Spirit Skill once defeated.
Head back to H18 and at the top of the map is a small gap that you can climb up to reach H24. Defeat the giant poison mob inside and you can pick up an Aura's Ring Relic.
Finally, in H18, at the bottom left of the map on a platform is 10x Furious Blight.
Now head to H17. Here you can pick up 30x Furious Blight on the right side of the map using the Executioner's Hook. In the middle of the map you'll find some Red Pustulant Ground, where there are several rats to defeat. You can then pick up 30x Furious Blight.
Now head to H8, where you can use your Executioner's Hook to get onto some of the platforms to pick up a Chain Of Sorcery.
Now head to H11, where you can find 30x Stagnant Blight using the Executioner's Hook at the left of the map.
Next head to H4 and climb up the roof using the Executioner's Hook. This will take you back to the outside of H2, where you can pick up an Amulet Gem and 30x Stagnant Blight.
Now head to H12 and climb all the way to the top. Go to the left of the map and you can enter a room to find H26 and defeat a giant poison mob to pick up a Chain Of Sorcery.
That's pretty much all of Stockade done for now!
Head now to A12, where in the middle of the map is some Lanterns you can hook on to that will take you to A13. In A13 you can pick up a Priestess's Wish and [FINDINGS] Lily's Note.
Now head to B3, where you can use the Executioner's Hook to pick up 10x Stagnant Blight. Likewise, head to B9 where you can pick up 10x Furious Blight using the Executioner's Hook.
Head to B16, where you can use the Executioner's Hook on the left of the map to pick up 800x Stagnant Blight!!!
Now head to F15, where you can use the Executioner's Hook to climb up a wall on the left and access F20. In F20 you can pick up stashes of Stagnant Blight for a total of 100x Stagnant Blight.
There is also a mini-boss fight:
Boss Fight - One-Eyed Royal Aegis
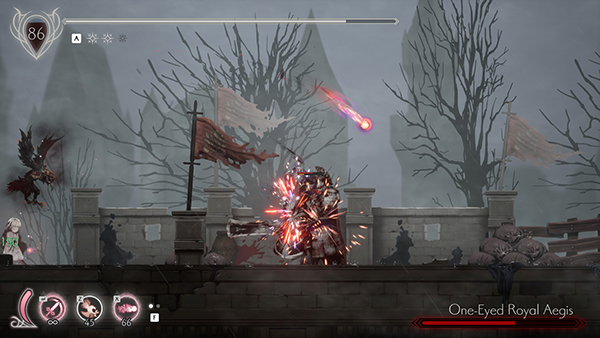
If you hated those shield mobs, then you won't really like this mini-boss fight either. The same tactics apply- dodge as soon as he slashes down hard with his sword attack, which leaves him vulnerable from the sides.
One-Eyed Royal Aegis becomes a Spirit Skill once defeated.
Now head to F17. In the middle of the map is a lantern you can hook onto; jump off towards your left and use the Piercing Action Skill to break a Red Pustulant Wall on the right of the map. This will allow you to pick up 100x Furious Blight.
Next head to F13. On the right of the map is an Elevator which takes you down. To the left of the Elevator, you can climb onto the ceiling and use your Glide skill to grab onto the wall leading up above the Elevator. You can then use the Executioner's Hook to pick up an Amulet Gem.
Now head to F8; at the bottom of the map you can find 30x Stagnant Blight on a small platform that you can get to by using the Executioner's Hook.
In F7, you can use Executioner's Hook to pick up a Chain Of Sorcery at the top of the map.
Next head to F2 and go to the far right of the map and use the Executioner's Hook to grab 30x Stagnant Blight.
Next head to F6 Respite and use the Executioner's Hook to climb up on the right and find E3, to pick up 30x Furious Blight.
Now go to Twin Spires and to E14. At the top of the map there is a Treasure Chest you can access using Executioner's Hook and pick up a Immortal's Crest Relic.
Heretic's Mask
Before going to Verboten Domain, you'll want to pick up the Heretic's Mask Relic to help prevent Poison damage. You can do this by going to Stockade and map H9. At the bottom left of the map is some Red Pustulant Wall you can break down that leads you to H27.
H27 has several Red Pustulant Grounds and Walls you're going to need to break, interspersed with Exploding Ogres and Mines. You'll have to do some specific jumping and gliding to get enough of a run up to break the walls.
Eventually, you'll come to I5, where there is a Treasure Chest you can open to pick up the Heretic's Mask and finally begin the Verboten Domain area.
Use the video guide below for help.
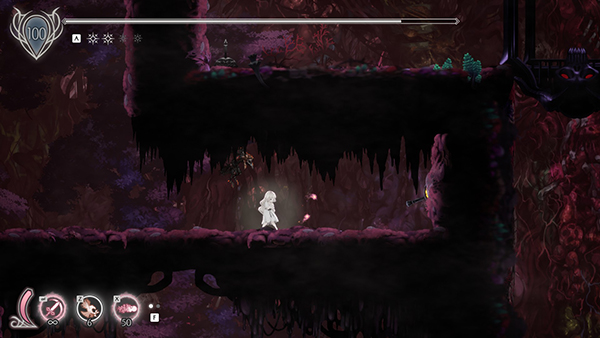
Verboten Domain

I5 is a Respite, but you'll want to enter Verboten Domain from the top of it. You can pick up [FINDINGS] Verboten Domain's Notice here too.
Head to C16. You'll come down a huge slope with several Witch mobs coming towards you. You'll eventually come to an area where you can use your Executioner's Hook to grapple up to a platform and claim 30x Furious Blight.
Head down, taking care of the Tree Witches mobs. There is a lever at the bottom which when pulled, opens up a timed-gate on the right. You will need to use your Glide and Piercing ability to speed along towards it before the gate closes.
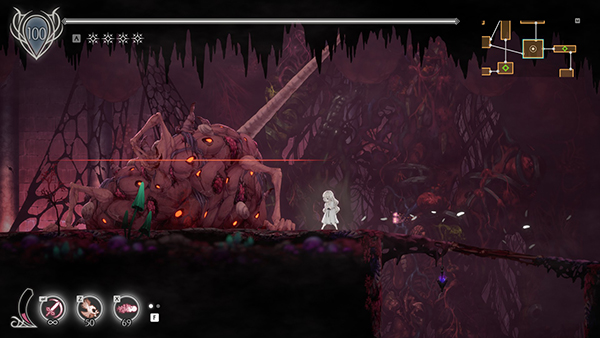
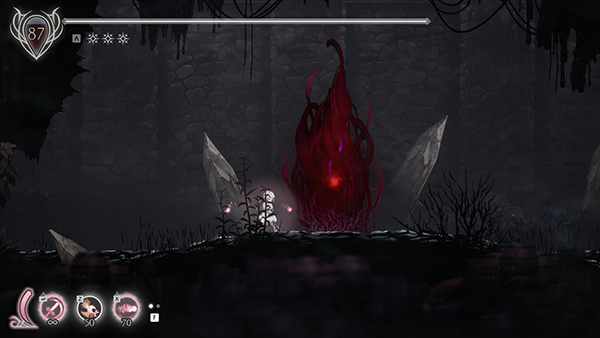
You will also have to take on a giant mob that we're going to call Giant Eye Spawn that hits very hard. It requires a lot of timing to dodge the attacks and can take you several tries to figure out this mob's attack patterns. You can't skip this mob as there are plenty of them throughout Verboten Domain.
Once defeated, you'll come to I1. This is a Respite and you can also pick up [FINDINGS] Faden's Archives 3. Now is the time to equip the Heretic's Mask. Head right to I2.
In I2, you can go multiple ways but the end goal is to unlock the area in I14. Before heading there, in I2, head right through red mist and pick up 30x Stagnant Blight. Drop down a few platforms; climb up the left-most wall to pick up an Amulet Fragment. Now take the right-most pathway to I3.
I3 contains lots of Red Poison. You should be able to survive long enough to pass through it now that you have the Heretic's Mask. Follow the path to the right and you'll come across a Giant Eye Spawn; defeat it to pick up a Chain Of Sorcery.
Head all the way down through the Red Poison Mist and you'll eventually come to I4. Go right to use the Respite to heal up (I5) and then head downwards past those Poison Bags.
You'll come to a river of Poison Water. Use the platforms to meander across.
In the middle of the platforms is a river fountain you can use to go downwards. Head right in this area and swim to the bottom of the water to find 30x Stagnant Blight. You can also pick up 100x Furious Blight at the bottom of the middle platform in the red water.
Now head left and you'll come to a Red Pustulant Wall; break it and you'll get access to I14. Head left and climb up a long wall to get an Amulet Fragment. Drop down and find the Lever that opens the first of the gates in I14.
Head back to I2 and take the left most path to I6.
You'll need to go all the way left through some Red Poison Mist. Climb up the left-most wall and pick up 30x Stagnant Blight. Climb down to about half-way through this level and then head right. You can climb up a wall to reveal a hidden area with a Treasure Chest containing a Weathered Necklace Relic.
If you drop all the way to the bottom on the map on the right side of the red pool, you'll come a flat area in I7 that is open but full of mobs. Defeat them and then pick up the Amulet Fragment on the right. Head back up to I6. Now go all the way to the bottom left, through some Red Poison Mist and you'll reveal another entrance down into I7.
As you jump down into I7, you'll be surrounded by Red Poison Mist and lots of mobs. You'll need to fight your way through, breaking through several Red Pustulant Walls and Grounds. On the second level, there is a hidden wall on the left containing 30x Stagnant Blight. Before going all the way down, you can find a Respite on the left of the map to heal up (I8).
In I8 you can find 30x Stagnant Blight in a hidden area on the left under the red water. You can also pick up [FINDINGS] Faden's Archives 4.
Now go back to I7; eventually you'll break through a Red Pustulant Ground and drop into an area that's free from the Red Poison Mist. There will be several platforms on top of Red Water. Go left and you'll come to some Red Pustulant Ground that you can break through and be prepared to take on a Giant Eye Spawn in Red Poison Mist.
Once defeated, head right and ignore the Red Pustulant Ground for now. Climb all the way up through I7 using the Executioner's Hook and open up all the doors with levers to help make your life easier if you pass through this area later. You can also pick up 30x Furious Blight on the right.
Now go back and break through the Red Pustulant Ground to open up I9.
I9 contains several Giant Eye Spawns, so take your time in this map. Head to the top-most right of the map to defeat a Giant Eye Spawn and pick up 100x Stagnant Blight. Now head back left and jump down to a platform containing two Giant Eye Spawn; defeat them and head left until you come to a wall to climb up. Once inside this area, you'll be locked in until you defeat the Giant Eye Spawn and the Fly Hive. You can pick up a Chain Of Sorcery here.
Head further down to I10. You'll come to an Elevator that takes you across a Red Water area; jump into the water and defeat the mobs before collecting 100x Stagnant Blight. In the middle platform, you can uncover a hidden area in the water to find an Amulet Gem. In the pool on the right you can pick up 100x Furious Blight.
Now jump back onto the first Elevator you used to ride across; use your Executioner's Hook to climb up to a top platform. You can then go pass several Poison Bags and head up right to I14.
In I14- head all the way right until you come to the second lever you need to pull. This will now open up access in I14. If you climb all the way up, you'll come across a Giant Eye Spawn that when defeated will allow you to pick up a Calivia's Ring Relic.
Before going there to I14, we still have a few things to collect. Head back to I10 and this time take both Elevators all the way right until you come to I11.
At the bottom of the map is a Red Water pool with a mini-boss fight.
Boss Fight - Incompetent Sinner
This boss requires you to use your dodge skill and keep your distance from it's bubble jet blast. Overall it's fairly easy to take down.
This skill is quite useful for getting to certain platforms in the game, so defeating this mini-boss is well worth it.
Once defeated, take the Elevator to the right of the map and keep heading right until you come to I13, which is a Respite where you can heal up. On the left of I13 you can also pick up [FINDINGS] Faden's Archives 2. You can also break some hidden Red Pustulant Ground on the right to take you down below the Respite and pick up a Priestess Wish.
Head back to I11 and use the Elevator to go left but upwards. You'll come across several Mines in the air you'll need to dodge. Keep making your way upwards until you come to the entrance to I12. Before going up to I12, you can find 30x Stagnant Blight from a platform below where the Elevator stops (you'll have to jump off blindly).
In I12, you'll find those Giant Eye Spawn mobs but this time they rush towards you. They are actually quite easy as they don't go all the way to the edges of the map, allowing you to defeat them from a safe distance. Head right and you'll eventually come to a Treasure Chest containing Blighted Appendage Relic. Keep heading up until you go left. You'll come to the edge of the platform; jump off and glide over to a platform containing an Amulet Fragment.
That is everything! Now head to I14 and take the Elevator down to I15, which is a Respite. Pick up the [FINDINGS] Faden's Archives 1. Heal up and head left to face the boss fight for this chapter!
Boss Fight - Miriel, the Beloved
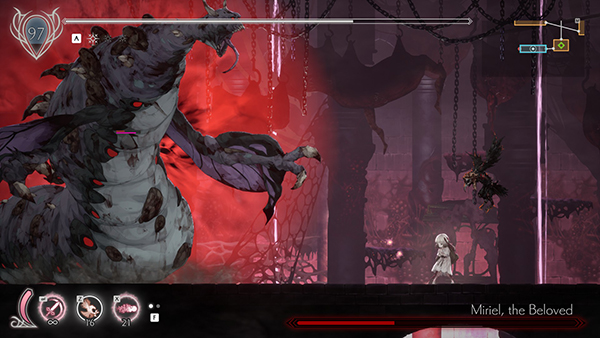
Recommended Level: 90
Miriel, the Beloved has three phases that get more and more tricky as you progress.
Phase one, Miriel will shoot out a giant explosive ball that will roll towards you. It does give touch damage, so you need to dodge it and then stand well clear of it as it will explode. If you get too close to Miriel, she will also swipe at you. She will also shoot out slow fireballs all around you, which are quite easy to dodge in this phase.
Phase Two, Miriel has a new attack which she will summon a giant claw beneath you that hangs around for a good few seconds. What's worse, is she usually does this move three consecutive times, making it harder to dodge. Your best bet is to use double jump as soon as it's summoned and then use your Glide ability to stay in the air longer. The fireballs in this phase also get faster and there is more of them.
In Phase Three you have more of the same- this time the giant claw will hit four times and the fireballs are really hard to dodge. Your better off getting really close to Miriel during the Fireballs as not many hit in this spot. If you have the Relic -, this can increase your Jump ability and allow you to dodge the claw easier.
Check out the video guide below for tips on how to beat Miriel, the Beloved.
If you go left to the next map I17, you can purify Miriel, the Beloved and pick up [FINDINGS] Miriel's Blighted Letter. You should also have the new Unlock ability for those special doors you should have seen on your journey!
And that wraps up Chapter Eight of Ender Lilies Walkthrough! Only one more chapter to go now until you complete the game 100%! Congratulations for making it this far!

Discussion