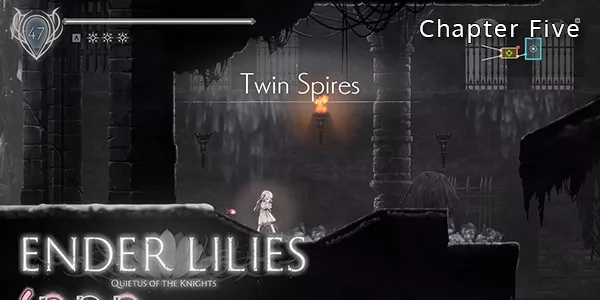
Chapter Five of ENDER LILIES takes us to the mighty tower of Twin Spires and this walkthrough will guide you to the very top. There are plenty of new Relics to find in this chapter so prepare yourself for some exploration!
We've just completed the Catacombs and defeated Guardian Silva to learn the new Action Ability Guardian Wings, which allows us to dash in both mid-air and on the ground to get to some out-of-reach platforms.
We'll first go back to previous maps to claim various items to help us when we finally take on Twin Spires.

- Findings: D20, E2, E7, E8, E10, E14, E13, E21
- Bosses: E3, E21
- Amulet Fragments: D4, B4, E5, E16, E12, E19
- Actions:
- Relics: D21, D22, B3, C11, C8, E11, E17, E22
- Chain Of Sorcery: E18
- Stagment Blight: D19, B2, B8, E1, B16, E5, E8, E9, E11, E14
- Furious Blight: D6, C8, E1, E15, E17
- Priestess Wish: E21
- Ancient Souls:
Tracking Back
The new Action skill Guardian Wings allows us to reach platforms and maps we previously couldn't get to.
First start by going to D9 and going all the way to the right of the map. You can use Guardian Wings after jumping out of the waterfall to grab onto a platform that leads you to D21.
Inside D21 is a giant mob that spurts out tons of fire shots. It shouldn't be too difficult; keep heading right and pick up a Relic Holy Spring Water, which increases the potency of Healing Prayer.
Now head to D6 Respite and pick up 10x Furious Blight from a platform on your right.
Now head to D8 and go left. In the middle of the left hand wall is a secret area with a bunch of pots. You can jump up the platforms and use Guardian Wings to access the top most platform on the left to reach D22. In the middle of the map you can find another one of those Giant mobs; defeat it and you can pick up a White Priestess Status Relic.
Now head to D4 and jump onto the left-most platform. Use Guardian Wing to get to the top-most left ledge and you can find an Amulet Fragment.
Head to D19 and head to the right-most part of the map. Jump onto the platforms with the Archers and then use Guardian Wing to get the top-most right ledge where you can pick up 10x Stagnant Blight.
Head back to B4 and head left to open up a Treasure Chest containing Amulet Gem (+20 HP!). Head on over to B2 where on the left of the map you can use Guardian Wing to pick up 10x Stagnant Blight. You can also go to B3 to open a Treasure Chest containing a Relic Broken Music Box.
In B8 you can pick up 10x Stagnant Blight at the right end of the map; you need to perform a double jump + Guardian Wing to get to this platform.
Now fast travel to C9 Respite and head to C11. On the right of the map is giant waterfall- you will need to double jump out of it to your left and then Guardian Wing across to find a Treasure Chest containing a Ruined Witch's Book Relic.
Now head to C8 where you can pick up another Treasure Chest at the top right of the map containing a Cracked Familiar Stone Relic. On the left side of the map is a waterfall that you can jump to the left of to pick up 10x Furious Blight.
Now you're ready to go to Twin Spires!
Twin Spires
Mobs You'll Find
Archer
The Archer fires arrows towards you- his range is impressive so be on the lookout for arrows flying your way.
+72 EXP
Pot Hider
Pot Hiders are mobs that are pretending to be smashable pots. As soon as you hit the pot they will burst out and strike. They hit hard, so dodging through them to get some strikes in is a good way to defeat these.
+148 EXP
Slug
This mob will launch at you as soon as it detects you. Use dive to dodge it.
+60 EXP
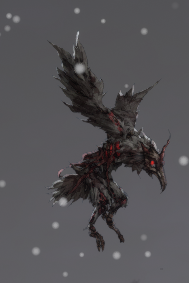
Teleporting Crow
This mob can go invisible and teleport behind you to scratch you. Be careful!
+51 EXP
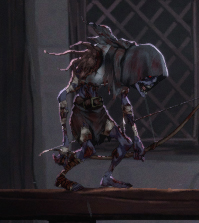
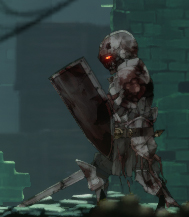
Bulky Shield Knight
Slow moving and hard to hit, the Bulky Shield Knight can ram you with his shield and hit you for hard damage with his sword. Once he uses his sword attack, that is the best time to attack!
+120 EXP

Red Eye
Does not move but will emit a pulsing red attack that covers a wide area- getting caught in it will hit you multiple times.
+74 EXP
Giant Dragon
There are two forms of this dragon; one that shoots out Poison Balls and another that breaths out fire.
+200 EXP
Sword Dragon
The Sword Dragon can rush-attack you from a distance so be careful.
+94 EXP

Axeman
Will throw an Axe into the air that can drop on you.
+92 EXP
Shield Knight
You cannot damage this mob when attacking it from the font. Dive behind it to deal damage. Watch out for it's slow, but hard-hitting jab attack.
+96 EXP
Twin Spires can be accessed from D20. You'll notice the area starts to get a little bit snowy and you can also pick up [Findings] Fretia's Memoirs 3. Keep heading right until you come to E1.
In the bottom right of E1 is 10x Stagnant Blight. In order to get to E2 you need to do a double jump + Guardian Wing. When your over the bridge jump down into the water and defeat the two frogs. On your left is 10x Furious Blight. Climb back up and head right to E2.
E2 is a Respite and you can pick up [FINDINGS] Bloodied Note 1 just before it. Before we head into Twin Spires, we'll make a little detour. You should see some platforms on your left; jump up them and head to E3.
In E3, head left and jump across the first pool of water and then jump into the second. You'll find a hidden underground tunnel leading back to B16. Here you can pick up 30x Stagnant Blight from a fallen soldier in the water. head back to E3 and this time carry on going up to your right where you'll come across a mini-boss.
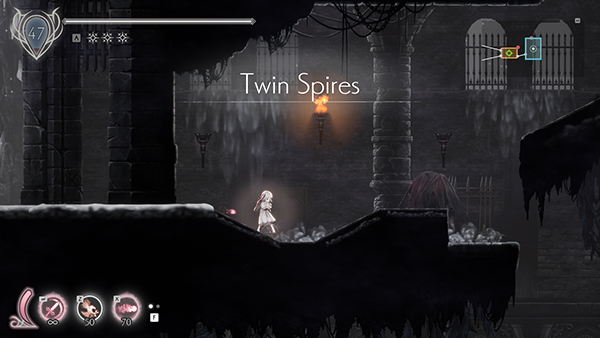
Boss Fight - Fallen Sentinel
This mini-boss is easy to take down. Just watch out for his first jab-teleport attacks that can catch you unawares. If you have Dark Witch Eleine Spirit equipped you can take it out from long-range.
Once defeated, you can equip Fallen Sentinel to your arsenal of Spirits.
Head back to E2 and heal up. Time to go into Twin Spires- head right to E4.
From E4, work your way up to E5. There's a couple of familiar mobs about this place, but they've all been buffed up with HP and damage so watch out if you're under level 50. In E5, if you go all the way right you can break through some Red Pustulant Ground and pick up 10x Stagnant Blight.
Head now to the top right of the map where you can pull a lever to open a gate on the right just below it.
Enter the area where the door was blocking and on the left in a pot is an Amulet Fragment. Keep jumping down and finally go right to E6.
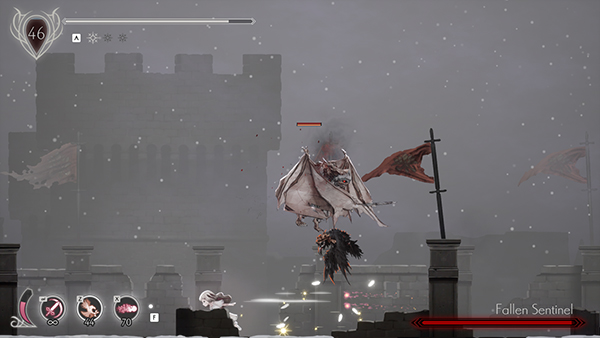
E6 has some scary dragons hovering around so be careful navigating this map. Jump down the gap to find E7, which is a Respite. On the left is [FINDINGS] Bloodied Note 2. Go right to E8.
In E8, to the bottom right of the map is a [FINDINGS] Note on the Castle Wall. You cannot break down the Vertical Red Pustulant Ground yet so ignore it for now. Go up a level and head right to pick up 10x Stagnant Blight. Keep making your way upwards and you'll eventually come to an Elevator that will take you to E9.
In E9, head right and upwards until you come to a Poison Red Water pool. Jump across it to pick up 10x Stagnant Blight. Now head left up an elevator and then go right until you come to E10, which is a Respite. On the right you can pick up [FINDINGS] Hoenir's Diary 3. Head back to E9 and head upwards to the right and take another Elevator to E11.
In E11, you need to go to the far left and work your way around the map to open up the door with the Green Light. Then head up the Elevator to E16.
In E16, quickly go to your right and jump down back to E11 where you can pick up 30x Stagnant Blight. If you keep going right outside the castle walls, you will come across a series of Red Pustulant Grounds you can break. The second one allows you to go to a new area and pick up a Relic Ricorus Ring, which increase SP Gauge by 1. Head back up to E16.
In E16, watch out for those Red Eye mobs that glow as they can deal serious damage if caught in their pulsating red attack. There are several levers and Green Lights to hit in this area but eventually you'll come to the left of the map where you can pick up an Amulet Fragment under the Elevator. Head left to E15.
E15 starts with several rats running towards you so be on your guard. If you head left and immediately jump down to E12, you can pick up an Amulet Fragment. Then head right and make your way back to E15. This time in E15 head right and jump on the moving platform that takes you to the center. Take the next moving platform to your left and jump down to find a bunch of Throwing Axeman. Defeat them, going right, and you'll come to an opening; head down, making sure to stick close to the edge. You'll then come to another moving platform but instead of using it, go left and discover a hidden wall where you can pick up 10x Furious Blight. Now go back to the left of the map and head to E14.
In E14, jump down and then go right and you will come to a new Respite in E13. Head back to E14.
E14 has plenty of Elevators and levers you're going to pull; there is a hidden area between two elevators that you can jump up through (it's a narrow wall) and pick up 10x Stagnant Blight.
In the middle of the map there is a Green Light and a [FINDINGS] Bloodied Note 3. When you break the Green Light, you can go back to the beginning of E14, jump down the door and head back to E13 and pick up [FINDINGS] Monument Engravings. Head back to E14 and work your way downwards, eventually going left past several Dragons and Bulky Shield Knights. You'll eventually need to work your way upwards and back to the top-right of the map to get to E19.
E19 is a fun level- just activate the platform and prepare to dodge lots of falling axes being thrown at you. At the top of the map on the left is an Amulet Fragment. Head right to E18.
Run across the bridges in E18 and defeat all the dragons. Before going to E17, jump down and use the platforms under the bridge to pick up a Chain Of Sorcery at the top.
In E17, you will come to a place with two levers separated by a wall. When you press the left lever, you will have a short amount of time to get to the door before it closes on you. It's best to go down and defeat the mobs on the path before doing this. You can also pick up a Ancient Dragon Claw Relic from a Treasure Chest on your way.
Once through the timed door, head upwards and go left until you come to some Red Pustulant Ground; break it to pick up 10x Furious Blight. Now go back up and you'll come to E20, which is a Respite before the major boss fight of the chapter!
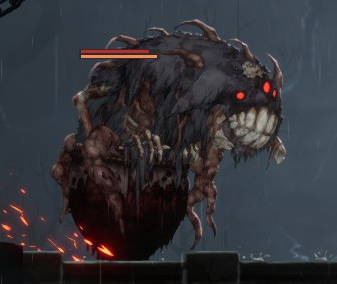
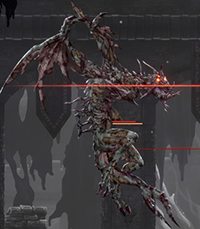
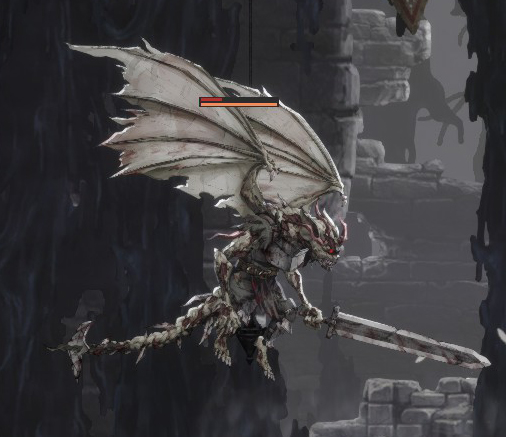
Boss Fight - Ulv, the Mad Knight.
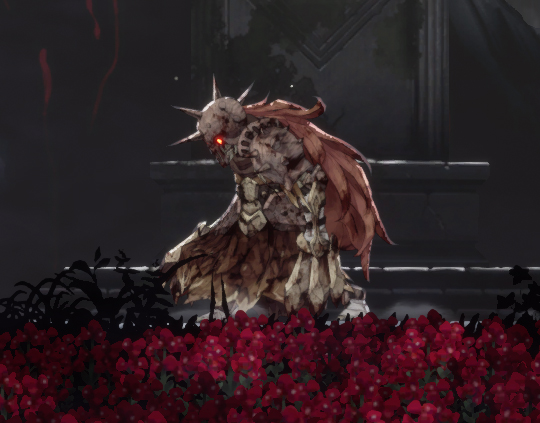
Recommend Level: 60
Ulv, the Mad Knight does cause a lot of players problems because he has a lot of moves in his third phase that are hard to dodge. The key is mastering the first two stages so that you have enough health and heals left for the third phase.
Phase one is pretty simple: he has a rush forward + swipe attack and then another quick swipe either side of him attack. He will occasionally dodge out of your way and do a Somersault Blast attack too. All of these are easy to dodge and you can get some good hits in after he lands with his Somersault Blast Attack.
Phase Two begins about after killing about 1/3rd of his health. Immediately from the start he will hit you with a Cross-Bleed attack that will hit you at the exact spot you are standing and it's quite hard to dodge as it has a long lead-up time. He has a new Fire Wave attack, that is sent towards you and needs to be dodged rather than jumped over.
Phase Three begins with one third of the HP left and Ulv will immediately cast an attack that hits several beams with equal spacing across the map. You can dodge this attack by standing far back and correctly judging the distance you need to be from him. Or you can get up real close and dodge the initial slam-down attack. He will also use two Fire Wave attacks in succession- so it's always best to dodge in two different directions to avoid getting touch damage from Ulv.
Check out the video guide below for help:
After the boss fight, you can use your new Action ability to jump up walls and pick up a Priestess Wish and a [Findings] White Priestess Bastion Letter.
You can now complete the game using the basic ending. If you head back to E8, you can climb up the right-most wall to find E22 and pick up a Nymphilia's Ring Relic. If you carry on going right you'll eventually come to Hitherlands Respite (G1). If you continue heading right, you'll come to G2 where the ending is played out.
This isn't the true ending of the game and there is plenty more to explore!
That wraps up Chapter Five of ENDER LILIES Walkthrough! Did you find Ulv, the Mad Knight a difficult boss or was he like the others so far? What level did you guys take him out? Leave a comment below!

Discussion