Stockade awaits us in Chapter Seven of ENDER LILIES as we move ever-closer to the finish line and final bosses.
You should be around level 70 as you come into this part of the guide and have picked up a healthy amount of Enhancing Items to upgrade your Spirit Skills. It will make your life a lot easier when dealing with mobs and bosses if you are decently upgraded.
After defeating Knight Captain Julius, we now have learned a new Action ability called that allows us to penetrate vertical Red Pustulant Walls. This opens up a few more areas for us to explore so let's track back first before continuing.
- Findings: F17, H1, H6, H9, H14, H16
- Bosses: E12, H5, H20
- Amulet Fragments: F17, C17, H8, H13, H13
- Actions: Executioner's Hook
- Relics: A12, F17, E8, H15
- Chain Of Sorcery: H7, H16
- Stagment Blight: F14, F1, E4, E15, C17, H2, H8, H10, H10, H10, H12, H16, H21
- Furious Blight: F1, H3
- Priestess Wish: H21
- Ancient Souls:
- Priestess Doll:
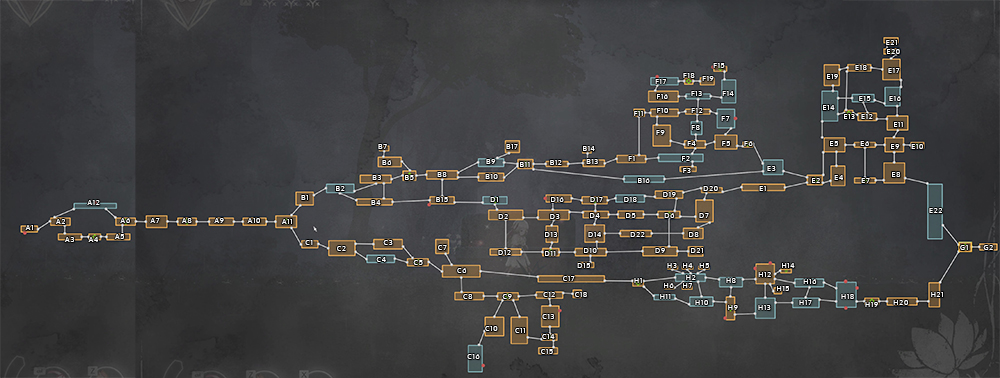
Tracking Back
First we need to go back to a few maps that have those Vertical Red Pustulant Walls that we can now break through. Head to F17 and you should be able to find two of them in this map. The first one gives you an Amulet Fragment and the second contains [FINDINGS] King's Note 2 and a Treasure Chest containing a Eldred's Ring Relic.
You can pick up 100x Stagnant Blight from F14 by breaking a Red Pustulant Wall in the right-most tower.
Now go to F1 and you can find two Red Pustulant Walls to break; the one on the left gives you 100x Stagnant Blight and the one on the right of the map gives 100x Furious Blight.
Head now to A6 where you can climb up the left-most wall to A12. In A12 you'll notice a Red Pustulant Wall on your right. To break it, you need to climb up one of the dangling ceiling walls on your left to reveal a hidden entrance. Then you can use the Piercing to break the Red Pustulant Wall and get a Vibrant Plume Relic.
Next head to Twin Spires and to E8 where you can break a Red Pustulant Wall and pick up a Snowdrop Bracelet Relic.
Now head to E4. If you go to the top right of the map you can break a Red Pustulant Wall to pick up 100x Stagnant Blight.
Next make your way to E15. In the middle of the map you can break a Red Pustulant Wall to pick up 100x Stagnant Blight. Now jump down to E12 and head left and by doing a glide to the middle platform. Break the Red Pustulant Wall to find a new mini-boss.
Boss Fight - Forsaken Fellwyrm
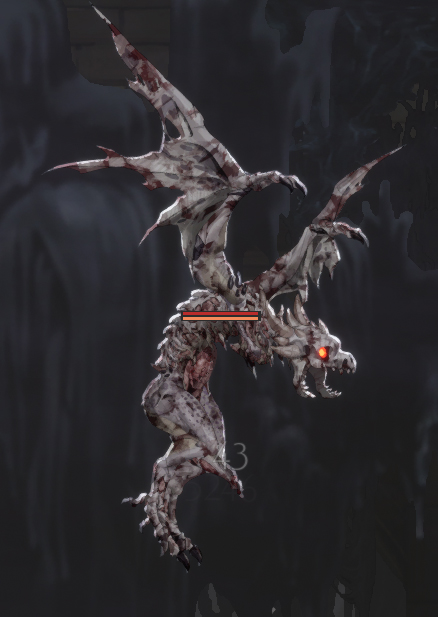
This mini-boss fight can be tricky as it has some quite annoying moves. It will constantly shoot out dark energy balls towards you that slowly follow you around the map. It can also do a Poison Mist attack that covers 2/3rds of the map and getting caught in it will hit you hard.
If you can equip range Spirit Skills you can take him out quite easy. Be wary of the mist attack and use your glide skill to get away from it.
Stockade
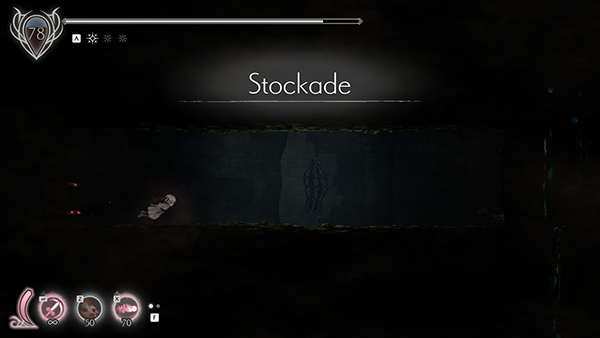
In order to get to Stockade, you need to go to C5 Respite and then head to C6. From C6, go all the way to the top right and into the water where you'll find C17.
In C17 you'll come across lots of Mines that you'll need to dodge past. You can use your Glide to dodge past them easily enough. There are two secret walls in this map; one in the middle on the right of a wall which gives 10x Stagnant Blight. And one towards the end of the map on the left of a wall that gives you an Amulet Fragment. The path is quite linear and you'll soon come to H1, which is a Respite.
In H1, you can pick up [FINDINGS] Executioner's Vow. Head right and there are two pathways; go to the top-most path first to H2.
H11 has 10x Furious Blight you can pick up and that's about it.
H2 has several rooms you can enter. H6 has [FINDINGS] Forbidden Text Scrap inside, H7 has a Chain Of Sorcery inside, H5 contains a mini boss (see below), H4 is empty and H3 contains 10x Furious Blight.
Boss Fight - Secret Experiment
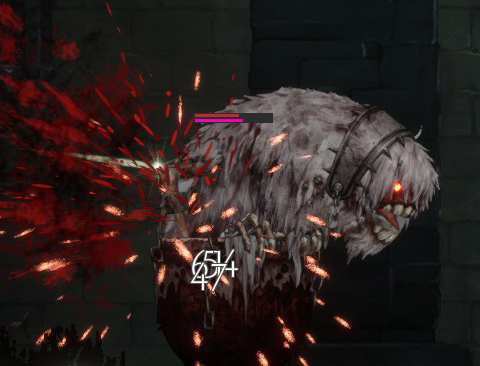
This pot hider worm monster thing is pretty easy to take down. It has only one decent attack which has a small area of attack and easy to dodge.
Defeating this boss gives you the Hidden Test Subject Spirit Skill.
If you go to the top left of H2, you can pick up 100x Stagnant Blight.
From H2, jump down to H10. Be careful of the giant poison monster in the water that will produce poison gas clouds all around you. In H10, you can find 800x Stagnant Blight by breaking the Red Pustulant Wall on the left of where you just jumped into the water from. You need to have a big run up to do it- climb all the way to the right side of the map and power up your Piercing Spectral Lance and when you fall off the edge towards the water, activate the attack just before you hit the water and it should break the wall.
You can also find 10x Stagnant Blight on the left of the map under the water (dodging Mines) and also 10x Stagnant Blight on the right under water.
Head right past them and you will eventually come to some Mines. Dodge them and climb the stairs to H9.
H9 is a Respite so take a moment to heal up. At the bottom right of the map is a [FINDINGS] Executioner's Missive. If you climb up to H8 and immediately go right in the map you can pick up 10x Stagnant Blight. If you go left, you can pick an Amulet Fragment hidden between some Pot Hiding monsters.
Go back to H9.
Take the water tunnel right to H13.
In H13, if you climb up the left-most wall out of the water, you'll find a giant Poison mob. Defeat it and you can pick up Amulet Fragment x2. You can also find 30x Stagnant Blight on the right-side of the map by activating the Elevators Levers in the water below that will take you upwards. However, instead of going right, use the first Elevator on the left of the map at the beginning to get to H12.
In H12 and climb the platforms to get to H14, which is a Respite and you can find [FINDINGS] Hoenir's Diary 1.
Next go back to H12 and you can find a platform to drop down into to H15. In the water is one of those giant poisonous monsters; defeat it to pick up a Executioner's Gloves Relic.
From H12 go right to H16 where you can pick up 100x Stagnant Blight on the right of the map. You can also pick up a Chain Of Sorcery on a platform in the middle of the map. If you drop down to the next level of the map, and head right you can pick up a [FINDINGS] Slip Of Paper. If you drop down again this time you can find H17.
From H17 go right and you'll come to H18. Go right to H19 which is a Respite before the final boss of this chapter. Here you can pick [FINDINGS] Hoenir's Diary 2. Go right to H20.
Boss Fight - Heonir, Keeper of the Abyss.
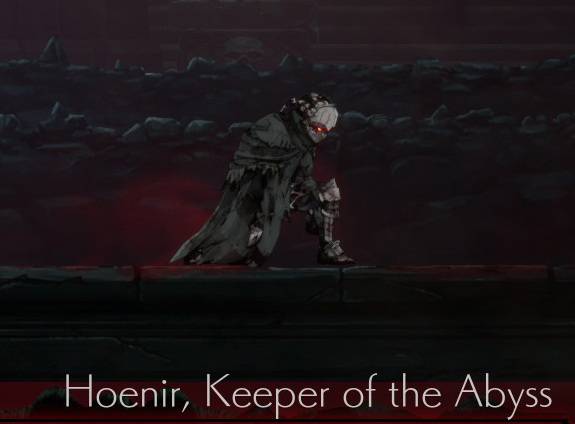
Recommended Level: 80
Heonir is a three-phase boss that is also accompanied by respawning mobs Dead Ghost Knights.
In Phase One, Heonir will simply jump away from you and fire a single-shot arrow at you. The difficultly is wiping out the mobs first so that you can concentrate on Heonir.
Phase Two Heonir gains a new sommersault ability where he will jump over you and fire down arrows on you. It's pretty simple to dodge and really the fight doesn't change much.
Phase Three Heonir goes into a berserk mode where he is a bit faster and more aggressive towards you. He has a new sommersault attack and if you get too close to him he can summon a spinning fire-disc attack.
Overall the fight is quite easy. Concentrate first on taking down the ads and Heonir will be yours!
If you need help, check out the video guide below:
Now that you've defeated Heonir, go right to H21 where you can pick up 10x Stagnant Blight. You can now use your new Action Skill Executioner's Hook to climb up towards G1. On your way you can pick up a Priestess Wish.
From G1 you can complete the game by heading to G2- however, this isn't the true ending and there's plenty more to explore first!
That wraps up Chapter 7 of ENDER LILIES Walkthrough. Let us know how you found the Heonir Boss Fight- was it too easy?

Discussion