The second part of ENDER Lilies Walkthrough is here and after facing our first Spirit Boss we now head further into the realms of Land's End.
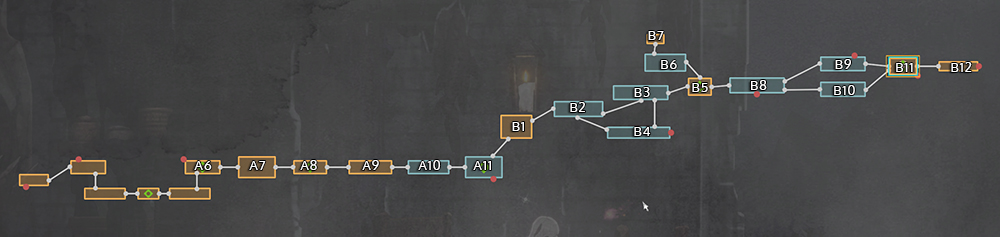
- Findings: A8, A11, B5, B11, B11
- Bosses: A10, B7, B10, B12
- Amulet Fragments: B2, B6, B8, B10
- Actions: Guardian's Leap
- Relics: A6
- Chain Of Sorcery: B9
- Stagment Blight: B4, B3, B5, B6, B9
Chapter Two opens up some new paths that we can explore called White Parish. We'll stick to the linear route in this part, but you're free to explore the other areas to get some leveling in that can help you with damage dealing.
Mobs you'll find in this area:

Slug
This mob will launch at you as soon as it detects you. Use dive to dodge it.
+4 EXP

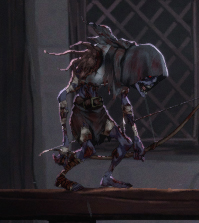
Shield Knight
You cannot damage this mob when attacking it from the font. Dive behind it to deal damage. Watch out for it's slow, but hard-hitting jab attack.
+6 EXP

Goblin
There are two forms of this Goblin; one where he does multiple slashes and another where he charges you and delivers on single slash.
+5 EXP
Archer
The Archer fires arrows towards you- his range is impressive so be on the lookout for arrows flying your way.
+9 EXP
Crow
Crows fly all around you with low HP. They shoot out heat-seeking fireballs.
+5 EXP

Toad
The Toad has lots of HP and hits hard with a double punch attack. He can also jump from distance and getting hit by it hurts!
+16 EXP
Poisoned Toad
The Poisoned Toad has lots of HP and spews out a Poison Mist that will hit you multiple times if you get near it. He also has a jump slam attack!
+16 EXP
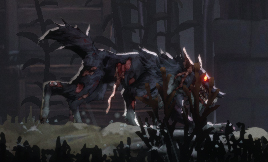
Dog
The dog charges towards you before you have time to react- watch out!.
+7 EXP
First thing you'll want to do is head back to A6 and pick up your first Relic. You can now use Double Jump to get up to higher platforms and the Relic Soiled Prayer Beads can be found at the far-most left of the map.
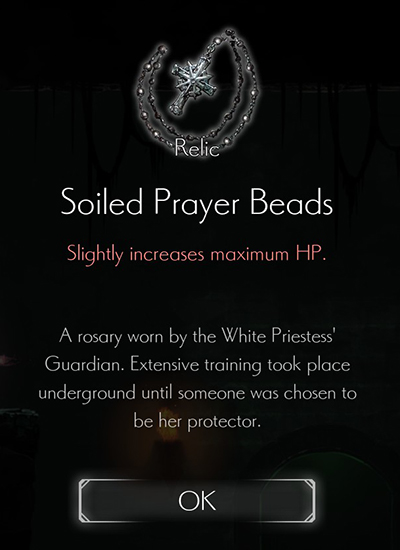
This Relic will slightly increase your Maximum HP. Go to a Respite to equip it; you can increase your Relic Slots by finding Chain Of Socery items.
If you haven't already, go ahead and equip your Guardian Siegrid Spirit to your loadout from a Respite. This skill has a cooldown and limited use (refreshes each time you use a Respite); you can place this skill in a spot as it swings a chain around and attacks enemies within range.
From A6 head to A8 where you'll find a new Respite and a few short cutscenes; pick up [FINDINGS] Groa's Letter. Head to A9.
A9 you'll find a White Flower and a Red Flower.
A White Flower when hit will restore one of Lily's Prayers; if they are already full then it will heal Lily's HP.
A Red Flower when hit will restore your Skills usage count.
Head to A10 and battle your way through; there are pits of Slugs to deal with- if you time it right you can jump down and drop a Guardian Siegrid skill to deal damage to them. Ignore the Red Bridge Wall (known as Pustulant Ground); you can't get past that yet.
Boss Fight - Cliffside Hamlet Youth
If you jump up to the top platforms in A10, you'll come across a mini-boss called Cliffside Hamlet Youth. It's quite easy; just watch out for it's diving attacks and you should have no trouble taking it down.
Once you defeat it, you'll get the new Spirit skill Cliffside Hamlet Youth which fires slugs at enemies, which is great for range attacks.
Head to A11 for a new Respite. Equip your new Cliffside Hamlet Youth skill. You unlock the Fast Travel mechanism, which allows you to teleport to any Respite you have found previously.
Head right and pick up [FINDINGS] The Parish Way 2. We'll return to this area later, but for now head to B1 and fight some mobs to get to B2.
B2 is the beginning of Cliffside Hamlet Village. There are a lot of mobs here, so take your time navigating the maps as you can quite easily take plenty of hits in quick succession. The Crows fire out fireballs that have heat seeking capabilities, so wipe those guys out first if you can.
In the basement of the first house is an Amulet Fragment inside a crate that you can smash open.
Halfway through the map you can jump down to B4 and pick up 10x Stagnant Blight and a Red Flower. Stagnant Blight can be used to upgrade your Spirit skills at a Respite. B4 is blocked off, so head back to B2 and make your way to B3.
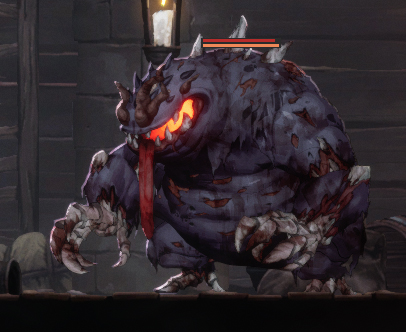
In B3, head left as you make your way up and watch out for the new mob Poisoned Ogre. It hits hard and has a lot of HP!
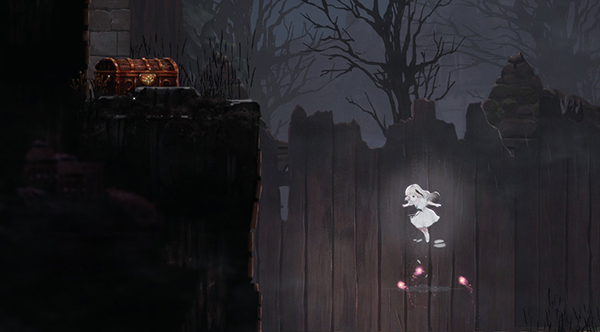
If you make your way down into the cellar of the building you'll find 10x Stagnant Blight. Again, ignore the Pustulant Ground as you cannot get past that yet. Ignore the tantalizing Treasure Chest that you cannot get to yet and head left to B5.
B5 is a new Respite spot. Pick up the [FINDINGS] True Believer's Note. Heal up and head to B6 by entering the archway to your right.
In B6 you can find an Amulet Fragment at the far left of the map and also 10x Stagnant Blight in a secret underground tunnel that is accessed by pulling the lever in the left-most house.
Once you clear the map, head through the archway in the middle of the map to B7.
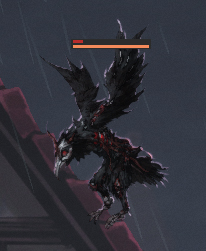
Boss Fight - Western Merchant
This fight can be a little tricky as the Western Merchant likes to fly away from you. This fight is best done if you have at least 2 Prayers- if you don't, head back to a Respite and then dodge all the mobs leading up to B7 to make sure you're at the most health possible.
Western Merchant is a mini-boss but the skill you get is very useful. Western Merchant acts very much like the Crow mobs- firing out a heat-seeking fireball. It can also fly towards you and scratch you, whilst also flying in the air it can deliver a three-way volley of fire arrows.
Your best bet is to use Double Jump and then hit it with three-way slash combos.
Once defeated, head back to B5 for a Respite and equip your new Western Merchant Spirit. You can also use the Enhance section to upgrade the Western Merchant skill.
Now travel to B8; pick up the Amulet Fragment on top of the first house roof and then head left towards B9.
You can pick up 10x Stagnant Blight in B9 on one of the houses (one of them is unreachable too). Watch out for the Dog mobs as they charge you down really fast! You can find a Chain Of Sorcery item on a ledge that will increase your Relic slots too. Head right to B11.
B11 is a Respite, you can also pick up [FINDINGS] Adherent's Letter. Before continuing on to B12, head back and jump into below the bridge to pick up [FINDINGS] Hamlet Request 1 and head to B10.
There is a hidden area in the middle of the map (one of the left walls reveals a new section) that allows you to pick up an Amulet Fragment.
Boss Fight - Headless Defender
In B10, you can find the Headless Defender in the middle of the map. This mini-boss is pretty easy- he's just a bulkier Shield Knight with the same attack patterns. Dodge when he stabs and hit him from behind.
Defeating Headless Defender gives you a new shield-type skill that blocks attacks if timed right.
Head back to B11 and heal up. Now we go to B12 for the major boss fight of this chapter!
Boss Fight - Gerrod, the Elder Warrior

Recommended Level: 11
If you've been finding the game pretty easy up until now, this is your first real challenge. It took us some 10+ tries before we manage to beat him.
Gerrod, the Elder Warrior has three phases.
In Phase One, he has two attacks. A slam down attack that has a wide AOE and also a slow but hard-hitting whack attack. Both of these can be easily dodged, so keep your wits about you. Each time he uses one of these attacks, he will be easy pickings for some combo hits. If you're using Western Merchant, Cliffside Hamlet Youth or Guardian Siegrid, these are great for creating combo's and knocking out his HP.
Phase Two begins as soon as one third of his HP is down. In addition to his current two attacks, he gains two more. He will smash his bulky sword down to create a fire wave that rushes towards you. You can dodge it easily by jumping in the air.
He also has another whack-attack, this time it can hit behind him too- so you need to make sure you jump plenty away from him when this skill is used.
Phase Three begins at about 1/3rd of his HP left.
In Phase Three, he will do a triple jump attack that is similar to his phase one move but it happens three times. You should dodge all three and on the last one, hit him for some combos as he is slow at getting up.
He also has a new rush attack- try to stick close to him as this will prevent him using it too much- it's quite slow to power up so you have plenty of time to get out of the way.
Check out the video guide below on how to beat him.
That wraps up Chapter Two of the ENDER LILIES Walkthrough! Let us know if you have any tips for the final boss fight and what loadouts you guys are rocking with!

Discussion