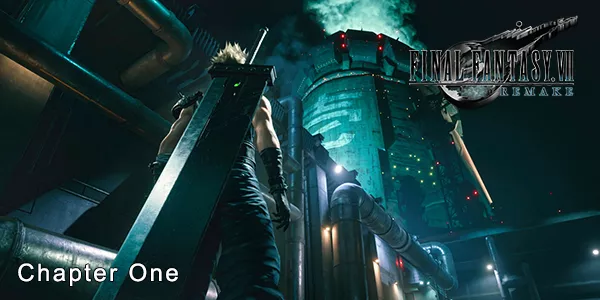
Chapter One of Final Fantasy VII Remake opens with a beautiful CGI cut-scene familiar to anyone who has ever played the original game. This guide will see us complete Chapter One, The Destruction Of Mako Reactor 1.
Chapter One gives us a nice introduction to the mechanics of the game, including the brand new action-based battle system. We'll be giving you hints and tips along the way to help make the process as painless as possible.
Difficulty Settings
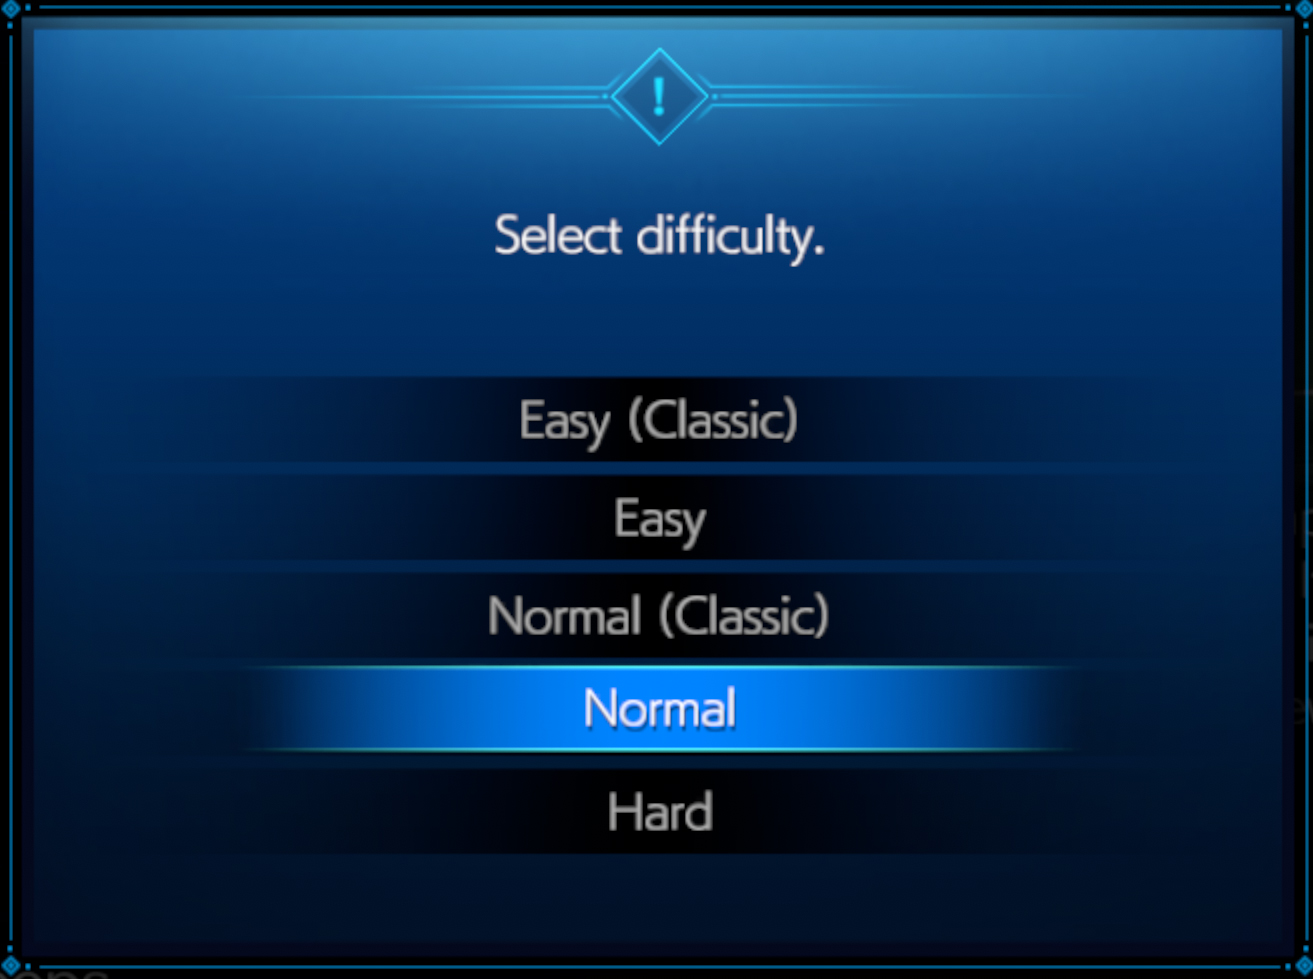
On your first playthrough of Final Fantasy VII Remake, you'll be given the option to change the difficulty between Easy and Normal. Hard mode is unlocked once you finish the game.
The Classic Version refers to how your characters perform in battle; instead of you spamming basic attacks the computer will do it for you and allow you to operate selecting just ATB commands.
The Train Arrives
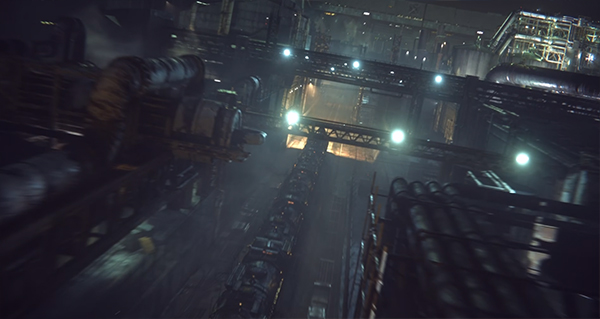
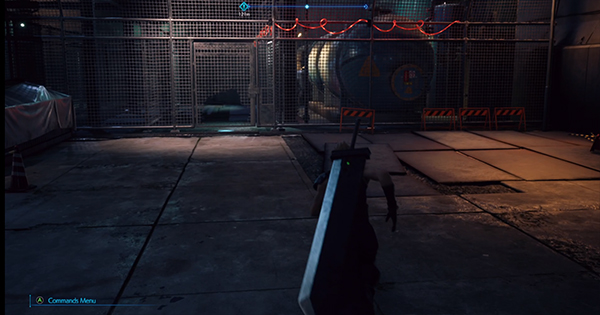
Our story begins as a train pulls into the station of Mako Reactor #1.
We play as Cloud Strife, a mercenary who has been hired by the anti-establishment group known as Avalanche to take on this mission.
As soon as you make your way off the platform and into the reactor, you'll have a few easy battles to contend with, giving you an introduction into the Battle System of Final Fantasy VII Remake.
Battle System Overview
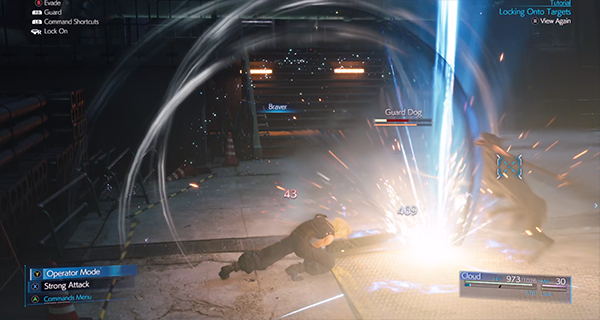
Without going into too much detail, the Battle System of Final Fantasy VII Remake uses a mixture of ATB, Action-Based Combat and Staggering Mechanics. If you ever played Final Fantasy XIII, you'll be familiar with the staggering system.
You control one character at a time in battle; however, you can switch between party members on the fly and have them perform specific commands.
Each time you open the command menu, it pauses the battle, allowing you to make strategic choices in your own time.
The ATB gauge allows you to perform special Abilities and use Materia. The ATB gauge slowly increases overtime, but also fills up more dramatically if you use normal attacks against enemies.
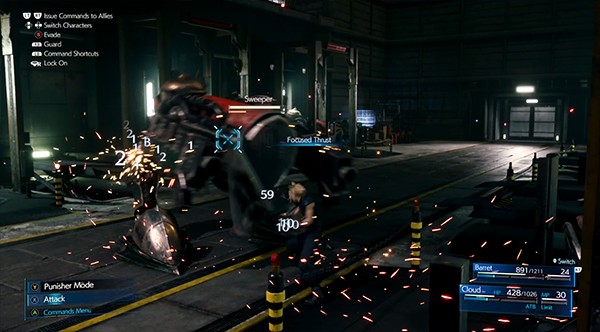
Each character in FF7R has their own special set of abilities and skills. Cloud can switch between Punisher Mode that allows him to deal hard-hitting damage but becomes slower when moving or move to Operator Mode to deal lighter damage but move faster.
Every enemy has a stagger bar; your goal is to get this stagger bar to 100%, which makes the enemy fall down and allows you to deal lots of burst damage in a short amount of time. Staggering each enemy is different; some are weak to magic, others to specific staggering abilities.
You'll learn new abilities by equipping different Weapons and learn new Magic by equipping new Materia. Check out our Final Fantasy VII Remake Battle System guide for more details.
Collectables
As you go from area to area, there will be plenty of Treasure Chests and Boxes for you to find.
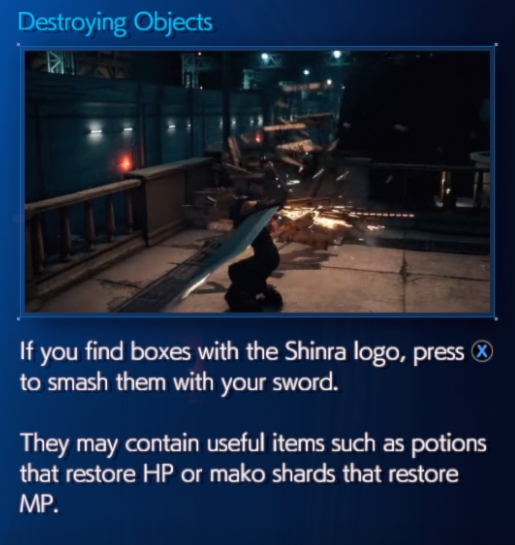
Boxes can be destroyed by your main attack, giving you useful items and restoring MP & HP. Treasure Chests tend to hold more valuable items too.
Note: You can miss various aspects of each chapter should you wish to as you can go back later on and replay them.
You can use our handy maps to check where all the Treasure Chests and Boxes are, including what you get when you open / destroy them.
Connecting Passage
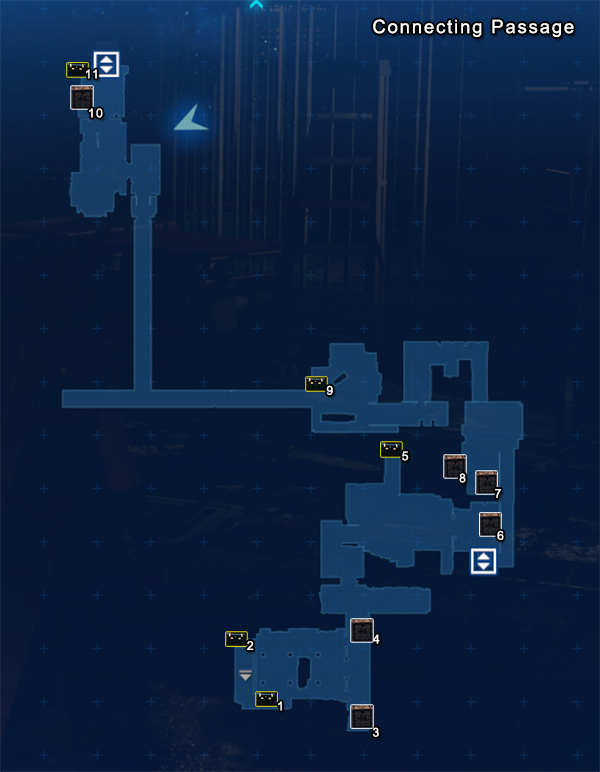
- 1 [Treasure Chest] - Potion x2
- 2 [Treasure Chest] - Grenades x2
- 3 [Box] - Potion, Recover MP
- 4 [Box] - Potion
- 5 [Treasure Chest] - Bottle Of Ether
- 6 [Box] - Moogle Medal, Recover MP
- 7 [Box] - Potion x2, Recover MP
- 8 [Box] - Potion
- 9 [Treasure Chest] - Potion x2
- 10 [Box] - Potion, Recover MP
- 11 [Treasure Chest] - Tuft of Phoenix Down
Inside the factory, Barret, Biggs, Wedge and Jessie all make their way ahead of you whilst you handle some Security Officers. They can be easily taken out using your Punisher / Strong Attack modes. Head up the stairs and you'll find two Treasure Chests(1,2) and two lots of Boxes (3,4) to smash.
You'll come to a quick cut-scene where Jessie and Biggs open up a gate. They give a bit of information about how you ended up in this situation; you're now an Ex-Solider. Speak to Barret to continue.
It seems they have paid you a nice amount of Gil to take on this mission.
The next area introduces a new enemy; the Guard Dog. This enemy is slightly more tricky; it runs around making it difficult to hit. Try using your Fire Materia to trigger it's stagger bar and then hit it with a Braver to finish it off.
Pick up the Treasure Chest (5) and Box (6) before moving to the elevator in the next room. Head down the slope towards the hole in the metal fence where you'll be attacked from behind by some more enemies. Smash open the two Boxes and head through the fence.
Note: Box 6 will give you a Moogle Medal. You'll want to collect these as they allow you to buy items from a special shop later on in the game.
Follow the path round, ignoring the boxes (they're empty!) and you'll come to a room with a fork-lift truck and some enemies. Open the Treasure Chest (9) and then follow the rest of the gang up ahead. You'll need to open a gate by holding down the switch.
You'll split off from Wedge and follow Barret, Biggs and Jessie to another locked door. Speak to Biggs to get it open.
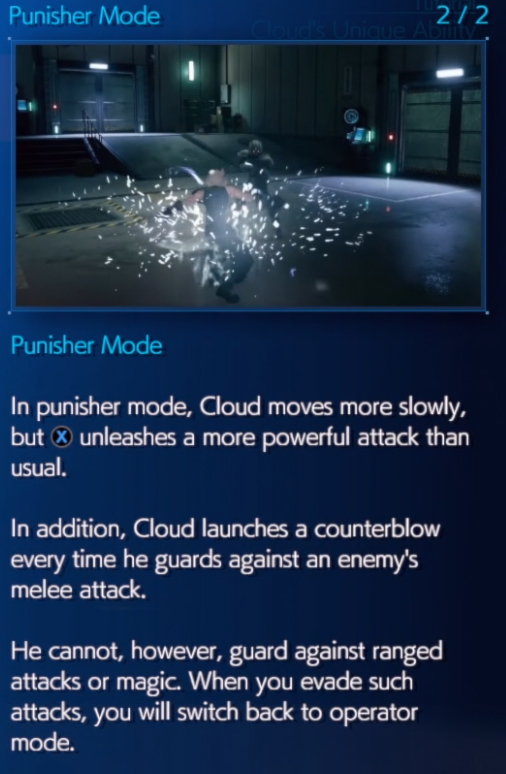
Inside there are a few more enemies to dispatch. You'll get a quick tutorial about Punisher Mode, where you can switch between slow and hard-hitting attacks, or fast and light-hitting attacks. You can also hit a counter-attack if you successfully guard against enemy's melee attacks.
Speak to Jessie at the next locked door to continue on. Inside you'll find Boxes (10) and another Treasure Chest (11).
Inside this room, flick the Elevator switch for a quick flashback cut-scene involving Cloud and Tifa.
Barret soon interrupts the chit-chat. After that, you're introduced to Shinra's President and Heidegger who are watching you infiltrate the Mako Reactor.
As the Elevator takes you to the next floor, Barret goes on a rant about Shinra sucking the planet dry. Cloud is having none of it.
Mako Reactor 1 - Utility Access
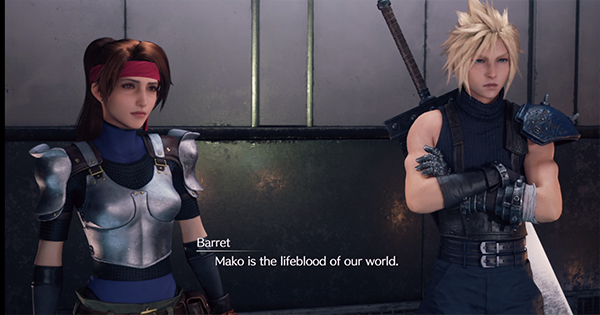
As you make it to the next part of the Mako Reactor, Barret joins the party.
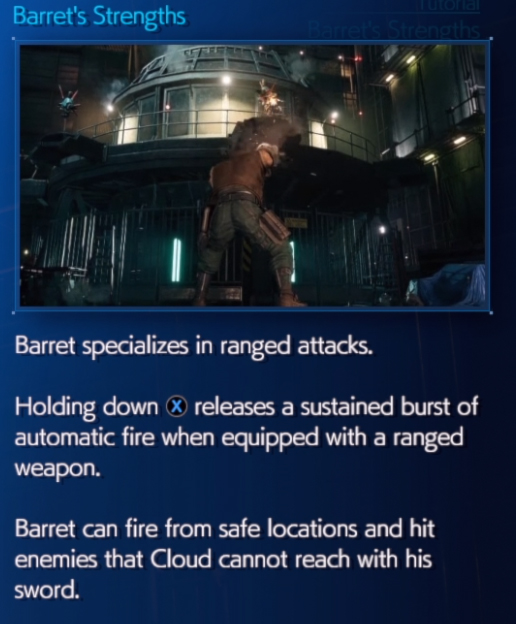
Barret's skill set is ranged attacks; you can use hit attacks to take out enemies that cloud otherwise cannot.
Try using Barret's Overcharge attack, as it can wipe out the Sentry Ray enemies from a distance very easily; it slowly charges up overtime, but you can give it a charge boost every 2 seconds or so.
Switch to Cloud to take out the Moondrive enemies.
- 1 [Box] - Potionx2, Recover MP
- 2 [Box] - Recover MP
- 3 [Treasure Chest] - Potion x2
- 4 [Treasure Chest] - Bottle Of Ether
- 5 [Box] - Recover MP
- 6 [Treasure Chest] - Phoenix Down
- 7 [Box] Potion x2, Moogle Medal, Recover MP
- 8 [Treasure Chest] - Bottle Of Ether
- 9 [Box] - Recover MP
- 10 [Box] - Recover MP (on the way out only)
- 11 [Treasure Chest] - Potion x2 (on the way out only)
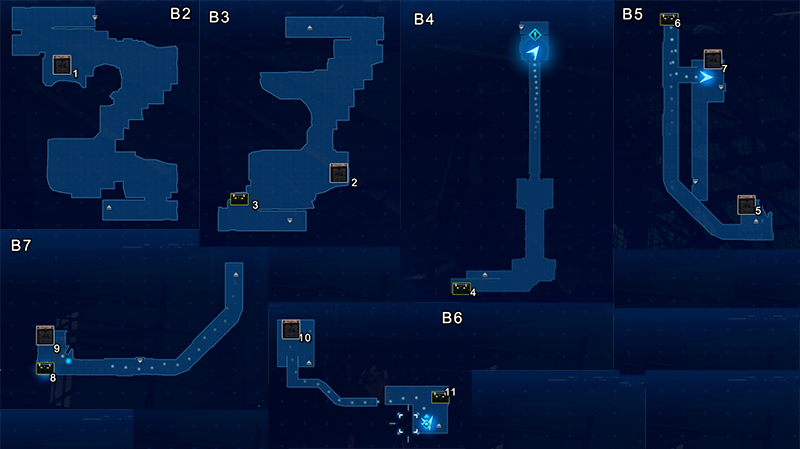
Location: Mako Reactor - B1
Our aim is to head to the Mako Reactor Core, and to do that we need to pass through a series of maps. Head down the stairs to B2 and find Jessie tell you about a Laser Security System that you'll need to dodge. If you hit a laser, you'll take a tiny bit of damage.
You can pick up Potion x2 and Recover MP from a set of Boxes (1) in the corner of the map.
Head further down to find more lasers to dodge. Here you can pick up a Box (2) and Treasure Chest (3). As you head down the stairs to B4, a new enemy awaits you. Before engaging, head back behind the stairs to pick up Treasure Chest (4).
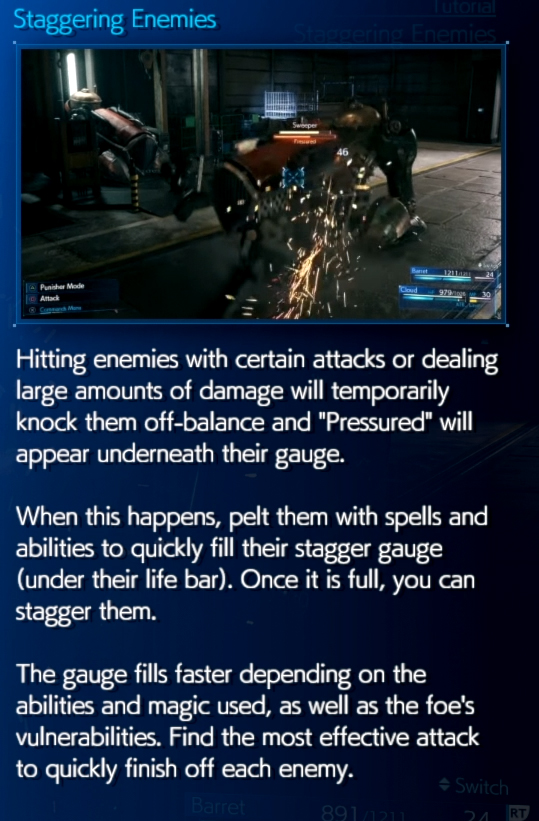
This new enemy is called a Sweeper and it has a lot of health. This is your introduction to staggering an enemy; if you use Barret's Thunder Materia and Cloud's Focused Thrust, you can get it's stagger bar up fast. Once staggered, use Cloud's Braver to deal hefty damage.
Once defeated, head after Jessie and take the ladder down to B5. You finally get a glimpse at your target- the Mako Reactor Core! Don't forget to pick up Box (7) to find a Moogle Medal.
As you head down to B6, you'll have to take on a few more enemies. Have Barret wipe out the Sentry Ray. Now head to B7, where you'll find a group of mobs at the end of the platform, as well as a Treasure Chest (8) and some Boxes (9).
Finally you reach Reactor Core. Here you can set the bomb to Twenty or Thirty Minutes. In reality, it doesn't actually matter.
Boss Fight - Scorpion Sentinel
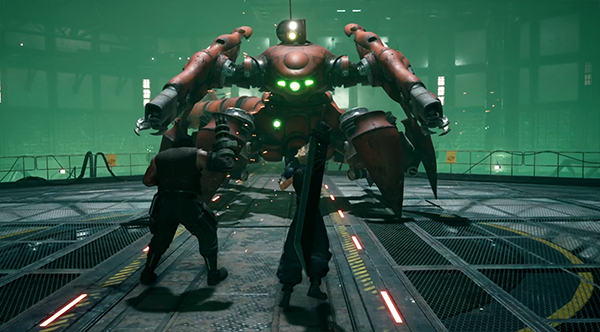
Your first boss fight of Final Fantasy 7 Remake is against the Scorpion Sentinel. This fight is slightly different to the original, and has a few cutscenes thrown into it as you take down it's HP.
Scorpion Sentinel will hit you with Electrostomp, immediately dodge away to the sides to avoid this attack. Have Cloud attack to get his ATB up and use your ability Focused Thrust to get the Stagger bar going.
Barret has Thunder and Cure Materia, so if you ever get in a spot of bother, have Barret use Cure. Scorpion Sentinel is weak to Thunder also, so have Barret cast that as often as possible.
Scorpion Sentinel will send a barrage of missiles at you with it's Mark 99 Launchers; if you use Guard you can prevent taking significant damage.
After you stagger it for the first time, the boss will jump to the wall and then behind you. Switch to Barret to use your range attacks to deal damage. It will now use a new move called Death Grip; whenever you see this flash up, get out of the way as you cannot guard against the move if attacked.
The bosses' weak spot is behind it, it is labeled as Field Generator. Cloud will struggle to hit the spot, so switch to Barret to use Focus Shot.
The boss will also use EM Field; an electric attack that'll hit anyone close, as well as knocking you back.
Keep hitting the boss until you stagger it and get it's HP down to < 50%. It will then switch to a new mode and use it's Tail Laser attack. To dodge it, simply hide behind the fallen debris. You can use this time to heal up if you have any unspent ATB.
The same pattern continues until it goes down to < 10% HP. It will switch to it's Overkill mode. In this mode, it's legs will be attackable. Target them with both Cloud and Barret to take destroy the boss. The boss can heal at this point, but you should have enough damage to burst through it without having to deal with the auto-repair bot.
If you need more help, check out the video below!
Congratulations on taking down your first boss!
After the fight, the timer begins to countdown. Head up the ladder back to B7, where some mobs will be waiting for you. Keep heading up and you'll eventually get separated from Barret and have to help Jessie.
Follow Jessie down the ladder and pick up the Treasure Chest (11).
Follow Jessie up the ladder and meet up with Barret where you'll take on some mobs as he rejoins your party. Make your way back through B4, where another Sweeper awaits you.
More mobs await on B3; smash the Boxes (2) that have respawned to get another Moogle Medal.
Head up to B2 to fight a new mob called a Shock Trooper. These guys are very hard to hit; time your Materia hits just right to stagger them. You can also collect Potion x2 and Recover MP from Boxes (1).
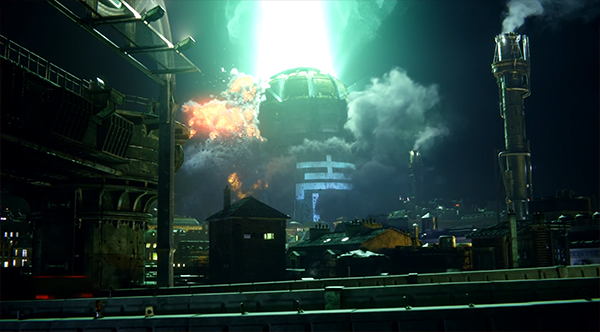
Use the Elevator on B1 to go up to Connecting Passageway where a new cutscene will show Shinra destroying their own Mako Reactor after the bomb goes off.
Follow Jessie out of the reactor and get to safety!
That wraps up Chapter One of Final Fantasy VII Remake! Let us know if we missed anything and if you have any tips for the boss battle in the comments below!

Discussion