After fixing Elena, the search is now on for Chloe, another one of Raymond's crew mates. The Seaports of Rythal are due to open soon, however a mysterious disease known as Helgar's Disease has spread upon them.
When you arrive at Rythal, head to the Infirmary and there appears to be an outbreak of Helgar's Disease.
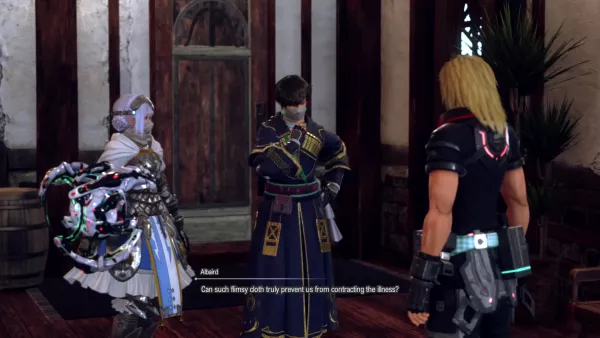
The gang mask up whilst Nina and Doctor Vahnel treat people. You'll then get an opportunity to check on Midas, who appears to have also fallen ill.
Elena proposes to collect samples to help create a cure for the disease.
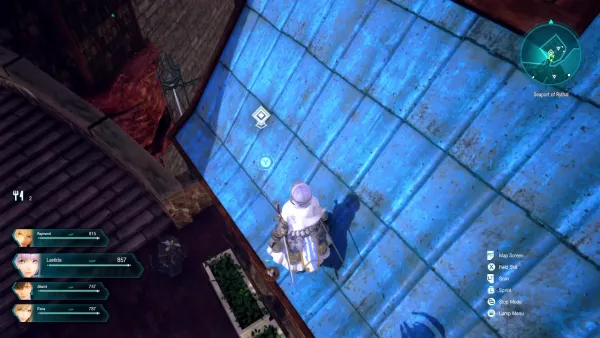
You can find three samples around the Seaport Of Rythal. The first two are pretty easy to get; one is on a rooftop and the other is sitting in a tree.
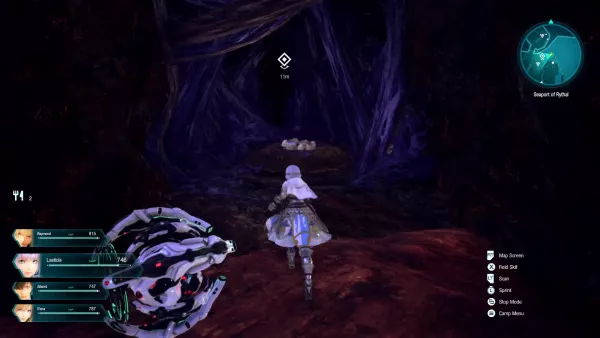
The third one can be found in a small alcove underneath the seaport. You'll need to head to the dock to reach it using DUMA.
Head back to The Infirmary with the samples; Nina and Elena both figure out a cure for Helgar's Disease and give it to Midas.
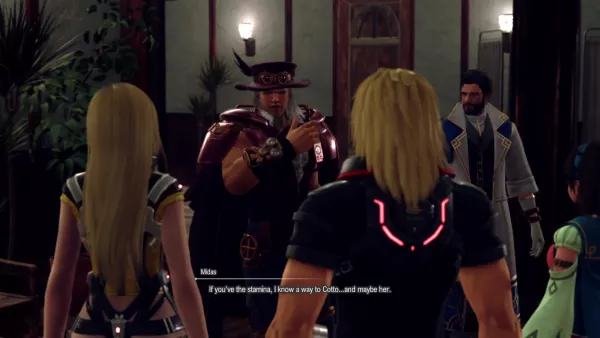
Unfortunately, due to the outbreak, all the ferries have stopped running. Midas suggests heading to Mt. Cottorinth to find the herbs needed for the medicine.
At this point, you'll get an alert from Welch about a new Item Creation quest becoming available.
Mt. Cottorinth
To get to Mt. Cottorinth, you need to head back to the Galca Shrine. When you arrive, the party pray for safety.
You can now begin your decent to Mt Cottorinth by heading up the snowy hill.
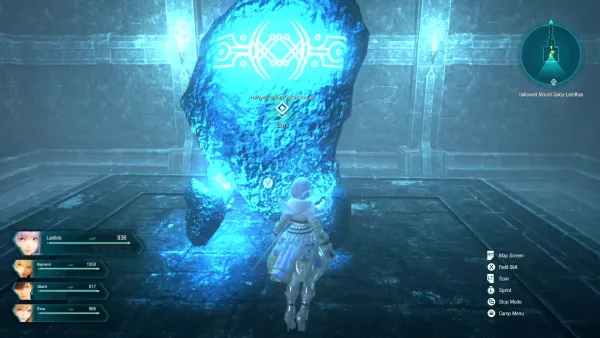
Hallowed Mount Galca-Lemthas
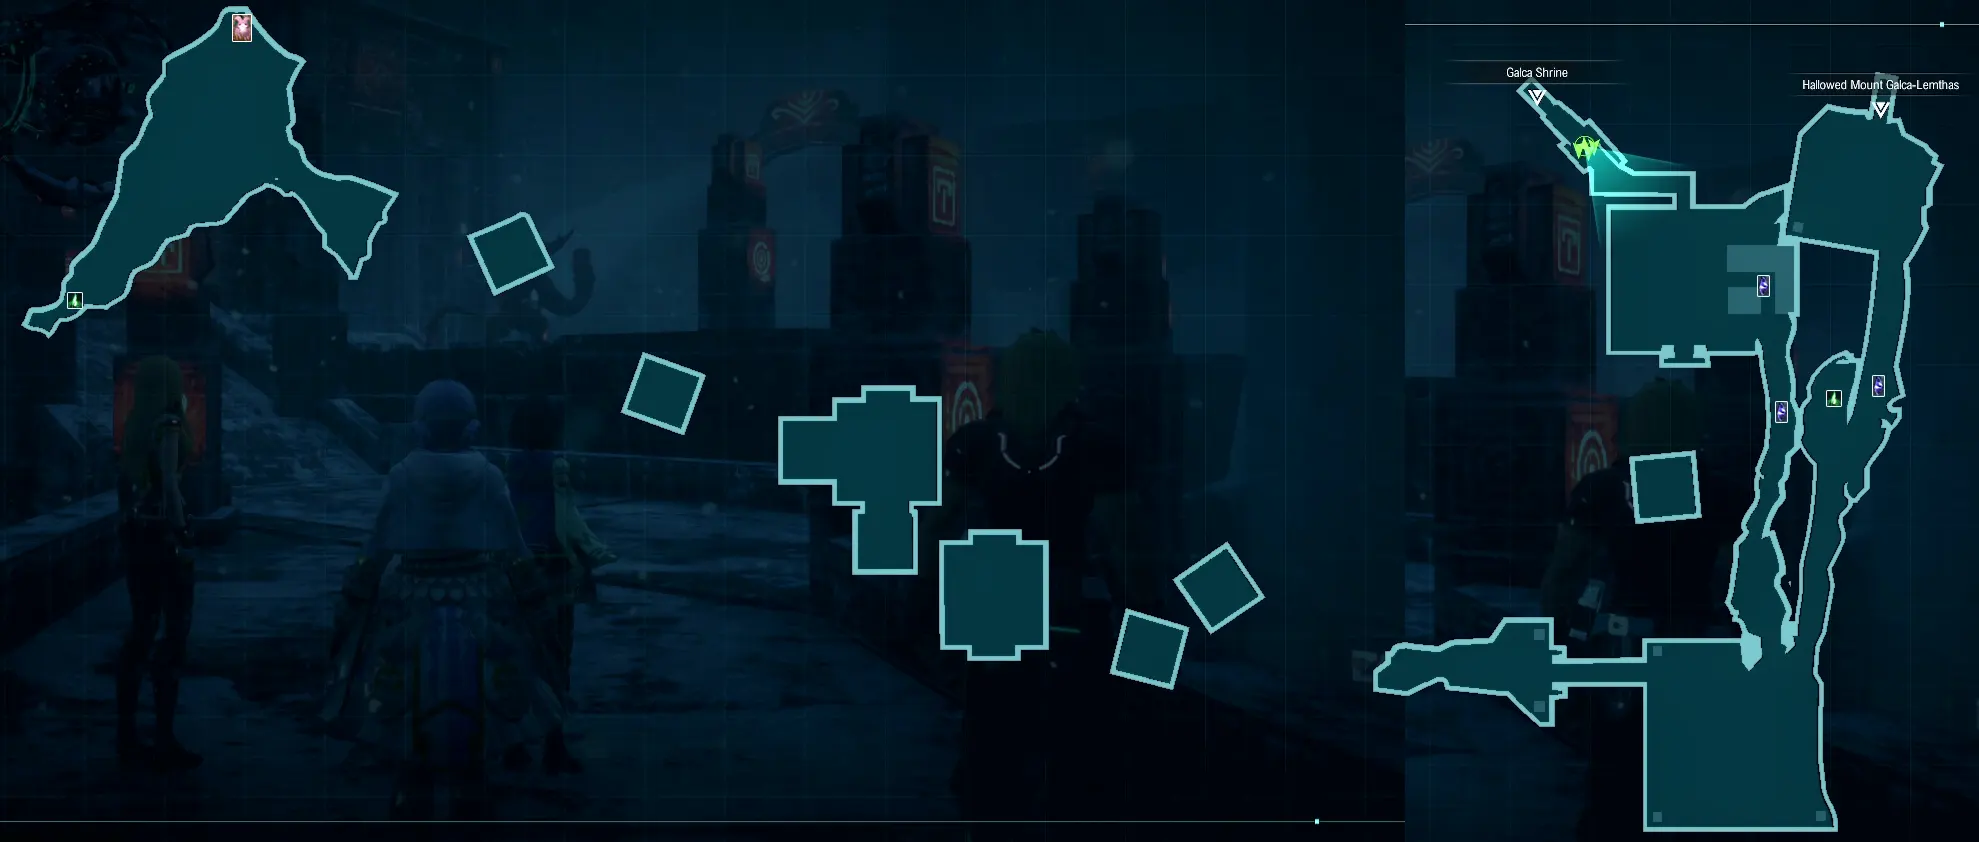
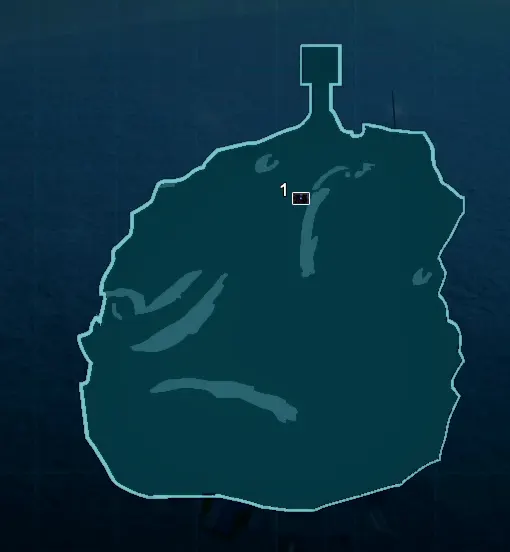
You'll begin at the Hallowed Mount Galca-Lemthas. There are four parts to this area and it has several challenging mobs to watch out for, including the Ancient Chimera and Soul Reaper.
You'll want to follow up the snowy ramp; you can take a detour across the floating islands and find a Mini-Bunny.
The second area contains more mobs for you to fight your way through.
Treasure Chests:
- [1] Treasure Chest: 400 Fol
- [2] Treasure Chest: Sapphire Pendant
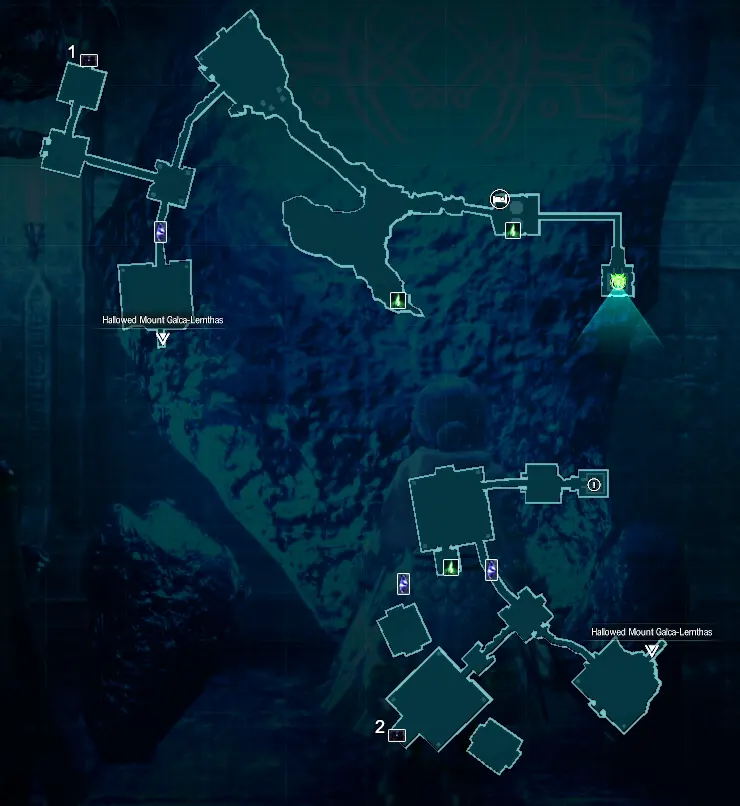
About halfway through, you'll find a place to rest where Raymond tells all about Elena.
You'll come to a blue shiny stone that if you touch it activates the raised platform taking you to the next map.
Here you can find another Blue Shiny Stone that will take you back down. There is also a treasure chest nearby containing a Water Charm.
You'll return back to the second part of Hallowed Mount Galca, only on the other side this time. Make your way through the mobs; be careful of the Soul Reapers!
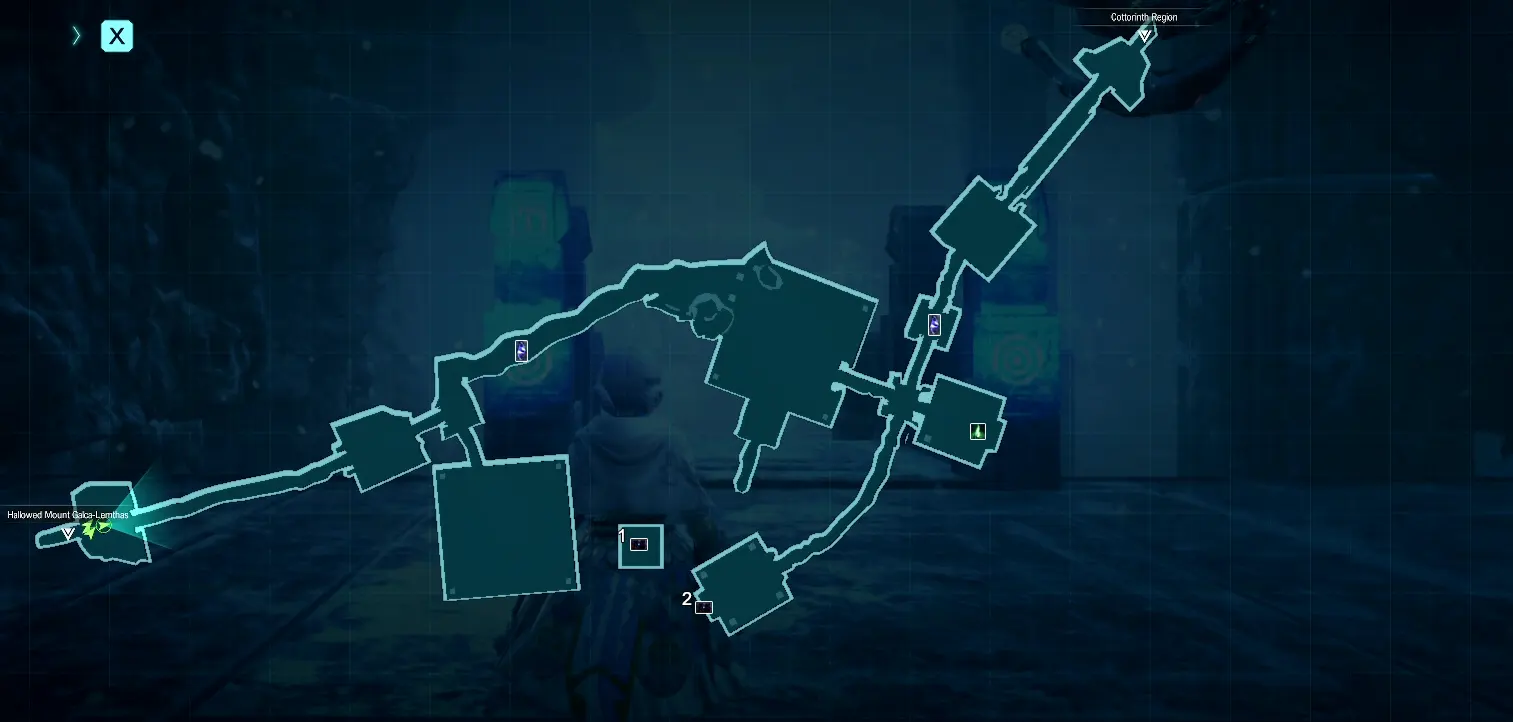
You'll come to the final part of Hallowed Mount Galca. Head down and you'll arrive at the Cottorinth Region.
- [1] Treasure Chest: Flamberge
- [2] Treasure Chest: Earth Incantation
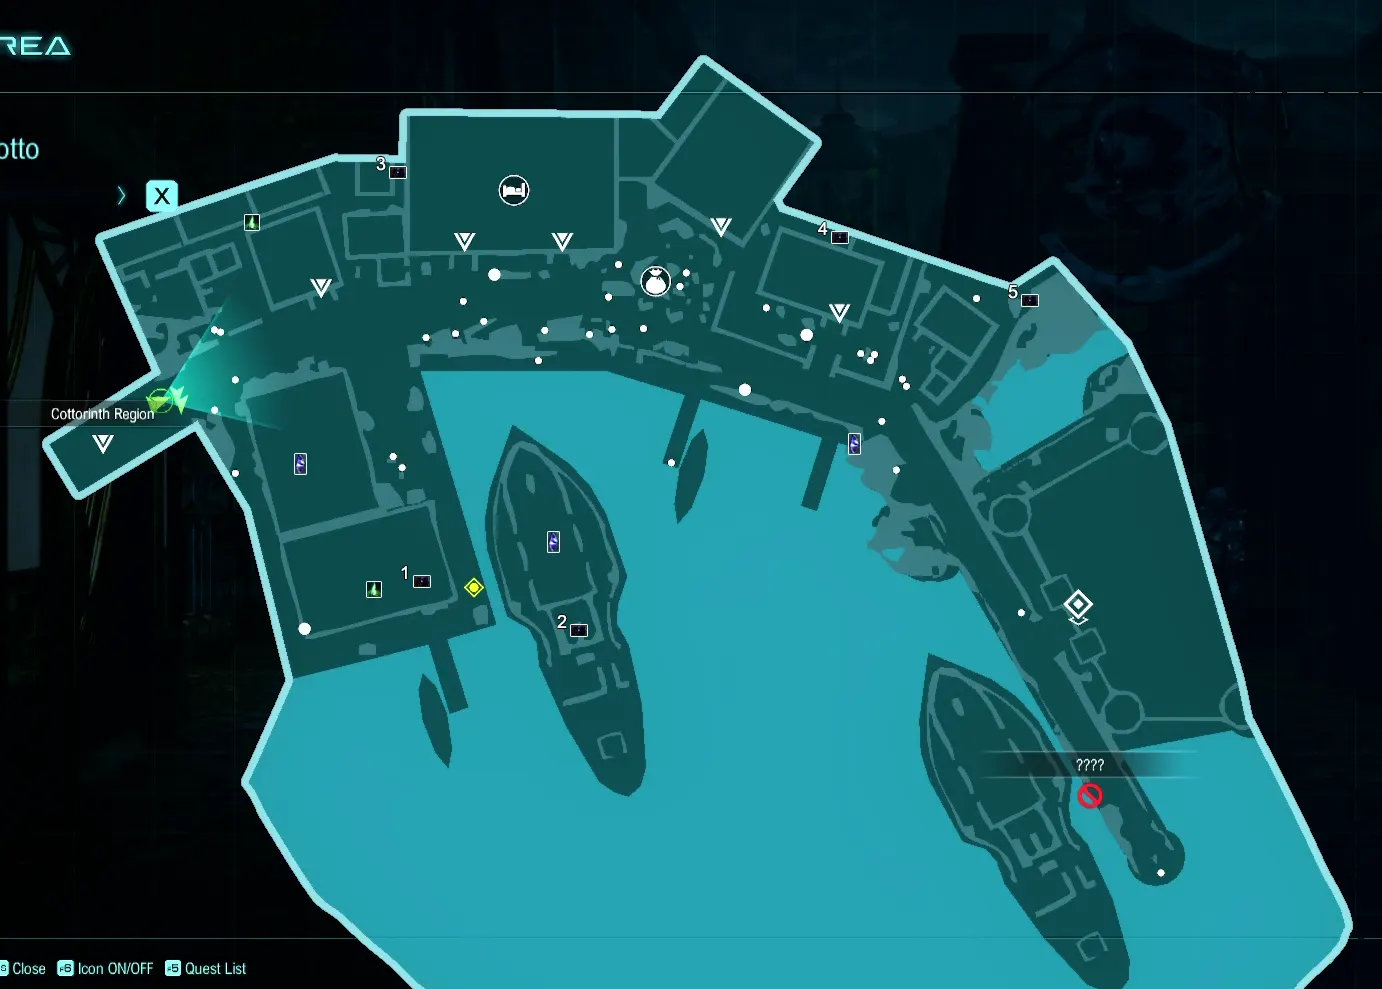
Cottorinth Region
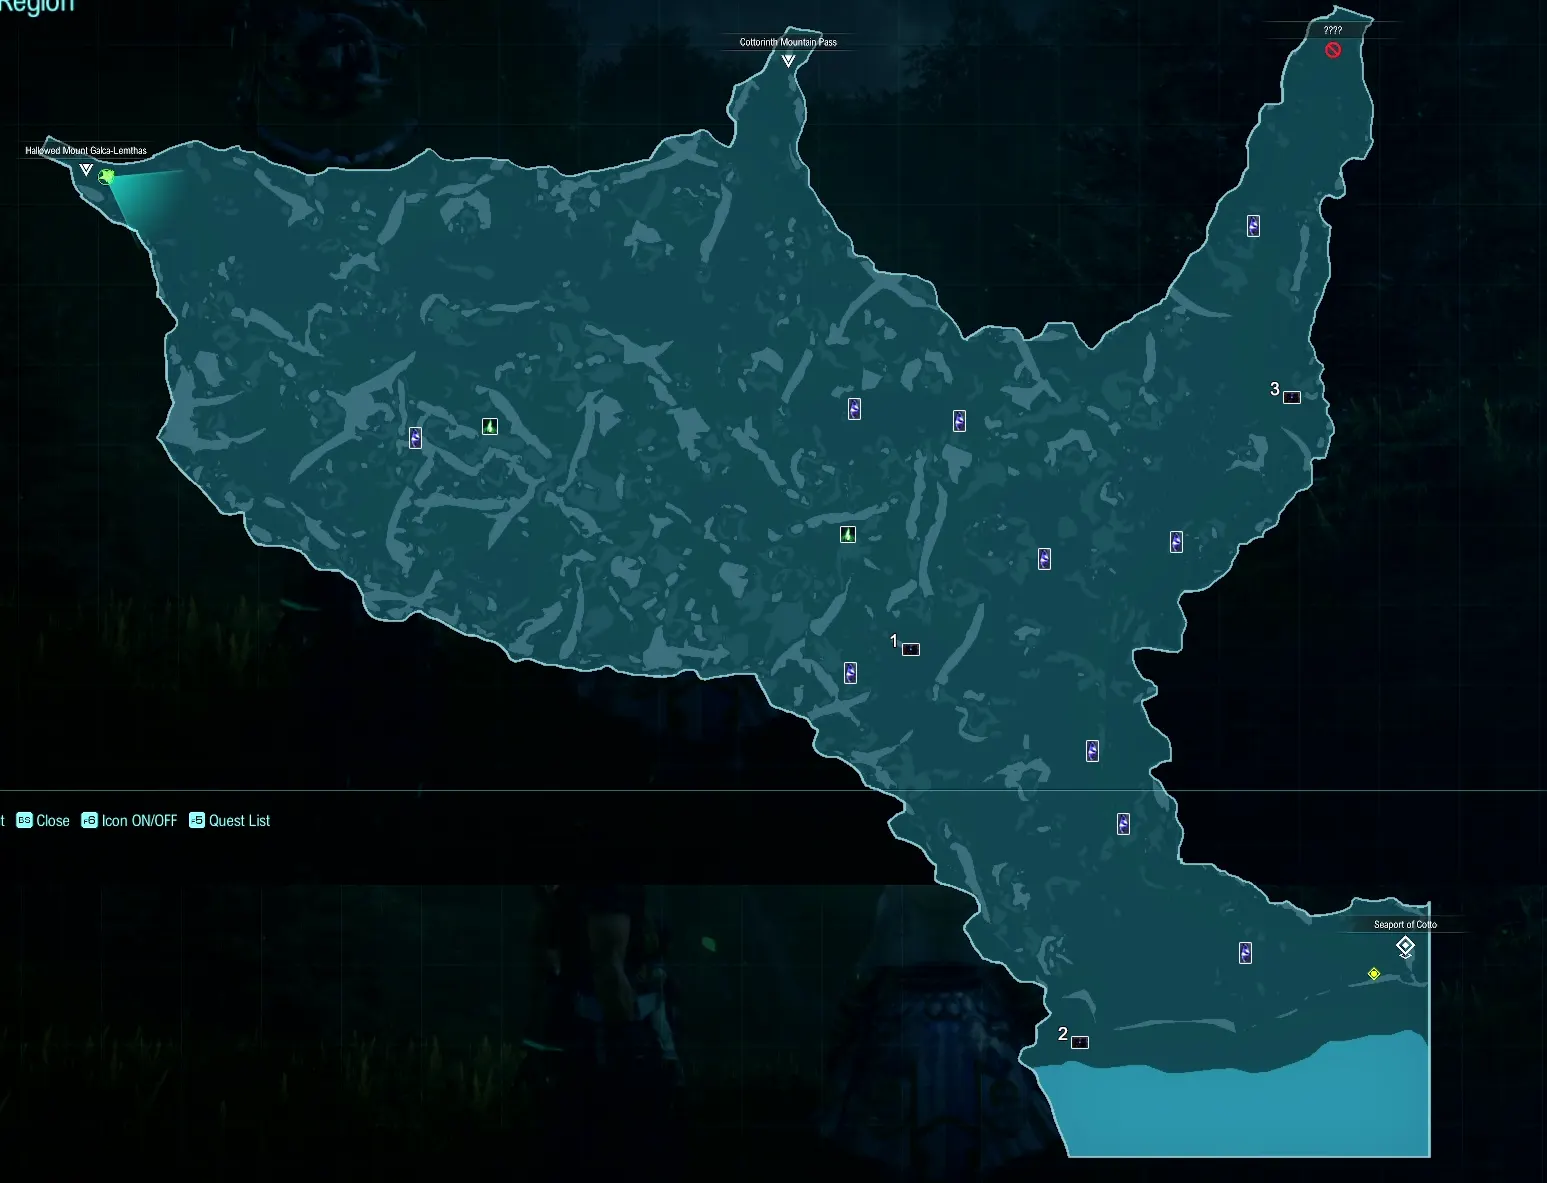
The Cottorinth Region is a large forest of giant tree trunks and vegetation. You'll want to head south to find the town of Seaport Of Cotto.
There is also a sidequest just outside of Cotto called: When I Sleep And When I Wake.
Treasure Chests:
- [1] Treasure Chest: Blissful Song
- [2] Treasure Chest: Chebelim Cane
- [3] Treasure Chest: Fortitude Potion
Enter the Seaport Of Cotto.
Seaport Of Cotto
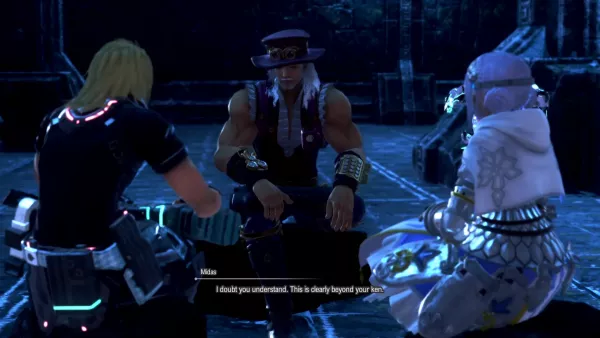
You'll be greeted by the guards of Cotto and after Midas makes some disparaging remarks, a small fight begins.
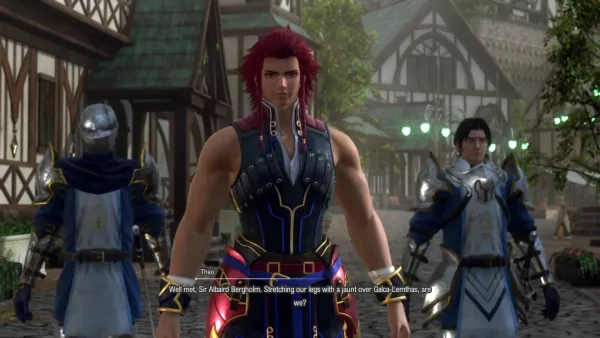
You'll then be introduced to Theo, who tells you that Cotto is also having issues with Helgar's Disease. He is seeking a girl in strange garb who he is attributing the spreading of the disease to.
If you head to Theo's office, he explains he is the cousin of Laeticia.
Raymond believes this strange girl might be Chloe, who was last seen in the mountains- the same place you're heading to find the herbs for Helgar's Disease Medicine.
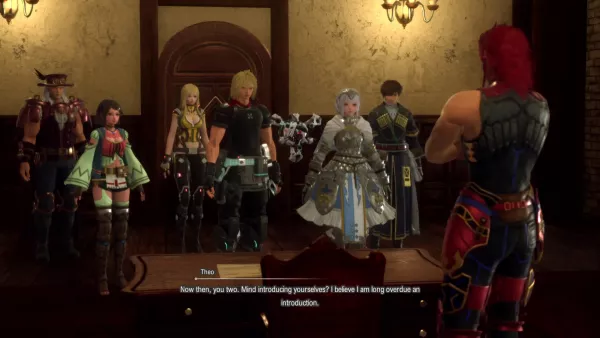
After leaving Theo's Office, make sure you stock up on new weapons from the Cotto item store.
| Name | Stats | Factor | Character |
|---|---|---|---|
| Balisarda | ATK: 116 INT: 73 |
Raymond | |
| Double-Fanged Ylfingr | ATK: 98 INT: 106 |
+10% DMG dealt on Critical Hit. | Laeticia |
| Di Zhen Lun | ATK: 91 INT: 114 |
Bestows the element of Earth to attacks. | Albaird |
| Tathlum Rings | ATK: 67 INT: 144 |
Bestows the element of Fire to attacks. | Albaird |
| Blissful Song | ATK: 73 INT: 141 |
Nina | |
| Chebelim Cain | ATK: 93 INT: 122 |
Bestows the element of Wind to attacks 10% chance to fire lightning projectiles upon ATK |
Midas |
You can also pick up a new quest: The Immortal Knight.
Treasure Chests:
- [1] Treasure Chest: Berserker
- [2] Treasure Chest: Amber Pendant
- [3] Treasure Chest: Mixed Berries
- [4] Treasure Chest: Mechanical Gears
- [5] Treasure Chest: Shrimp and Mayo Umaibo
Inside one of the houses you can find a Treasure Chest with a Tynave Accessory.
Now head back to the Cottorinth Region and towards the Cottorinth Mountain Pass.
Cottorinth Mountain Pass
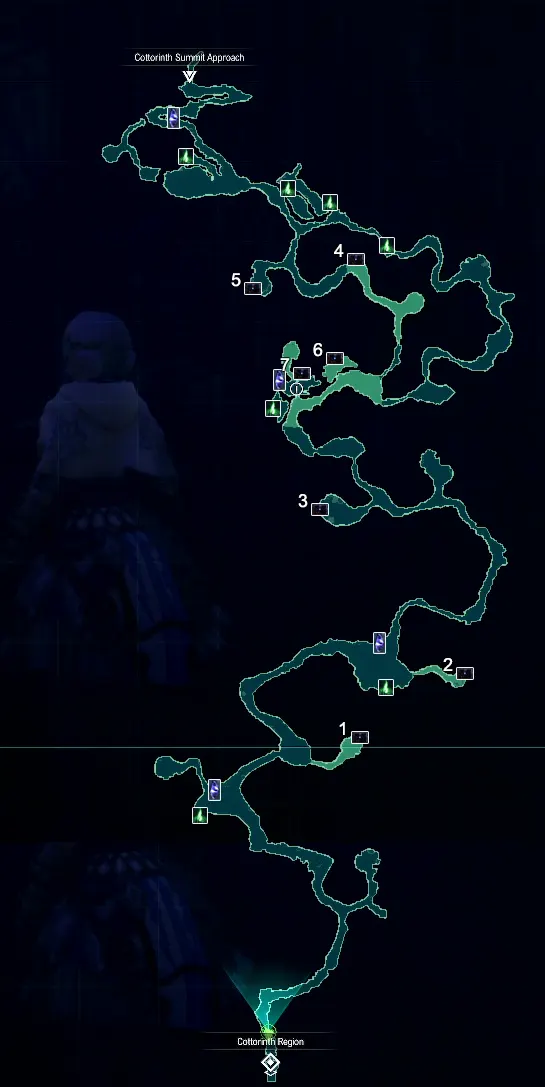
The Cottorinth Mountain Pass introduces a new mechanic where your way is blocked by thorns. You'll need to smash through them to open up new routes.
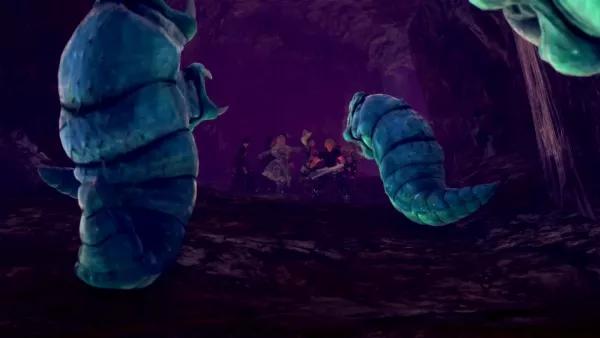
You'll find several mini-caves with Enigma Worm monsters in them. You'll also come across poison gas that will slowly drain your HP (but won't kill you). Elena is immune to it, so it's a good idea to have her in the party at this time.
Treasure Chests:
- [1] Treasure Chest: Blueberry Potion x2
- [2] Treasure Chest: Healing Device
- [3] Treasure Chest: Mechanical Gears
- [4] Treasure Chest: Heat Bomb x2
- [5] Treasure Chest: Healing Device
- [6] Treasure Chest: Green Pendant
- [7] Treasure Chest: Twin Naeglings
About halfway through the mountain pass you'll come across a blocked entrance that you can't move out of the way. Instead, you'll need to use D.U.M.A. and fly up to the higher clifftops and cross a bridge. Follow it round and you'll eventually jump back down onto the mountain pass.
When you towards the end of the Mountain Pass, you can use D.U.M.A. to fly up onto a cliff and find a blue statue that will activate the doorway at the end of the map to escape this toxic place!
Cottorinth Summit Approach
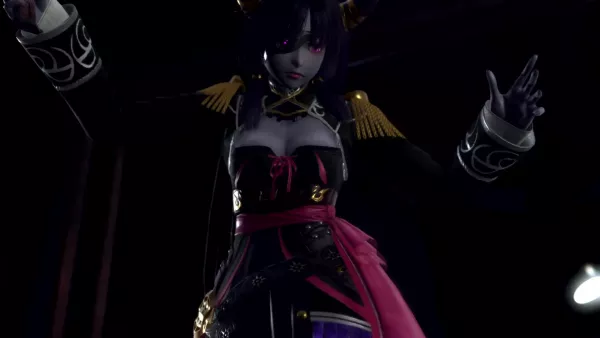
When you exit the Mountain Pass you come across a strange lab. You also get attacked by the purple skin horned lady who runs off. Follow her!
Treasure Chest:
- [1] Treasure Chest: 700 Fol
Head to the end of the summit and prepare for a boss fight...
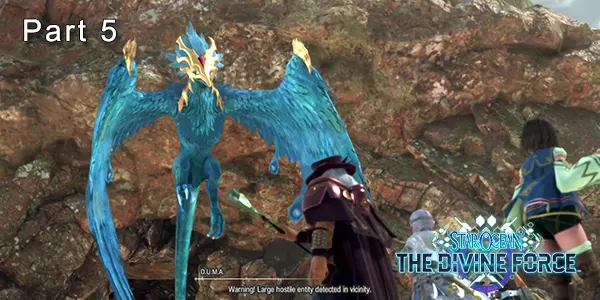
Boss Fight - Sampati, The Holy Bird
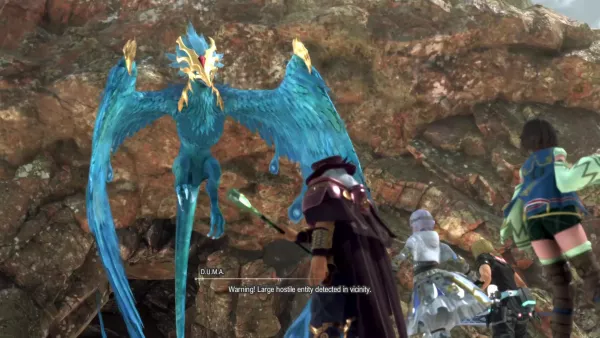
Recommended Level: 30
There are two main strategies for taking down Sampati, the Holy Bird.
The first is you want to be targeting Sampati's Head, so use your Lock on ability. Hitting it hard in the head can cause it to be stunned for several seconds, allowing you to get lots of nice damage in.
The other part of the winning strategy is when Sampati summons the fireballs in the arena, you want to run to the rocky outskirts as none of the wind attacks can hit you from there. This is also a great time to heal up.
You'll also get introduced to VATTING. These are powerful skills you can use during the battle; the gauge can be seen under your character's name. When full, trigger it using your RT button. This is very useful in this fight as the boss has a lot of HP!
Sampati is a flying boss, so you'll want to put your range party members into the fight so they can deal damage from a distance (Midas, Albaird).
Check out the video below for more tips:
Rewards:
- Mixed Berries x3
- 1940 Fol
- 5530 EXP
After the fight, Nina discovers the herbs needed for Helgar's Disease!
That wraps up part 5 of the Star Ocean: The Divine Force Walkthrough! Let us know if we missed anything in the comments below!

Discussion