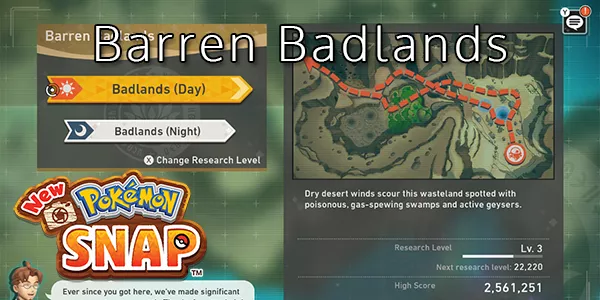
Below you can find a list of all the Pokemon available in Barren Badlands in New Pokemon Snap. Barren Badlands has both day and night versions; they were both added to the game after it's official release as new content for free, including several new Pokemon.
Night course is unlocked once you reach Level 2 in the Day course.
Barren Badlands - Pokemon List
| Day | Night |
|---|---|
| Max Level: 4 | Max Level: 3 |
|
Research Level & EXP |
Research Level & EXP |
Barren Badlands Maps
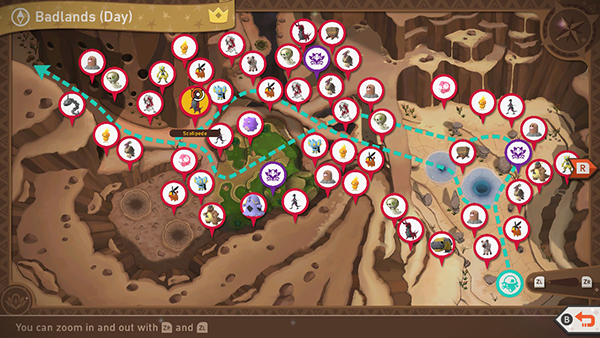
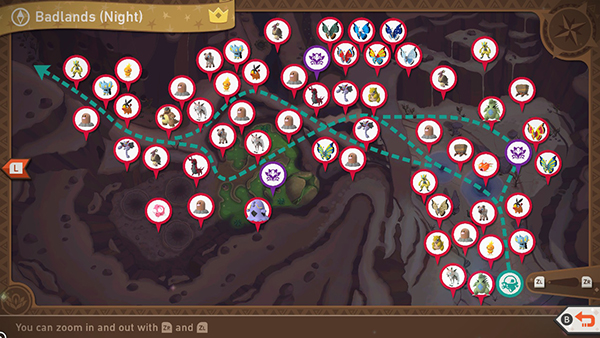
See our New Pokemon Snap Complete Maps guide.
Barren Badlands Pokemon List
Barren Badlands consists of three different research levels and has two themes: Day and Night. You will see different Pokemon at different levels and only some interactions are available at specific levels.
Below we've created a table of all the Pokemon in Barren Badlands, including their location and any interactions you need to perform in order to get them to appear.
Check out the New Pokemon Snap Photodex for a list of all Pokemon.
| Pokemon | Course | Level | Location | |
|---|---|---|---|---|
 Tepig |
Day | Level 1 Level 2 Level 3 |
Tepig can be found right at the beginning of the level and throughout the stage at various points, along with Torchic and Shinx. | |
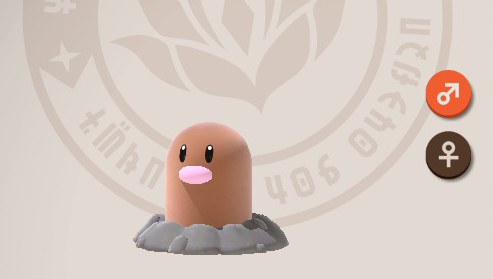 Diglett |
Day | Level 1 Level 2 Level 3 |
Diglett are seen all over this course. If you take the alternative route, there are three Torchic on your left. Use Fluffruit to group them together and then throw an Illumina Orb to get Diglett to appear. |
|
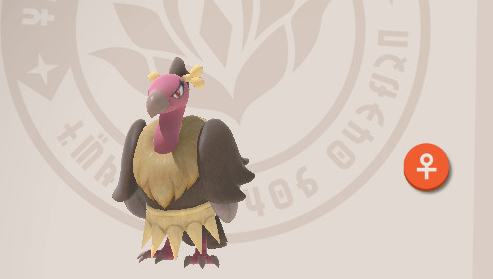 Mandibuzz |
Day |
Level 1 |
Mandibuzz are seen at the beginning of the course, flying around and perched on branches. To get the Mandibuzz to appear in the middle of the course, you need to throw Fluffruit at the two Mandibuzz at the beginning that are perched on rocks taking the normal route. Then a Mandibuzz will swoop down from your right as you get to the Poison area. |
|
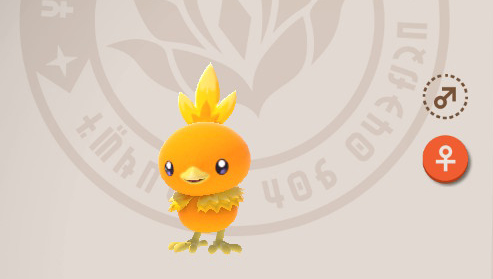 Torchic |
Day | Level 1 Level 2 Level 3 |
||
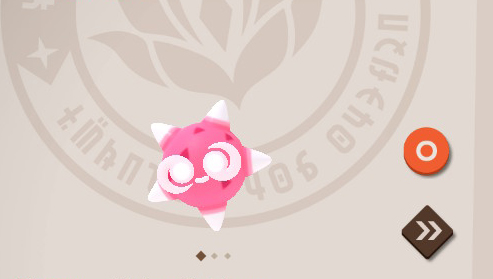 Minior |
Day | Level 1 Level 2 Level 3 |
||
 Lycanroc |
Day | Level 1 Level 2 Level 3 |
You can find a sleeping Lycanroc as you pass the Rock Bridges and go down the slope towards the Poison Gas area. | |
 Koffing |
Day | Level 1 Level 2 Level 3 |
||
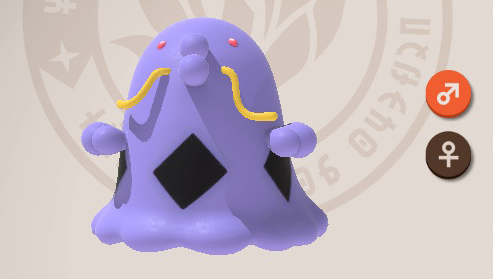 Swalot |
Day |
|
||
 Shinx |
Day | Level 1 Level 2 Level 3 |
||
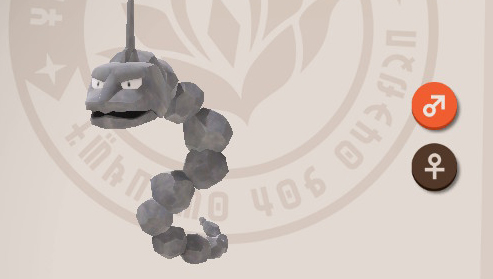 Onix |
Day | Level 1 Level 2 Level 3 |
Onix will pop his head out of the small cave holes at the end of the course. | |
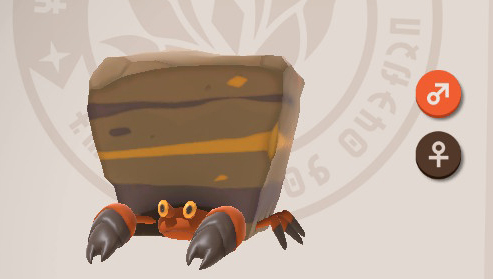 Crustle |
Day |
Level 1 |
||
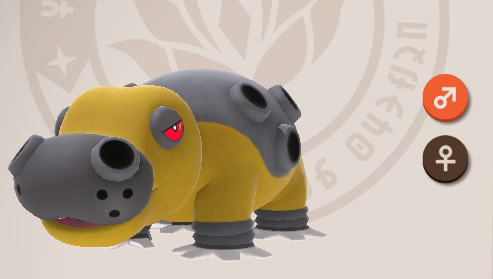 Hippowdon |
Day | Level 1 Level 2 Level 3 |
Hippowdon can be seen on your immediate left at the start of the course. |
|
 Rockruff |
Day | Level 2 Level 3 |
Rockruff appears at the beginning of the course from Level 2. | |
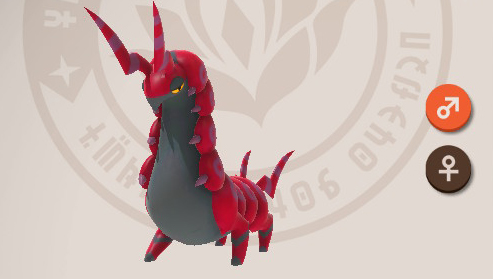 Scolipede |
Day | Level 2 Level 3 |
Scolipede can be seen at the beginning of the course on your left fighting a Silicobra. | |
 Silicobra |
Day | Level 2 Level 3 |
Scolipede can be seen at the beginning of the course on your left fighting a Silicobra. You can find a Silicobra in the sand next to a Tepig before the Rock bridge section. Throw a Fluffruit at it to get it to appear. You can also find Silcobra being chased by Scolipede by taking the alternative route. Throw an Illumina Orb at the Crystalbloom as the Scolipede goes past it. This will cause Silicobra to then be resting in the cave at the end of the course. |
|
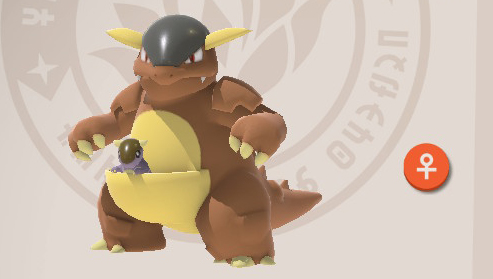 Kangaskhan |
Day | Level 2 |
Kangaskhan can be seen at the beginning of the stage on your right. One can also be seen at the end of the poison field area next to Tepig. |
|
 Salazzle |
Day | Level 3 |
Appears on top of the poison volcano looking down at the Koffing and Swalot. Will also chase after Zeraora when you wake it up at the beginning of the course. It then reappears again on a clifftop in the poison field area. |
|
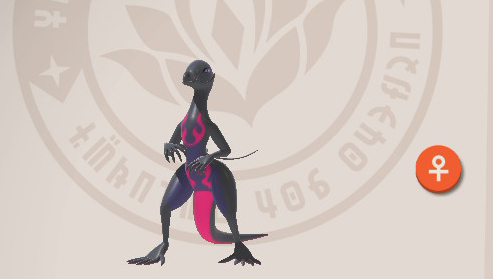
 Zeraora |
Day | Level 3 | You can find Zeraora asleep on top of a clifftop to your right at the beginning of the course (just behind the Kangaskhan). Throw a Fluffruit at it to wake it up and it'll then appear at the end of the level. | |
Rockruff |
Night | Level 1 Level 2 |
In Level 1, Rockruff will appear on the edge of a cliff over-looking the poison field area. | |
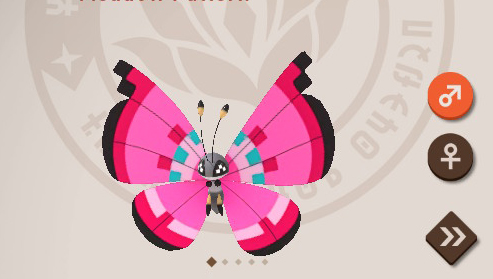 Vivillon |
Night | Level 1 Level 2 |
Throw Illumina Orb at the Vivillon at the start of the course. Then take the alternative route and throw an Illumina Orb at the Crystalbloom next to the three Diglett. Lots of Vivillon will then appear over the mountain tops and play with the other Vivillon you illuminated. | |
Torchic |
Night | Level 1 Level 2 |
Torchic, Shinx and Tepid all appear at the end of the level in the caves in Level 1 | |
Shinx |
Night | Level 1 Level 2 |
Torchic, Shinx and Tepid all appear at the end of the level in the caves in Level 1 |
|
Tepig |
Night | Level 1 | Torchic, Shinx and Tepid all appear at the end of the level in the caves in Level 1 | |
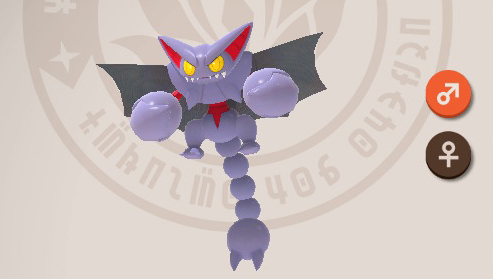
 Tyranitar |
Night | Level 1 Level 2 |
||
Lycanroc |
Night | Level 1 Level 2 |
||
Crustle |
Night | Level 1 Level 2 |
|
|
Mandibuzz |
Night | Level 1 Level 2 |
||
Diglett |
Night | Level 1 Level 2 |
||
Swalot |
Night | Level 1 Level 2 |
If you throw a Illumina Orb at the Crystalbloom before the poison volcano, Swalot will jump out of the poison. | |
Scolipede |
Night | Level 1 Level 2 |
There is a sleeping Scolipede just before you enter the last part of the level. | |
Kangaskhan |
Night | Level 1 Level 2 |
You can find two sleeping Kangaskhan at the end of the level. |
|
 Gliscor |
Night | Level 2 |
If you hit all four hanging Gliscor just before you go down into the poison field, a Gliscor will show up at the end of the level. | |
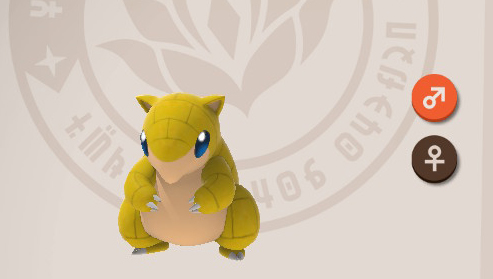 Sandshrew |
Night | Level 2 | ||
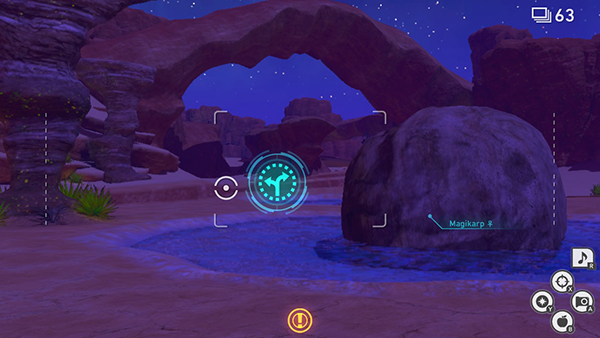
 Magikarp |
Night | Level 2 | They will shoot out of the Geyser at the beginning of the level. | |
Zeraora |
Night | Level 2 |
You can find one sleeping on your left at the beginning of the level near a giant rock. After waking it up with a Fluffruit, if you take the alternative route and speed up you can block it's path, forcing it to go further on in the course. Zeraora will then show up at the end of the level in one of the caves on the right. You can also get Zeraora to appear next to Tyranitar on the normal route by throwing a Fluffruit at Zeraora to wake it up. Then throw a Fluffruit at Tyranitar and snap it doing a Sandstorm move. Zeraora will then appear where the sandstorm was. |
|
Minior |
Night | Level 2 | Minior will shoot out of the sky as mini-meteorites; you'll have to snap them before they hit the ground to get their picture. |
Alternative Routes Barren Badlands
You can unlock various alternative routes in New Pokemon Snap courses, leading you to find brand new Pokemon and get those unique diamond snaps. To unlock these routes, you will have to perform a variety of tasks:
Barren Badlands Day
- You can take the route onto a Geyser by throwing an Illumina Orb at a Crystalbloom near a giant boulder on your right. This needs to be done early in the level to unlock the route.
Barren Badlands Night
- Illuminate the three Diglett near the Boulder and then throw an Illumina Orb at the Crystalbloom. This will cause Diglett to push the boulder into the Geyser and allow you to take the alternative route.

Discussion