Fantasian offers plenty of side-quests to keep you busy throughout the game and they also provide some of the best rewards, so it's well worth completing them. This guide will show all the quests available in Fantasian and how to complete them.
This guide is currently a work in progress and will be updated periodically! Check out the Fantasian - Complete Walkthrough and Guide page for more.
Quick Links
- Sick Mother
- His Whereabouts
- Beloved Cat
- Researcher
- Bait For Fishing
- Knuckles Development
- Letter to a Friend
- Picking Up Shells
- New Product Flyers
- True Dimengeon
- Cinderella Tri-Stars
Part Two
- Ultimate Rice Omelet (Lv 35)
- Money! Money!
- Researcher, Cont'd
- Treasure Mountain
- The Golem's Revival
- Extreme Dimengeon
- Omega
- The Forbidden Chest
- Metal Ribbidon
- The Lost Crystal Ball
- Supreme Rice Omelet
- Satisfying Sebastian
- Merging Powers
- All Aboard
- Calling All Cat Fish!
- Calling All Sea Dogs!
- Using the Crystal Ball
Fantasian Quests
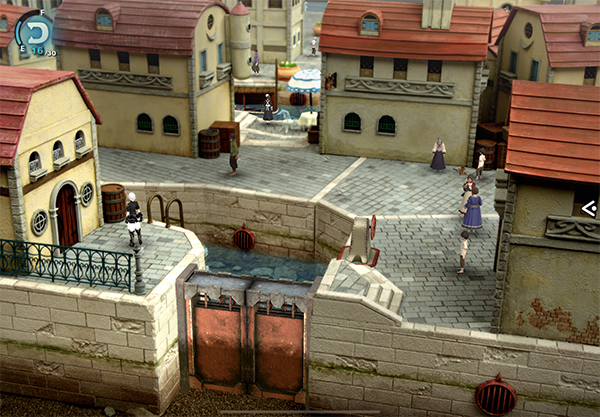
Sick Mother

Location: Frontier Of En - New District
Rewards: Iron Key
Find the lost boy of a mother who is worried about him. This means heading to En - Old District.
The boy is located at the top of En - Old District to the left of Owen's Shop.
Once you found the boy, select the following options:
- Your mother is looking for you.
- Your mother is crying for you.
- How could you make her cry like that?!
- Go on home and let her know you're safe!
Head back to En - New District and talk to the mother to get your reward.
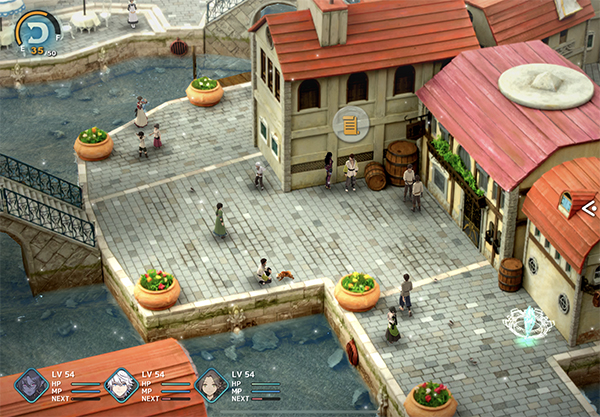
His Whereabouts

Location: Frontier Of En - New District
Rewards: Ether S x3, +500 G
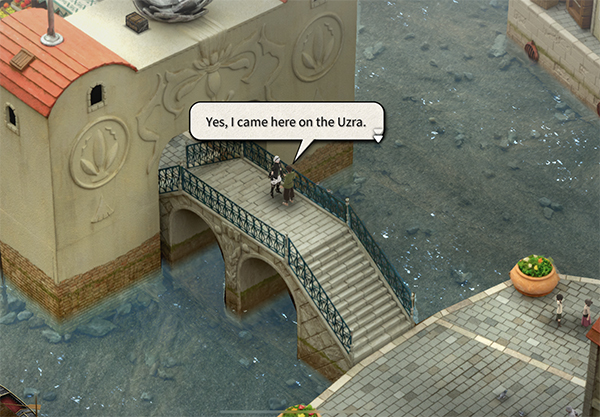
In order to complete this quest, you need access to En - New District - Harbour, which is unlocked after you speak to Sid about travelling on the Urza.
The boyfriend is hanging out an the En - New District - Harbour where a giant Anchor is hanging on the wall. Talk to him and he will give you Lover's Letter.
Head back to En - New District Public Square and give the lady the letter.
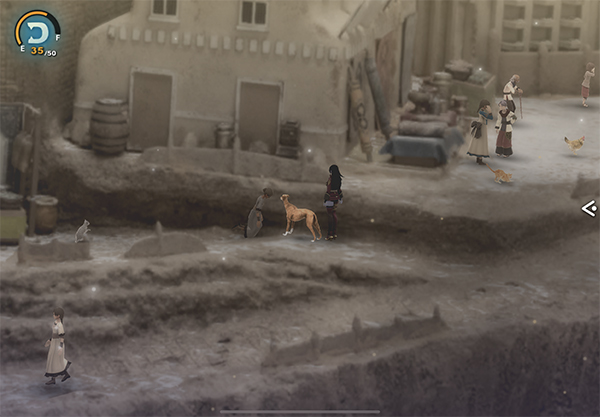
Beloved Cat

Location: En - Old District
Rewards: Iron Key, +1200 G
You're tasked with finding a lost striped cat. The cat itself is hidden in En - New District, but first you need to collect a Piranhara Bones from the stones at Mountain Path Connecting to En. These are needed to lure and capture the cat.
Head now to En - New District. There is a small opening that you can interact with on the left side of Starry Eyes [Bar].
You'll be given the option to squeeze through- do so and enter the Residence house.
Inside there are two Treasure Chests: 1000 G and Energy Drink x5.
Walk towards the dark striped cat and you'll attract it's attention with the Piranhaha Bones and allow you to capture it.
Head back to En - Old District and give the man back his cat.
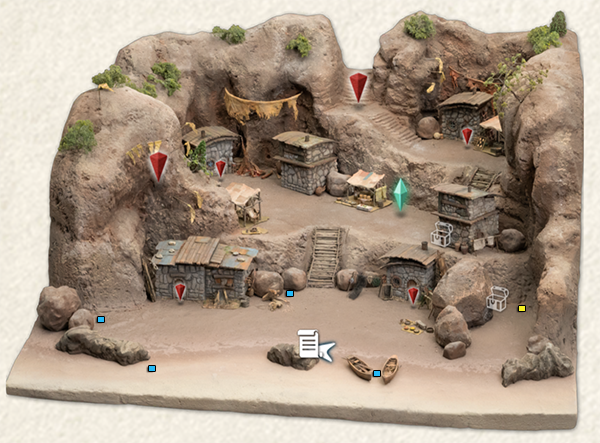
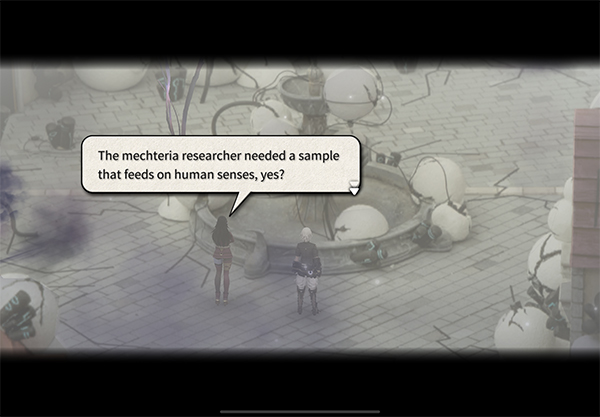
Researcher

Location: Vence - Central Vence (Residence House)
Rewards: Obsidian, 2,500 G
You can find the Researcher in quest in a Residential House in Central Vence. The quest becomes available after you have obtained the Warp Device.
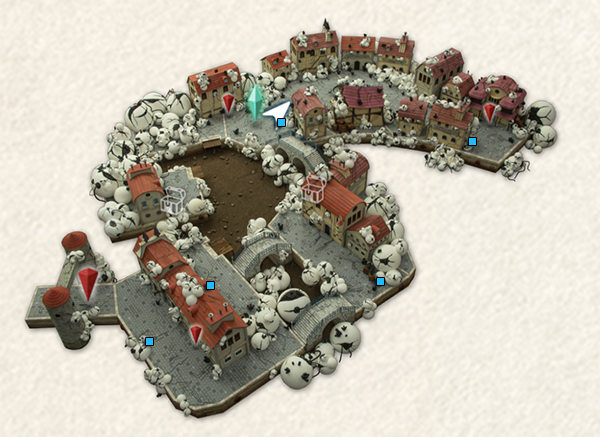
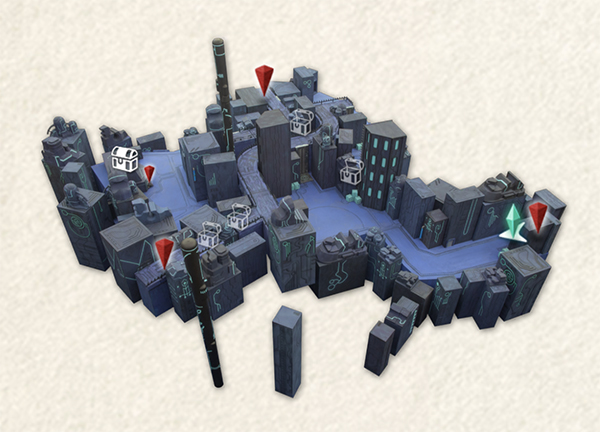
You're tasked with getting Mechteria samples from East Vence - Deserted Area. Use the map below for their locations. Once you have all 5, return back to the Researcher for your reward.
Bait For Fishing

Location: Vence - Harbor
Reward: Iron Key - 2,000 G
A man at the end of one of the piers needs some fishing bait. Once you accept his quest, head to West Vence - Marketplace where you can buy weapons and items. An NPC there will give you 1x Bait when you talk to them. You can see them on the mini-map for their location.
Knuckles Development

Location: West Vence
Reward: Seashell Knuckles
In order to complete Knuckles Development, you need to have completed Picking Up Shells Quest first.
You can find the quest in West Vence in one of the Residential Houses on the same side as the Innocent Eyes [Bar]. A man will ask you to bring him a rare seashell found in the Royal Capital. In actuality, you get the rare seashell as a reward from completing the Picking Up Shells quest: Metallic Shell.
Once you've completed that quest, head back to the man and turn in the quest for rewards.
Letter To A Friend

Location: Royal Capital - Town Center
Reward: Onyx M, Mechteria Key, 5000 G
You can find this quest in the Royal Capital - Town Center. An old man wants you to give a letter to a friend who was an Uzra passenger; this quest involves talking to several different people in Vence.
First go to Central Vence - City Hall. Talk to the person behind the desk, they tell you to head to the Inn.
Second go to Central Vence - Sandview [Inn] and speak to one of the ladies sat on the sofas. She tells you to go to the Observation Deck.
Third go to Central Vence - City Hall and go up the stairs to the Observation Deck. Speak to the lady who is looking out to the sky. She tells you go to a bridge.
Fourth go to West Vence and go to the bridge that leads you to the market. Speak to the man on the bridge and he will tell you to go to the bar.
Fifth go to West Vence - Innocent Eyes [Bar] and speak to the middle customer and he tells you to go to someone else's house.
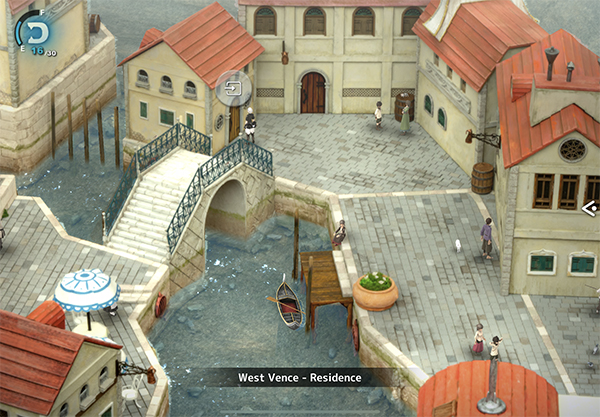
Sixth go to West Vence and go to Residence House that is above the canal leading to the Fortune Teller's house. Inside you'll find a drunk man and an old man at the table. Speak to the old man and he will give you a postcard to deliver to the old man at the Royal Capital - Town Center.
Finally head back to Royal Capital - Town Center and speak to the man who gave you the quest.
Picking Up Shells

Location: Vibra - Outskirts
Reward: Metellic Shell
Speak to the boy on the beach of Vibra - Outskirts. He wants you to find a really nice looking shell for his mother. Once the quest is activated, several different floor loot options pop-up, which all contain different shells.
You want to grab the shell behind the Barrel at the far-right of Vibra - Outskirts. Give that to him and he'll reward you. The other shells don't matter.
New Product Flyers

Location: Royal Captial - Town Center
Reward: Mechteria Key, 5000 G
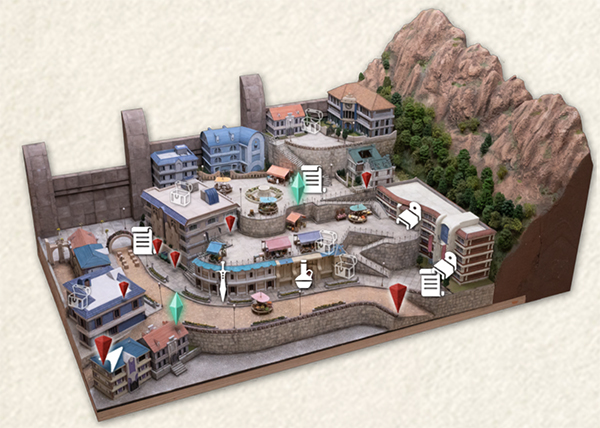
A man at the center of the Town Center wants to put up posters for him to promote his business. As soon as you activate the quest, several locations pop-up allowing you to put up the posters. Use the map below for all the locations:
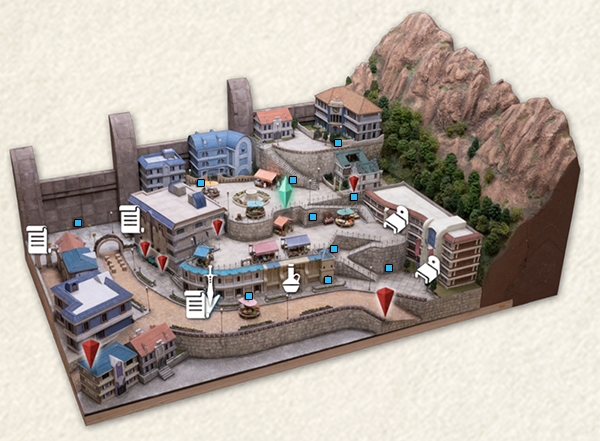
Afterwards, speak to the man for your reward.
True Dimengeon

Location: Vibra - Outskirts (Ez's house)
Reward: Upgraded Dimengeon (holds 40 monsters)
Inside Ez's house in Vibra Outskirts, one of the worker boys will offer to upgrade your Dimengeon Device.
First he requires 1x Magic Crystal and 1x Battery. These items are pretty common to get and usually drop from one of the mobs you've already been fighting on your journey, so you should have no problem finding them.
Afterwards the boy tells you to go to Royal Captial - Town Center and pick up a Circuit Board. The type of board needed varies each playthrough, so make sure you note down which one it is he asks for. If you choose the wrong one, just go back to the boy and get another Deal Ticket.
When you arrive in Royal Capital - Town Center, first speak to one of the boys who shows you the secret location for the trade. Then go to the alleyway across from him and speak to the man inside. He will give you a choice of Circuit Boards to choose from.
Once you've picked the right one, head back to the boy at Ez's house and give him the required Circuit Board.
Cinderella Tri-Stars

Location: Multiple Locations
Reward: Ultimate Guard x2, Holy Belt
Check out the Cinderella Tri-Stars guide for all their locations on completing this quest.
Part Two Quests
The following quests are only available once you start part two. They won't show up in part one. Part Two begins when you return to En using the mirror warp device.
Ultimate Rice Omelet

Reward: Ancient Relic, Diamond L, SP Capsule
Required Level: LV 35
You get this side-quest automatically after starting part two of Fantasian talking to Sid. He wants you to pick up a Giant Egg for his new Omelette.
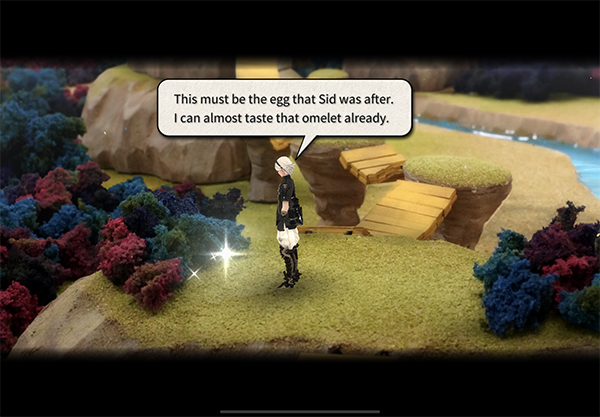
The Giant Egg can be found back at Ancient Hill - Nail Rock Region. After picking up the egg you'll then trigger a boss battle against Giant Slime.
Boss Fight - Giant Slime

Giant Slime - 30,000 HP
You can take this quest down at level 35 without too much difficulty or come back at a later stage once you've gained some DPS.
The Giant Slime is resistant to physical attacks, so when using Leo make sure you alternate between Fire Slash and Lightning Slash for damage.
Each time you hit the boss with an elemental attack, it will store the element and become slightly more resistant to it. To maximise damage, you'll want to make sure each character is using their different elemental damage. Valrika can use Ice and Dark, Prickle can use Lightning and Leo Fire and Lightning.
Alternate each character healing, and make use of Leo's Tension Skill to deal some sweet damage.
After defeating the Giant Slime, head back to Sid and give him the Ultimate Egg.
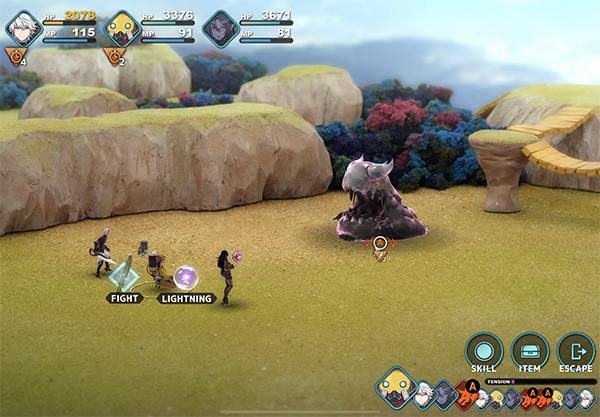
Money! Money!

Reward: Amber L, 8,000 G
Required Level: LV 33
You can pick this quest up in En by talking to an old man just outside of Sid's bar (Starry Eyes).
The old man wants you to pick up some Magic Money for him; head to the Southern Forest and you can find the Magic Money Tree Boss waiting for you at Southern Forest - Waterfront. You'll have to defeat the boss in order to obtain the Magical Coins; this time around it's a lot tougher!
Money-Money Tree
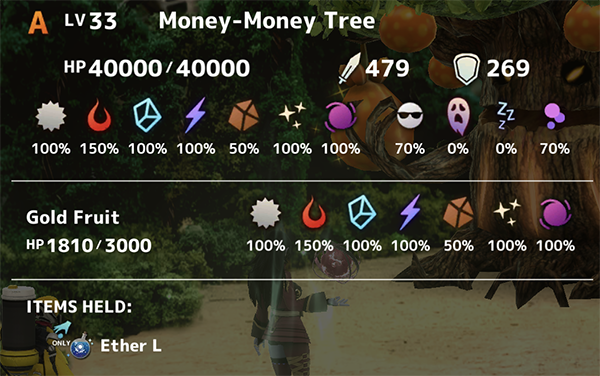
Money-money Tree - 30,000 HP
This should be one of the first quests you do as the level requirement is pretty low. Overall the boss is a cake-walk; just make sure you take down any Gold Fruit bags that pop-up and keep an eye on everyone's health. The boss will alternate between throwing one bag and three bags at you; dealing around 2K HP damage each time.
When he gets low on health he'll use Call and summon lots of mobs; but you should be able to take them all out with your piercing skills. He'll then constantly start using his Sap Spit, which hits for 3K damage each to everyone in the party. Heal with Prickle and Valrika, whilst damaging with Leo using Samidare.
Once defeated, head back to En and give the old man his coins.
Researcher, Cont'd

Reward: Mech-Reduction Device! Elixir x2, 30,000 G
Required Level: -
This quest can be picked up in Central Vence - Residence, which is one of the houses before the bridge.
The quest asks you to pick up three samples of Mechteria. There locations are:

- East Vence - Mecha Infestation (the Fountain where you warp to)
- Southern Forest - Mecha Infestation (near the beginning of the map)
- Heart of the Infestation in the northwest (enter the north west Mech Infestation - Center via the Uzra- you will have needed to complete Zinikr's Story Line defeating Yim to access this part of the world map).
Head back to the Central Vence - Residence and hand over the samples. You can now access the Mech Infestation - Center without losing health.
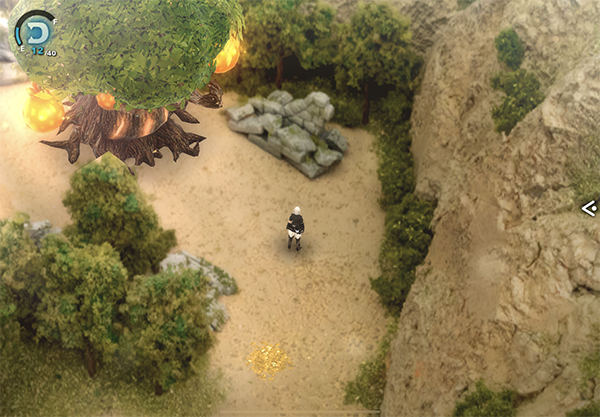
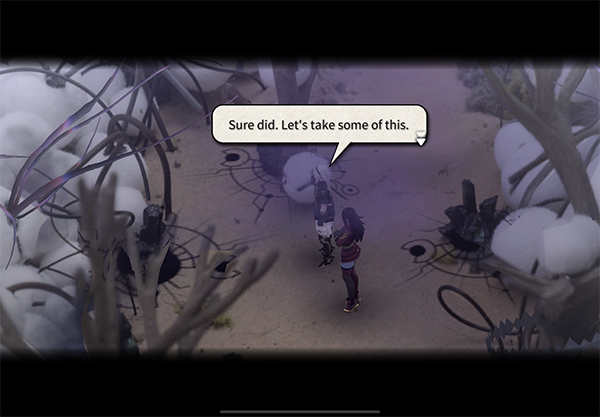
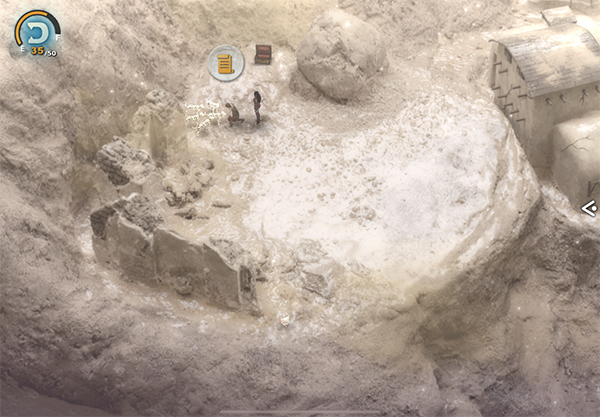
Treasure Mountain

Reward:Poisonthrower, Sorcery Core, Battery x11, Regulator Chip x8, Magic Crystal x6, Chaos Stone x9
Required Level: -
Visit Ez's old man Pops in Outskirts and he will ask you to go to the Junkyard to collect some treasure.
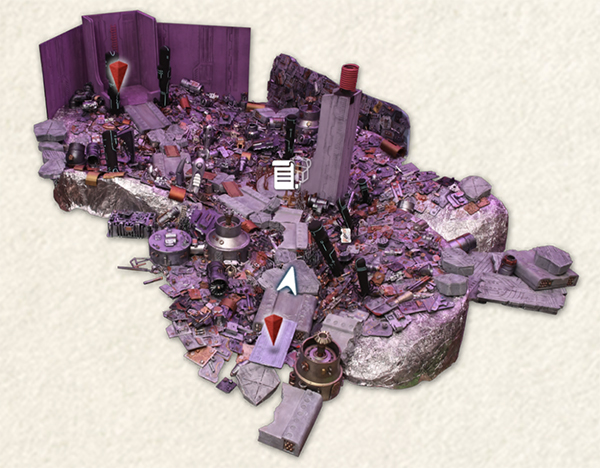
You can access the Junkyard by teleporting to the Secret Base, exiting and heading to Machine City - Security Gate Area. Head all the way to the save point (check your map) and you can take a ladder down to Junkyard.
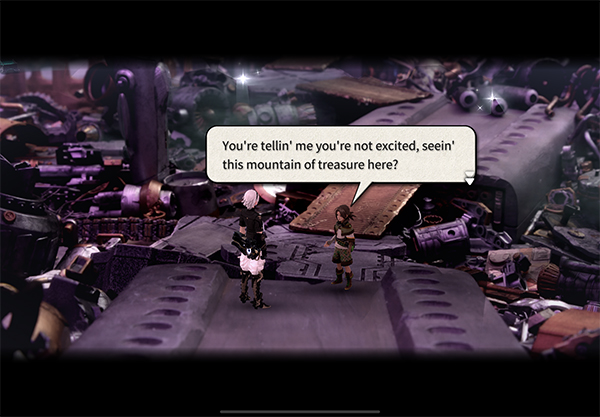
Once you access Junkyard, Ez tells you to collect 10 pieces of Junk. You can find them along the path; it's all pretty linear.
Once you collect all 10, Ez gives you a new weapon called Poisonthrower. He'll also give you Sorcery Core and a bunch of other items.
Now that this quest is complete, you can access another side quest from Pops in Outskirts called The Golem's Revival.
The Golem's Revival

Reward: Ancient Staff
Required Level: 41 | Completed Quest Treasure Mountain
Ez's old man says you can awaken an old weapon on an old hill. So we need to head to Ancient Hill - Bridge to get started with this quest.
Go to the area where the old stone golem is (Ancient Hill - River) (from part 1) and a new cutscene will happen.
Boss Fight - Golem
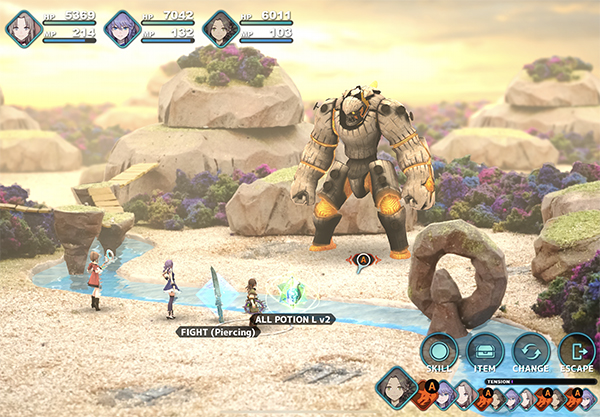
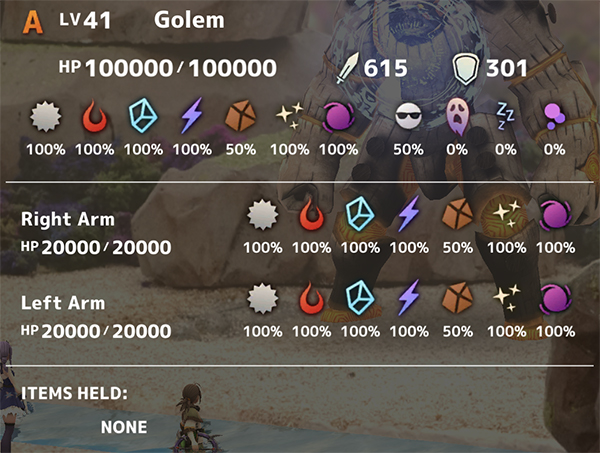
Golem - 100,000 HP
This boss is pretty easy- you just need to make sure you keep his Attack Down so that the damage dealt to your party isn't too much. You can also equip Earth Resistant Gems to help negate his Earth attacks.
Start by taking out his right and left arms. This will prevent him using his pummel attacks.
Golem will use his Silvery Ray attack which hits for around 3K HP each when attack down is applied. After that he will start to summon rocks around him which can block your attacks if you don't time it right.
If you don't destroy his orb in time, he will unleash a powerful attack on you. If you do destroy the orb, he will fall to his knees and allow you to freely hit him.
Check out the video guide below for more help:
After defeating the boss, it will allow you to cross the river and head to Ancient Hill - Stone Pillar Path. At the top of the map you will see something glittering and allow you to pick up the Ancient Staff.
Extreme Dimengeon
Reward: Dimengeon Machine Upgrade (50 monsters+boosted buffs)
Required Level: 43
This quest becomes available from one of Ez's little workers once you have completed his Story Quest Ez and The Guild.
They need two new parts for the Dimengeon Device.
You can find the Blueprint at the Merchant's Guild in Vibra and the High-output Power Supply at the Thaumatech Factory.
First head to Merchant's Guild and check your map. You should see a new quest icon; head there to start the quest.
Once you arrive, search the shelf and it tells you about a key you need. Check your map and you can see another new quest icon. Head there to find a Key Orbling that you'll have to chase around. Eventually you'll corner it and start a battle. Defeat it and head back to the shelf to obtain the blueprint.
Next head to Thaumatech Factory- Entrance Floor. Head to terminal in the corner of the room (check your mini-map) and prepare for a boss fight...
Boss Fight - Atomecha 2.0
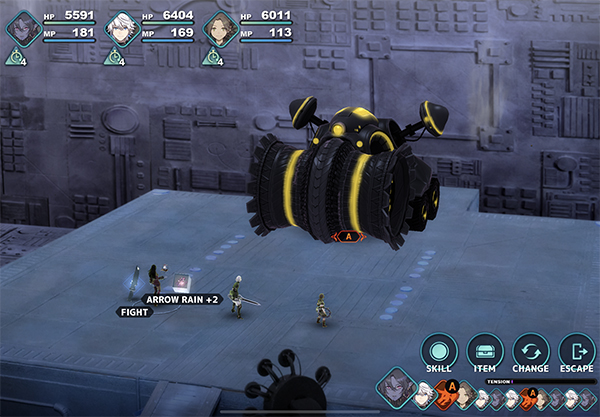
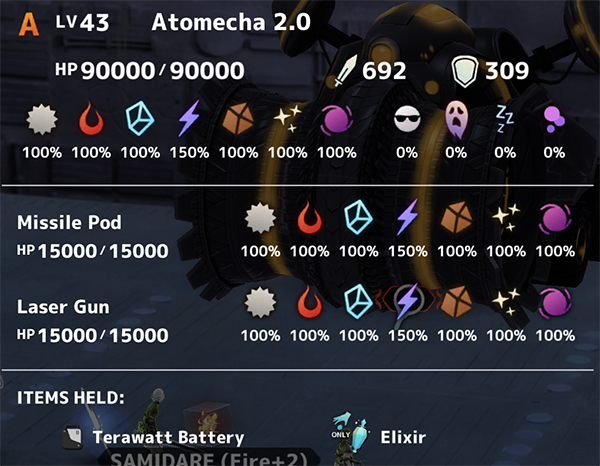
Atomecha 2.0 - 90,000 HP
This boss is weak to Lightning attacks, so have Leo use his Samidare Lightning skill. Have Ez cast Quick All, Attack Up and Guard Up.
Guard Up is important for surviving the boss's Roll Crusher attack, that can potentially wipe the party out. Have Valrika use her attack down skill to help.
Overall this boss is pretty easy. You can check the video guide below:
Afterwards, it will drop the High-output power supply item. Head back to the Outskirts and turn in the quest.
Omega

Reward:Positron Blaster
Required Level: 50
Check out the Fantasian Omega Guide for this quest.
The Forbidden Chest

Reward: Tyrfing
Required Level: 47
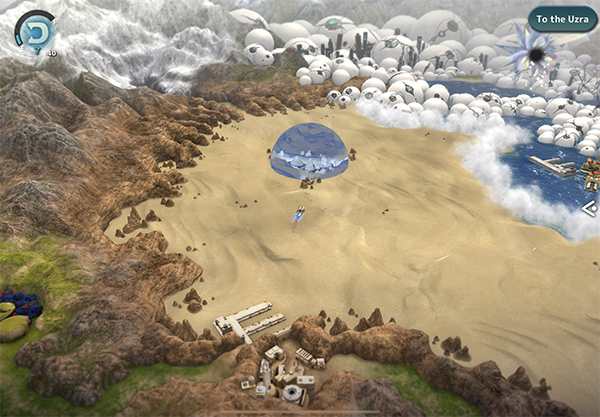
You can get this quest by heading to the Maxi Toy Box (as soon as you arrive a cutscene will happen).
The Forbidden Chest was available in Part One of Fantasian, but it was way too strong for you back then. Now it's a side-quest and at around level 47 you should be able to take it on.
The chest is located in the backroom of the Maxi Toy Box.
Boss Fight - Eternal Holy

Eternal Holy - 200,000 HP
Eternal Darkness - 100,000 HP
This boss requires you to have equipped both Diamond Gems (Holy Resistance) and Onyx Gems (Darkness Resistance). You can buy Holy M and Onyx M gems from the terminal machine at Valrika's Laboratory.
The beginning of this fight see's the Eternal Holy boss in the distance, with you unable to damage it properly. You should use this set of rounds to buff up and debuff the boss. Have Ez cast Quick All, Attack All and Guard Up. Valrika and Leo are good for debuffing the boss.
When Eternal Holy comes in, you then deal your damage with Leo and Valrika. Have Ez be healer.
Eternal Holy will use two rounds of a claw attack that deals Holy Damage to everyone. Make sure the boss has Attack Down applied. After the two rounds he will then use Claw Of Everlasting Light, which is a three-hit holy attack. He will then return to being far away, allowing you to buff up again and heal.
When Eternal Holy reaches <100,000 HP, he will summon Eternal Darkness, which is just the dark version of himself. His attacks aren't as deadly- but now you have two of them to deal with. At this point, it's a good idea to switch Valrika out for a Healer to help manage to extra damage you'll now be receiving. Make sure to always cast Attack Down on the boss that is closest to you.
Keep chipping away at both bosses; it's a slow process with two healers in your party, but it allows you to survive all the different attacks.
Check out the video below for help:
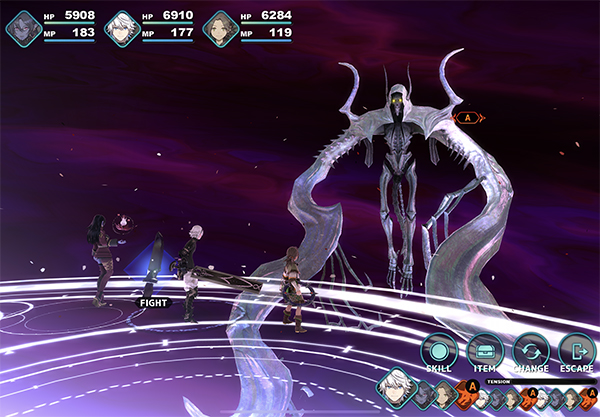
Metal Ribbidon

Reward: Majestic Lantern
Required Level: 46
This quest becomes available as soon as you complete the Story Quest Kina and Owen. You can find the quest in Valrika's Laboratory.
Tan wants to know more about the Ribbidons, so head to Owen's Shop in En and speak to the Ribbidon. He will tell you of a Metal Ribbidon that is on Nameless Island.
Head to Nameless Island and go to Camilla's Grave and prepare for a boss fight.
Boss Fight - Metal Ribbidon
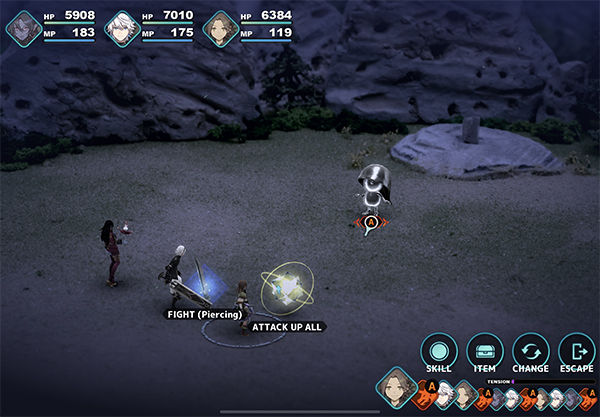
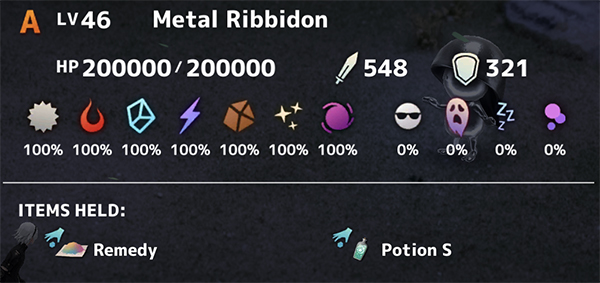
Metal Ribbidon - 200,000 HP
Metal Ribbidon has a mechanic that means everyone does 1 HP damage to it. The trick to this fight is to use Leo's Fire Samidare; this will cause the Metal Ribbidon to heat up and after 3 rounds of Fire Samidare you can then attack it normally.
Ribbidon doesn't have many attacks apart from a slap attack and a Super Buff skill. At 100,000 HP, it speeds up with Super Buff; all you need to do is make sure Attack Down is cast on it constantly and the rest of the fight is easy.
You can watch the video below for tips:
The Lost Crystal Ball

Reward: Onyx L, Phantom Quartz
Required Level: -
This quest can be picked up in West Vence - Marketplace just outside the Innocent Eyes [Bar].
Once you have picked up the quest, head to the Fortune Teller at West Vence - Waterway Depths.
After a brief conversation with her, Zinikr has a plan to trade something for the Crystal Ball. Head to Maxi Toy Box.
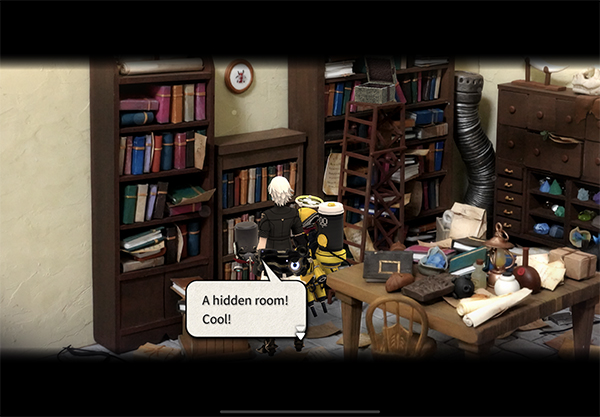
You can find a hidden door behind the bookshelve at the left of the room. This will take you to a secret room where you'll find special Silver Tarot Cards.
Head back to the Fortune Teller to complete the quest.
Supreme Rice Omelet

Reward: Amethyst L, SP Capsule
Required Level: 39
Head to Innocent Eyes [Bar] and speak to Sid behind the bar. He will task you with finding a Lyranodon Egg; which will be dropped by the Lyranodon Boss at Ancient Mountain Path (the same place you last fought it)
Boss Fight - Lyranodon
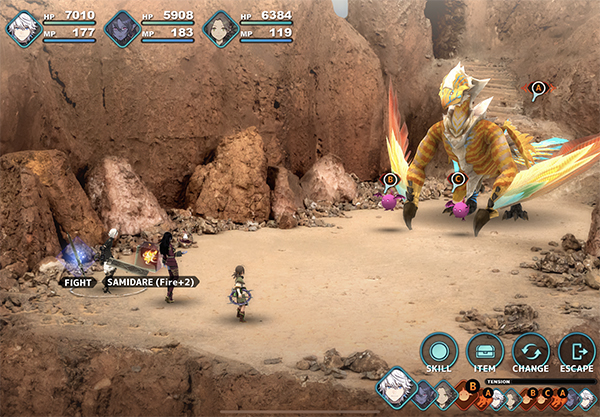
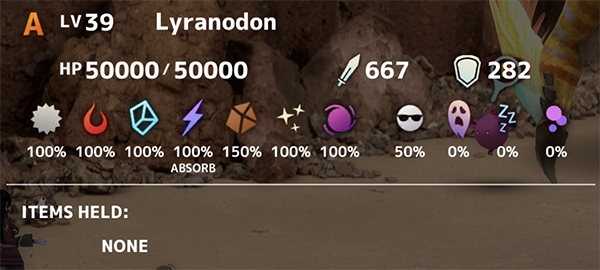
Lyranodon - 50,000 HP
This boss fight is similar to the one you faced in Part One. Only this time, you start at the very edge of the cliff so you can't afford to allow Lyrandon to shock you off.
Use the same tactic as before; have a party member use Taunt to take all the Lightning damage to prevent Lyranodon from powering up and use everyone else to deal damage. The fight should be fairly easy, especially if you take on this quest at higher levels.
Once defeated, the egg you receive will hatch.

So now you need to go buy an egg from West Vence - Marketplace. Just head to the vendors and a cutscene will play out in which you get an egg.
Return the egg to Sid.
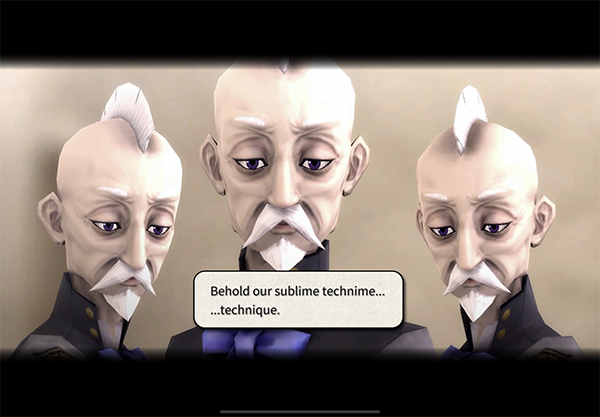
Satisfying Sebastian

Reward: Ultimate Fists
Required Level: 44
This quest becomes available after Cheryl becomes Queen.
Head to the Vibra - Throne Room and speak to Sebastian.
Sebastian will offer to fight you in the Coliseum. Head to the Coliseum Entrance to start the fight.
Boss Fight - Sebastian
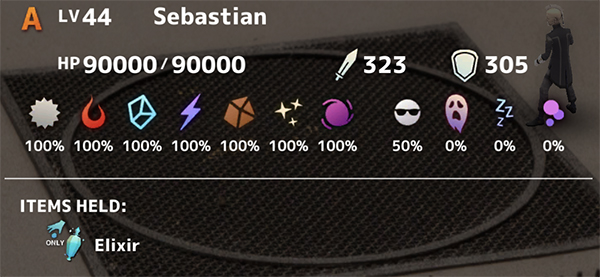
Sebastian - 90,000 HP
At the start of this fight, it's just Leo and Sebastian fighting one on one. However, after a certain point Sebastian will clone himself twice (or rather, his siblings arrive!).
Cherly and Kina will join you for the fight once the clones arrive. Sebastian will cast Phantom on himself, which will cause you to miss a few hits. You should focus on his clones during this phase. Have Kina cast Barrier All to prevent the status ailments that the clones give.
Have Leo cast Attack Down on the main Sebastian as often as possible.
Once defeated, the quest is complete.
Merging Powers

Reward: Carnwennan
Required Level: 47
You can pick up this quest after complete Ez's upgraded Divine Artifact quest. Go to Ez's house in Outskirts and talk to Pops.
You'll be tasked with crafting a new weapon and need to find several materials.
The first is some material from the Chaos Cavern in the Chaos Realm.
Once you have that, you're then tasked with getting a fang of a Giant Sandsea Serpent. This boss can be found at the Triangle Of Calamity on the World Map.
You'll need to use your Uzra to get there and constantly driving around the triangle to get the boss fight to initiate.
Boss Fight - Titanic Serpent
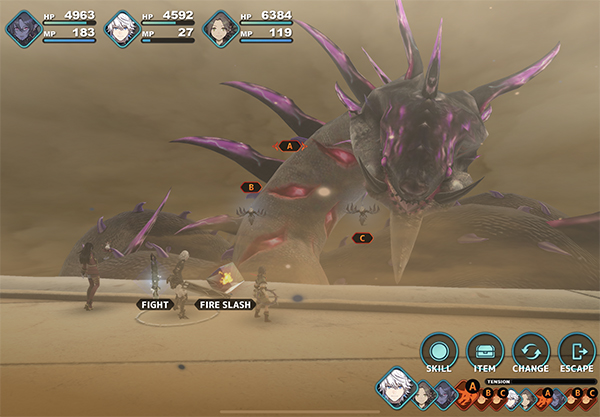
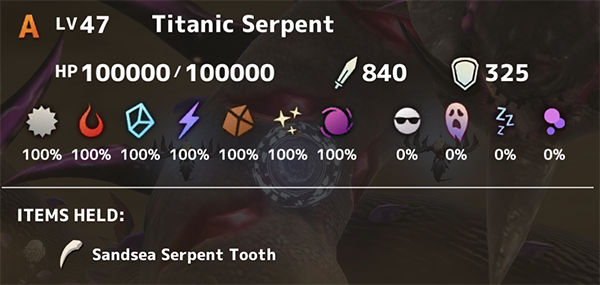
Titanic Serpent - 100,000 HP
This boss uses Lightning attacks, so equip any Amethyst Gems you have to your main party.
Titanic Serpent will spawn with two mobs that will constantly heal him. This boss should always have Attack Down placed on it, as its attacks are really strong.
Titanic Serpent will attack you three times; each time it has a charge for it's main attack. It can do any of the following attacks:
- Chomp Attack- Single target hit that gives Poison and Mist status ailments
- Hyper Bite - Hits all three party members for high damage
- Thunder Ball - Hits all three party members for lightning damage
Once the Serpent is fully charged, it will unleash Thunder Breath for high Lightning damage to all members.
Have Ez casting Quick All and Attack All as often as possible. Have Leo and Valrika be casting Attack Down on the Serpent; use Arrow Rain to deal with the healing mobs.
Check out the video guide for more tips:
After the fight, you'll be tasked with getting the Olympus Calculator from Junkyard in the Machine Realm.
Head back to Ez's home and turn the quest in.
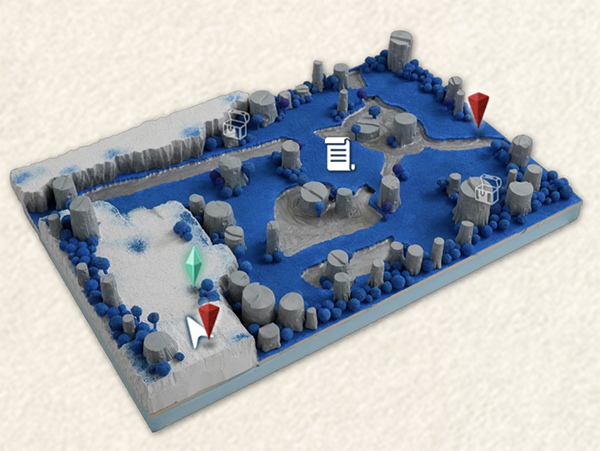
All Aboard

Reward: Smoky Quartz, Citrine Quartz, Moss Quartz
Required Level: -
This quest can be picked up from the Vence - Harbor. You are tasked with tracking down passengers for the Uzra. You can find them in the following locations:
Vence - Central
West Vence - Marketplace
Vibra - Royal Capital - Town Center
There are three passengers in the Town Center. You can use your mini-map to see their locations.
Calling All Cat Fish

Reward: Cat's Eye
Required Level: -
This quest becomes available after Tan has joined your party. You can find him on the Uzra - Bow Walkway (just before the Bridge) to accept this quest.
Tan asks you to rescue cats all over the world. Here are their locations:
En - New District
En - Old District
West Vence - Marketplace
Central Vence
Vibra - Town Center
Outskirts
Calling All Sea Dogs

Reward: Lantern Of Prayer
Required Level: -
This quest becomes available after completing the Calling All Cat Fish! You can find Tan on the Uzra - Bow Walkway (just before the Bridge) to accept this quest.
You're tasked with finding missing dogs all over the world. Here are their locations:
En - New District
En - Old District
West Vence - Marketplace
Central Vence
Outskirts

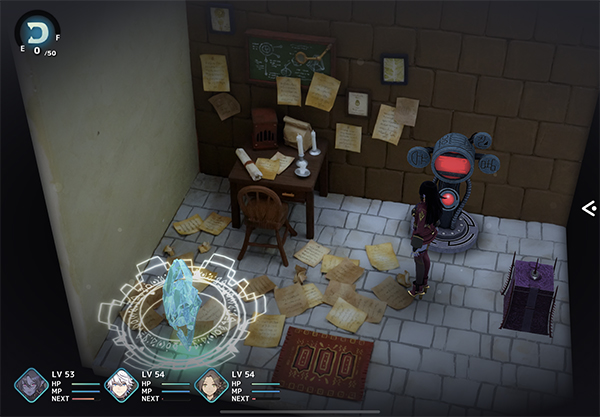
Using the Crystal Ball

Reward: Growth Crystal
Required Level: 40
You can complete this quest after completing the quest The Lost Crystal Ball. You can pick up the quest from Zinikr at Valrika's Laboratory.
Zinikr says we should investigate Bernard's Laboratory to find his research notes. Head over to Hidden Valley - Bernard's Laboratory and a cutscene will play out.
Valrika can help make a weapon from the Crystal Ball, but she needs some Chaos material first. You can find these Chaos Material at the Chaos Lakes (where the Chaos Serpent Boss is).
Check the following Lakes for the material. The last one requires you to defeat the Dual Chaos Serpents. Check out our Chaos Realm Walkthrough guide for the boss battle tips (as we defeated this boss earlier).

Discussion