
In this part of the Fantasian Walkthrough we finally make it to the God Realm where Jas awaits. But first, there are some other tough bosses to get past before we make it to the end.
In the last part, we completed The Six Elements story to unlock some of our most powerful abilities in the Growth Map for our party. These skills will be very useful going forward, so if you haven't already, go and complete those trials first.
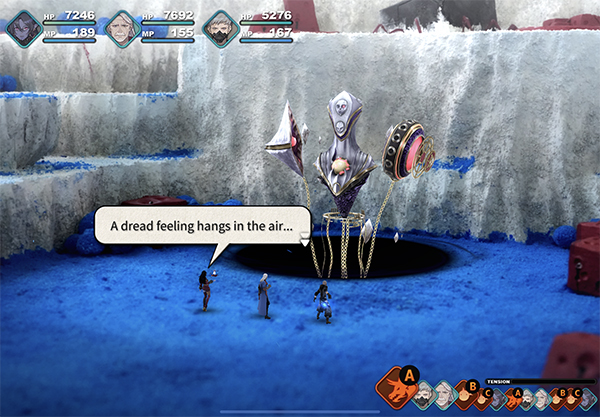
In order to get to the God Realm, we need to pass through the Communication Network. You can get to there from Valrika's Laboratory.
Communication Network
The Communication Network is what stands between us and the God Realm. Here you can find Van's scattered memories. This place is quite strange and mobs here are very focused on being elemental resistant. This is where your new skills will come in handy.
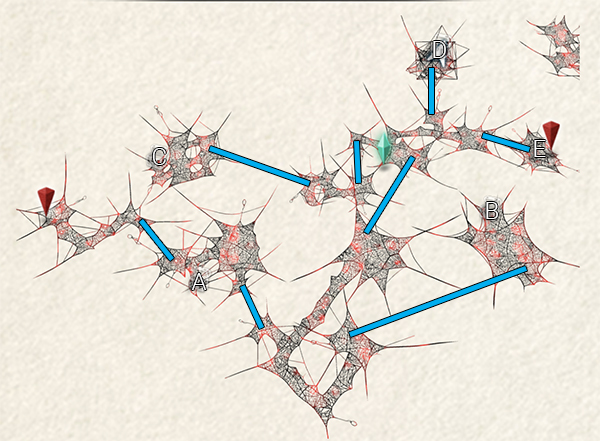
Location: Communication Network
In order to get around this map you need to walk to the various teleport locations. You can also find the following items from Treasure Chests:
- (A) - Chaos Clay
- (B) - Order Motes x2
- (C) - Hyperspace Ring
- (D) - Peridot L
Head towards (E) to fight the boss...
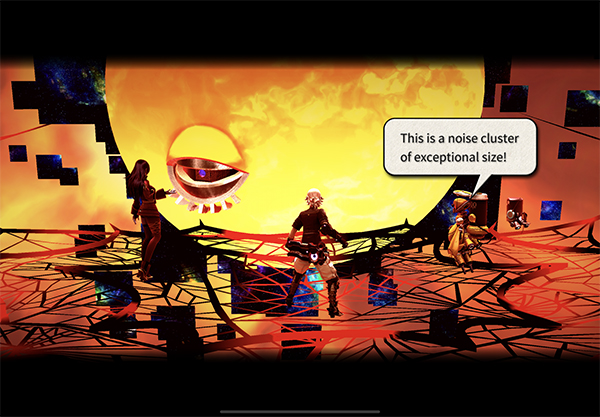
Boss Fight - Solar Flare Noise
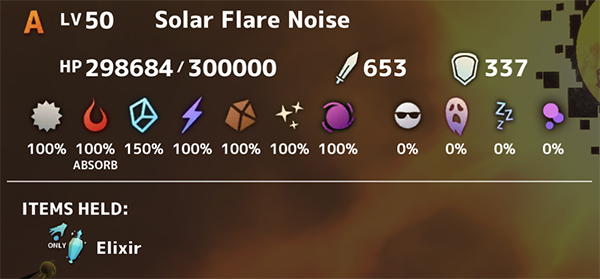
Solar Flare Noise - 300,000 HP
For this fight, you're definitely going to want to equip any Garnet Gems to your party as Solar Flare deals tons of Fire damage to you. The boss starts off far away, and gradually grows in size and power the closer it gets. He can also put your entire party to sleep, so any Citrine Quartz gems you have get them equipped too.
Make sure you cast Attack Down on this boss as often as possible. Have Cheryl in your party to deal plenty of Ice damage with Blizzard. Ez should be buffing your party with the usual Quick All, Attack All and Potion L. Leo is good for debuffing the boss and dealing decent damage with Samidare Lightning.
Solar Flare will constantly cast Flare to a single target and Noise Block which wipes out any buffs you have and make you weak to Fire attacks. Once Solar Flare reaches around 200,000 HP, it will grow in size and start to cause Incinerate on every party members turn. You'll be dealt around 500 damage per turn at this stage.
Solar Flare will build up to it's most powerful attack Prominence. During this phase, it's a good idea to switch to Kina, Leo and Zinikr and use Guard to protect against the attack. You can survive it without though.
Once Solar Flare gets to around 100,000 HP, it'll reach it's final form and get even closer to you. Incinerate will then cause around 1K damage each turn, so it's a good idea to switch out Leo for Kina for extra healing and have Cheryl the main damage dealer. You'll likely have to face another round of Prominence too, so switch out to Zinikr, Kina and Leo for Guard.
Check out the video for more help:
Once defeated you'll then be taken to the God Realm.
God Realm - Sanctum
Location: Sanctum - Thousand-Hand Canal
The end is almost here, but first we have a big maze and several more boss fights coming up. You can pick up a Ether L x5 from a Treasure Chest at the bottom of this map. Make your way up to the top of the map and pick up Elixirs x2 from the Chest on your right just before the entrance to the castle.

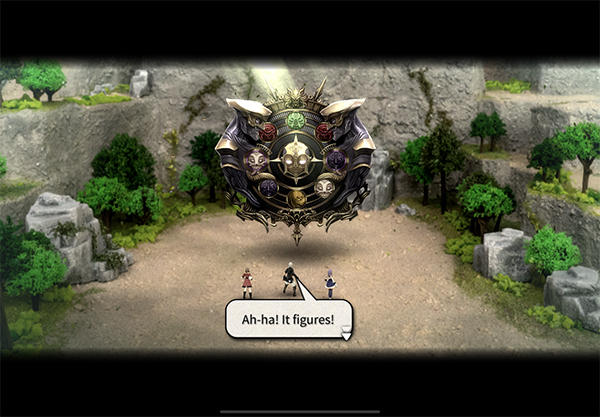
Inside you'll come across a strange portal device that will split the party up into three groups. The three realms you are teleported have junk items for you to find that will help you navigate across the maps and eventually progress to a boss fight.
Unfortunately, during this stage, your Dimengeon Device does not work so Random Battles are back on the menu.
Leo, Cheryl and Kina will be sent to the Human Realm.
Ez and Prickle will go to the Machine Realm.
Valrika, Zinikr and Tan will go to the Chaos Realm.
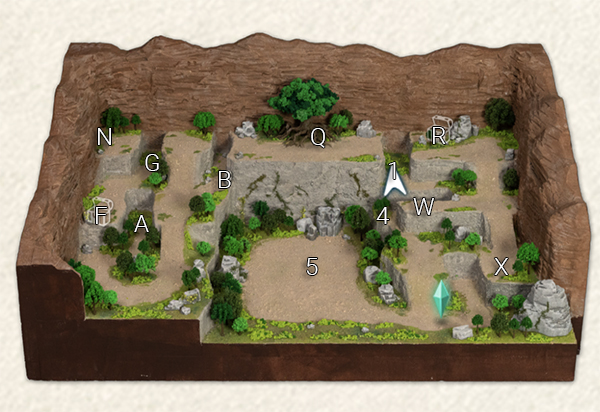
You'll start off with Leo in the Human Realm. For the maps above and this guide on how to navigate through this maze. You can teleport to the other realms using the teleport device poles.
First go to (A) and (B) in the Human Realm and then Teleport to Chaos Realm and pick up (C) and (D).
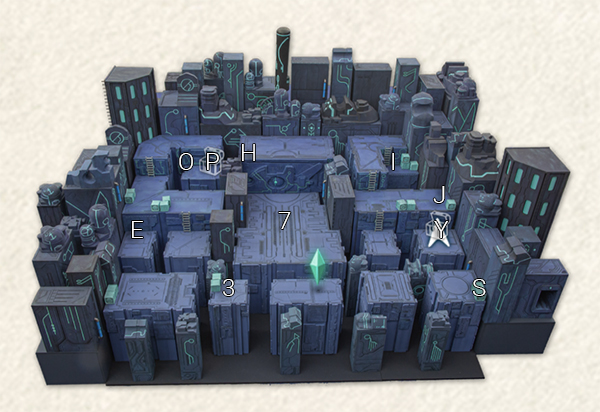
Then go Machine Realm and pick up (E).
Head back to Human Realm and open the Treasure Chest at (F) to claim Whetstone x2. Then head and pick up (G).
Now go to Machine Realm and pick up (H), (I) and (J).
Next head to Chaos Realm pick up (K) and open Treasure Chest (L) to find Deus Augite. Then pick up (M).
Go back to Human Realm and pick up (N).
Then head to Machine Realm and pick up (O) and open Treasure Chest (P) to find Order Motes x2.
Now head back to Human Realm and pick up (Q) and open Treasure Chest (R) to find Deus Augite.
Head to Machine Realm and pick up (S).
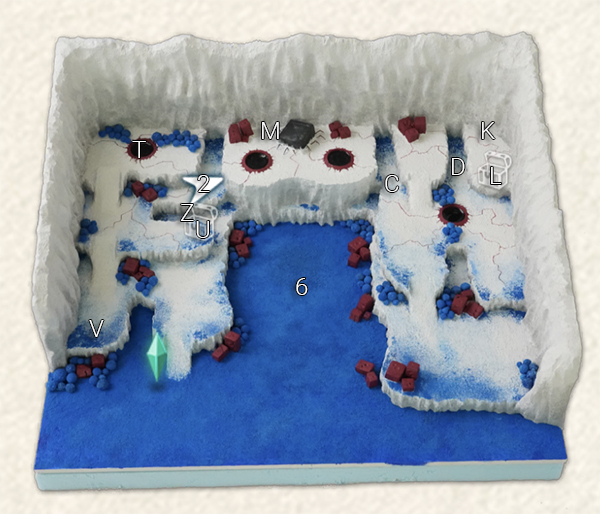
Head to Chaos Realm and pick up (T) and open Treasure Chest (U) to find Chaos Clay x2. Pick up (V) next.
Next head to Human Realm and pick up (W) and (X).
Go to Machine Realm and open Treasure Chest (Y) to find Deus Augite.
Now go to Chaos Realm and pick up (Z).
Now go to Human Realm and pick up (1).
Back to Chaos Realm and pick up (2).
Then to Machine Realm and pick up (3).
Finally, to Human Realm and pick up (4).
Phew! This now gives you access to all three bosses. You can take them on in any order. Head to (5) for Leo's fight, (7) for Ez and (6) for Valrika's.
Boss Fight - God's Compass

God's Compass - 100,000 HP
You'll want to equip each character with Phantom Quartz for Curse Null and Iris Quartz for Berserk Null. This will make the fight a lot easier.
This boss is actually quite fun! The boss is surrounded by different faces that rotate every round of attacks. The faces will each deal a different skill based on it's type. They have around 5,000 HP each and each time you destroy one, the boss will counter-attack you with Curse (which shouldn't be a problem with Phantom Quartz equipped).
You won't be able to deal damage to the boss at first; you need to destroy all the faces once and then he'll become vulnerable. You will want to do this twice.
The key is to leaving one face left after you have defeated them all twice. If you leave the Yellow Face that deals out Berserk, you can then just concentrate on attacking the boss since you have equipped Iris Quarts for Berserk Null.
After you defeat the first round of faces, God's Compass will use Judgement Of God, which attacks everyone for around 2-3k damage. This move happens every two rounds or so, so take your time with healing and attacking.
Cherly can one-hit the Red Face with Blizzard (it's weak to Blizzard). Kina can one-shot the Darkness faces with Radiance (it's weak to holy).
Check out the video for more tips.
Boss Fight - God's Hand
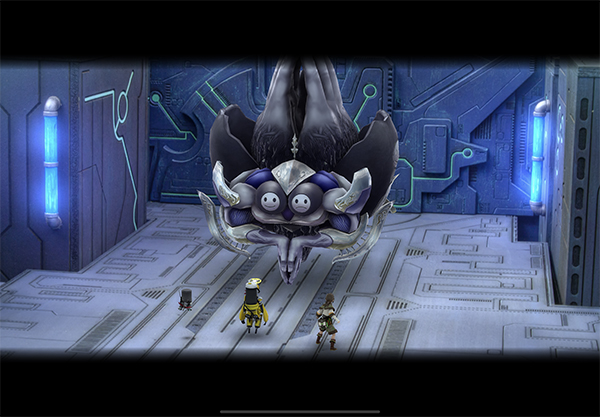

God's Hand - 80,000 HP
This fight is a lot easier if you have equipped Diamond Gems as this boss will constantly be hitting you with Holy attacks.
Overall this boss is quite easy. Ez should use Quick All and be throwing Shock Grenades to take out the mobs. Have Prickle use Plasma to wipe out mobs and deal damage to the main boss.
The boss will switch between different modes; Defensive Mode you'll deal less damage and so will he. Normal Mode he will deal normal damage and Attack Mode he'll do more damage. Each time he switches modes he'll summon four mobs for you to fight too. These are all weak to Lightning attacks. You need to balance your attack between wiping the mobs out and dealing damage to the boss.
Overall, making sure Ez has Quick All up will help a lot with this battle.
Check out the video for more tips:
Boss Fight - God's Weapon

God's Weapon - 80,000 HP
For this fight you'll want to equip any Snow Quartz gems to prevent Petrification.
The beginning of this fight the boss will cast Barrier on it's two arms so you won't be able to damage them. Instead attack the face (which has 15K HP) whilst tanking the attacks from the two arms.
Once the first face is done, the real boss will appear. The arms are now vulnerable to attacks and you want to start by taking out the right arm first (the one that attacks). It has 40,000 HP and is weak to Dark-type attacks, so have Valrika use Darkness for damage dealing.
The boss can have Attack Down placed on it, so use Valrika's Break skill to cast Attack Down on two body parts at once.
Your party doesn't have a Heal All skill, so use Tan's First Aid skill to heal the party and sometimes you'll get any extra move. You don't need to worry about the left arm as the Petrification skill is blocked by Snow Quartz. The left arm will deal damage via Rock Fall once the Right arm is destroyed.
At a certain point, when both arms are destroyed, the boss will power up for it's Energy Discharge attack.
Watch the video for more tips
And that wraps up this part of the Fantasian Walkthrough. We are almost at the end now with only a few more bosses standing in our way! Let us know if this guide has helped you in the comments.

Discussion