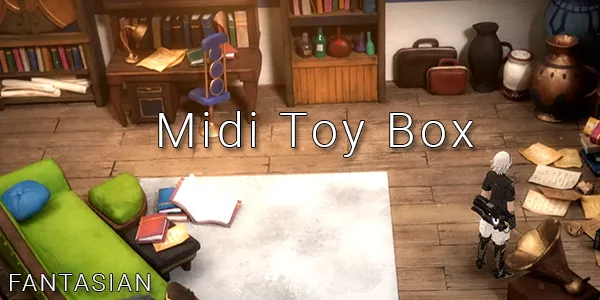
After battling the Mechteria Blob, it's time to head to the Midi Toy Box to see if we can jog some more memories out of Leo.
Key Notes
- Items: Frostbird Belt, Garnet L
- Bosses: 2
- Notes: Get access to the Warp Device.
- Locations: Midi Toy Box
Location: Midi Toy Box
Inside the Midi Toy Box are two Treasure Chests. One with 2500 G and one with 10x Research Lens. You can also pick up an Opal S from the scrolls on your left.
Go to the notes on the desk to start a new cutscene. Once it’s over, speak to Kina. At some point Captain Zinikr comes in and scares you. Cheryl gets angry at Leo and throws books at him to reveal a hidden passage behind a bookcase.
Location: Midi Toy Box - Basement
Enter the Midi Toy Box - Basement. It seems Leo has setup some security trips to make it a bit more difficult for you. You can either dodge the alarms or deactivate them by fighting. It’s up to you.
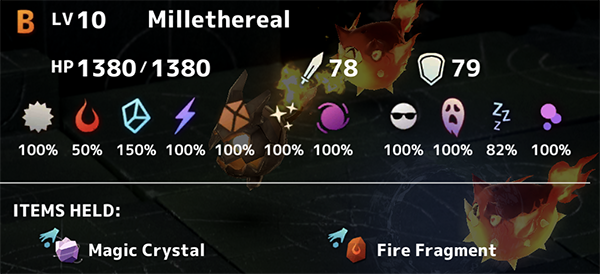
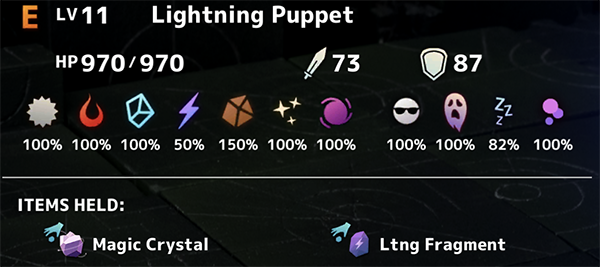
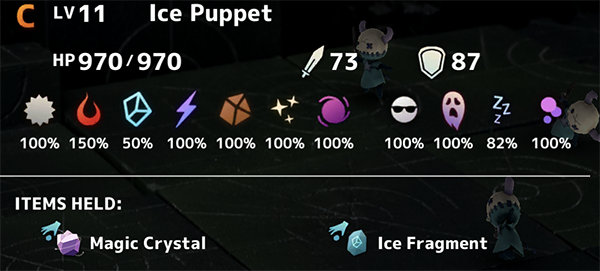
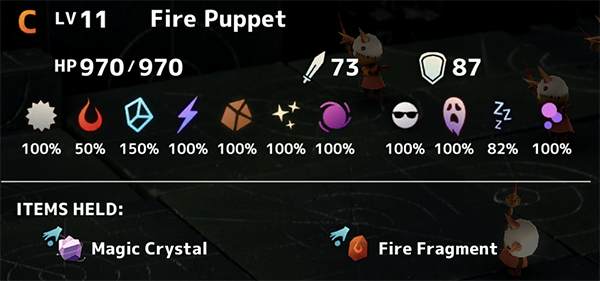
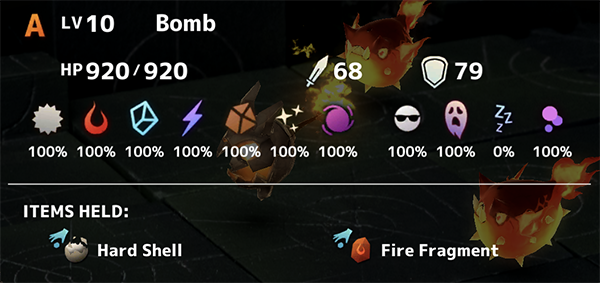
There are new random enemies here too, including: Bomb, Millethereal, Fire Puppet, Ice Puppet, Lightening Puppet.
First head across towards the Treasure Chest containing 3x Clock Of Truths. Head past the first alarm tower and you can find a Frostbird Belt in the next Treasure Chest. When you come to the two switches, Leo presses the wrong one and launches you into a battle. The same things happens again and then head across to the Treasure Chest containing an Elixir.
Head towards the last set of switches. You get the option of choosing Red or Blue this time. Press blue if you don’t want to battle some mobs. Now head down further into the basement.
You’ll see three alarms ahead of you before coming to a Save Point. If you have any Garnet S, Garnet M or Garnet L you should equip them as the next boss deals Fire Damage! The Frostbird Belt you just found can also offer +1 Fire Resist.
Boss - Salamander
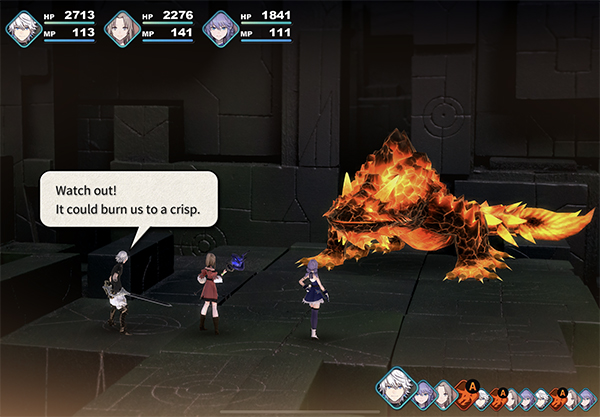
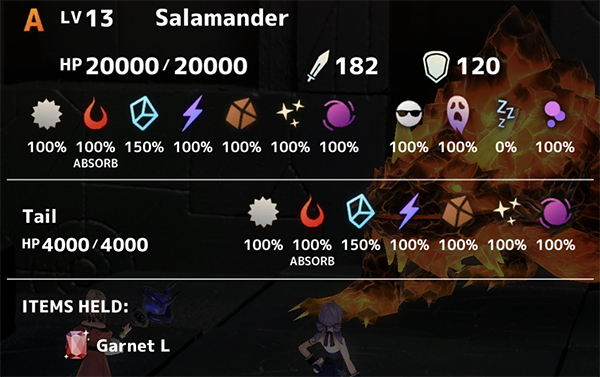
Salamander - 20,000 HP
The salamander can hit you up to 1K damage with it’s basic attacks. At the beginning your damage is very limited.
Salamander’s Tail Slash will hit all three for around 1k damage too. At this point you need to do quick healing with Leo and Kina.
When it goes into Mode Change, it will stand up. This is where you can deal damage to it’s tail and body for more damage. You want to destroy the tail as soon as possible to prevent it from healing.
The Salamander will then transition into a heat-up mode. Whilst in Heat-up mode it can use Mucus, which casts slow on the player it hits.
It will use its devastating move called Ground Flare which deals around 1.5k damage to each party member and end the heat-up mode.
Rewards: +780 EXP, Garnet L, 5,720 G
You can now enter Midi Toy Box - Secret Room.
Location: Midi Toy Box - Secret Room
When you first enter most of the Treasure Chests are locked. Go to the Treasure Chest on the left to get Remedy x2. The room contains two Treasure Chests that need Chaos Keys and two Treasure Chests that need Machine Keys to open. You'll have to return back here to open these at a later date!
Try the Treasure Chest right at the back of the room- a cutscene will follow letting you know the Treasure Chest is locked with a passcode.
Go back to the front desk to read some notes in which Cheryl reminds you of their date. Then head back to the locked treasure chest and try the code 1014.
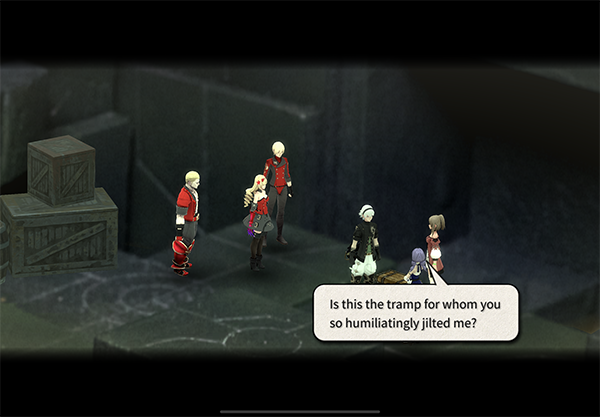
Leo is then interrupted by the Cinderella Tri-Stars.
Boss Fight - Cinderella Tri-Stars
This is an easy fun fight. Just focus on taking out Morrigan and then Folt. Once they’ve fallen take out Jolt.
Rewards: Mechteria Key
After the fight, go to the crates of the left side and read the notes again. This time it will reveal the dates. Then go to the right sided desk and look through the notes. Go back to the locked chest and enter the pass code 1105.
Inside the Locked Chest is a switch which opens up the two Locked Treasure Chests at the front of the room. Open them to reveal a Warp Device and a Crystal Ball.
Zinikr turns up to claim back his Crystal Ball. He recommends researching the opened Treasure Chests again. Go back to locked Treasure Chest that you opened with the pass code and search again to find a hidden note.
You’ve now gained access to the Warp Device and can travel to any of the locations you’ve previously been!
That wraps up this part of the Fantasian Walkthrough.

Discussion